
LED strip lights have become a popular choice for both residential and commercial lighting due to their energy efficiency, versatility, and vibrant illumination. These innovative lighting solutions not only enhance the aesthetic appeal of any space but also offer significant energy savings, making them an ideal choice for modern lighting needs. However, like any electronic component, LED strip lights can sometimes malfunction, leading to dimming, flickering, or complete failure. Understanding how to test LED strip lights with a multimeter is crucial for diagnosing and resolving these issues efficiently.
Testing LED strip lights with a multimeter allows you to pinpoint problems quickly, ensuring that your lighting system operates at its best. A multimeter is an indispensable tool for measuring voltage, continuity, and resistance, providing valuable insights into the health of your LED strips. By mastering the use of a multimeter, you can identify faulty LEDs, verify power supply output, and check for continuity, ultimately saving time and money on repairs and replacements. This guide will equip you with the knowledge and skills needed to troubleshoot and maintain your LED strip lights effectively.
In this comprehensive, step-by-step guide, we will walk you through the entire process of testing LED strip lights with a multimeter. From understanding multimeter settings to identifying faulty LEDs, each section is designed to provide you with practical, actionable information. Whether you are a DIY enthusiast or a professional, this guide will help you ensure that your LED strip lights are always in top condition. So, let’s dive right in and explore how to test LED strip lights with a multimeter!
Tools Needed to Test LED Strip Lights
Before you begin testing your LED strip lights, gather the necessary tools to ensure a smooth process. Here’s what you’ll need:
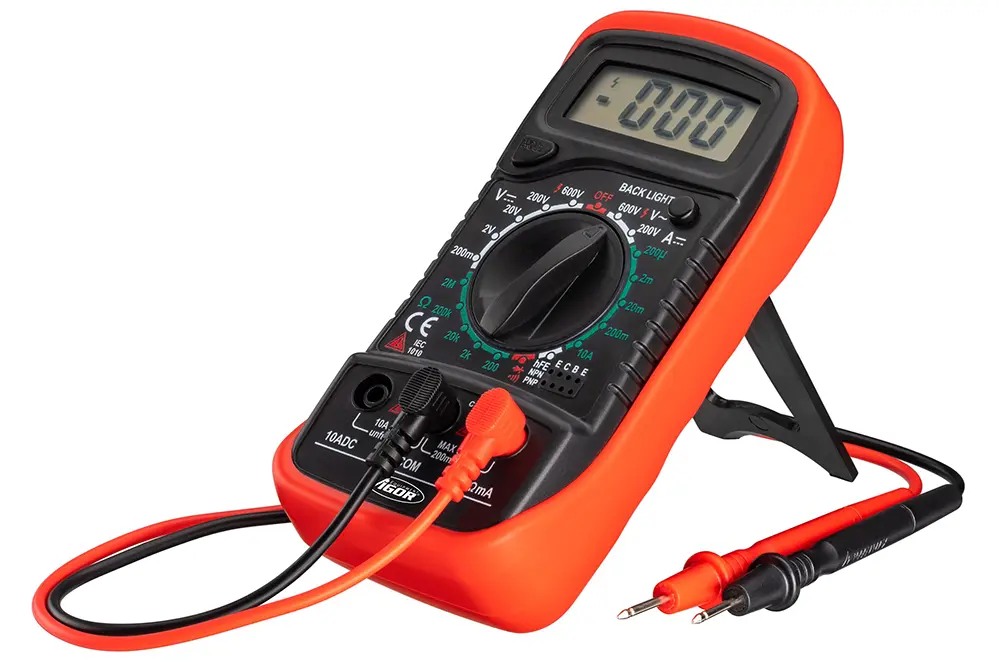
- Multimeter: A digital or analog multimeter capable of measuring voltage, continuity, and resistance.
- Power Supply: The appropriate power supply for your LED strip lights.
- Connecting Wires: To connect the multimeter probes to the LED strip.
- Insulated Gloves: For safety while handling electrical components.
- LED Tester: Optional, but useful for testing individual LEDs.
Safety Precautions When Using a Multimeter
Safety should always be your top priority when working with electrical components. Here are some essential safety precautions to follow:
- Turn Off Power: Always turn off the power supply before connecting or disconnecting the LED strip lights.
- Use Insulated Tools: Use insulated gloves and tools to prevent electric shocks.
- Check Multimeter Settings: Ensure the multimeter is set to the correct measurement type (voltage, continuity, etc.) before testing.
- Avoid Water: Keep the testing area dry to avoid any risk of electric shock.
Understanding Multimeter Settings
A multimeter is a versatile tool that can measure various electrical properties. Understanding its settings is crucial for accurate testing:
- Voltage (V): Measures the electrical potential difference between two points.
- Continuity (Ω): Checks if there is a continuous path for current flow.
- Resistance (Ω): Measures the opposition to current flow.
- Current (A): Measures the flow of electric charge.
Preparing the LED Strip for Testing
Proper preparation of the LED strip is essential for accurate testing. Follow these steps:
- Disconnect Power: Ensure the LED strip is disconnected from the power supply.
- Inspect Visually: Look for any visible damage, such as burnt areas or broken connections.
- Clean the Strip: Remove any dust or debris that might interfere with the testing process.
How to Set Up the Multimeter
Setting up your multimeter correctly is the first step to accurate testing. Here’s how:
- Select the Measurement Type: Turn the dial to the appropriate setting (voltage, continuity, or resistance).
- Connect Probes: Insert the black probe into the COM port and the red probe into the VΩmA port.
- Check Battery: Ensure the multimeter’s battery is fully charged for accurate readings.
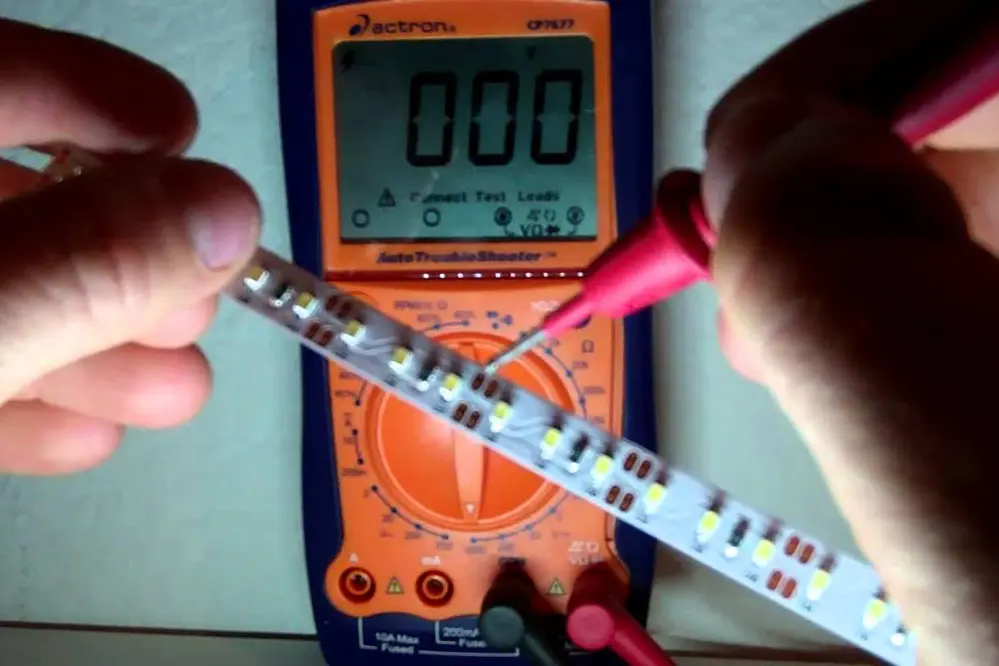
Testing for Continuity in the LED Strip
Continuity testing procedures help determine if there is a complete path for current flow in the LED strip. Here’s how to do it:
- Set Multimeter to Continuity Mode: Turn the dial to the continuity setting.
- Touch Probes to LED Strip: Place the probes on the positive and negative terminals of the LED strip.
- Check Reading: If the multimeter beeps or shows a low resistance value, the circuit is complete. If not, there may be a break in the circuit.
Measuring Voltage Across the LED Strip
Measuring the voltage across the LED strip through voltage measurement helps ensure it’s receiving the correct power supply. Follow these steps:
- Set Multimeter to Voltage Mode: Turn the dial to the DC voltage setting.
- Connect Power Supply: Reconnect the LED strip to its power supply.
- Measure Voltage: Place the black probe on the negative terminal and the red probe on the positive terminal of the LED strip.
- Read Display: The multimeter should display the voltage. Compare it to the LED strip’s rated voltage to ensure it’s correct.
Checking LED Polarity with a Multimeter
LEDs are polarity-sensitive, meaning they only work if connected correctly. Here’s how to check the polarity:
- Set Multimeter to Diode Mode: Turn the dial to the diode setting.
- Touch Probes to LED Terminals: Place the red probe on the anode (positive) and the black probe on the cathode (negative).
- Check Reading: The multimeter should show a forward voltage drop (typically 1.8-3.3V for LEDs). If it shows OL (overload), the LED is connected in reverse.
Identifying Faulty LEDs in the Strip
Identifying faulty LEDs and understanding their led functionality can help you decide whether to replace individual LEDs or the entire strip. Here’s how:
- Set Multimeter to Continuity Mode: Turn the dial to the continuity setting.
- Test Each LED: Place the probes on the terminals of each LED.
- Check for Beep: If the multimeter beeps, the LED is functioning. If not, the LED may be faulty.
How to Test an Individual LED
Testing individual LEDs can pinpoint specific issues. Here’s the process:
- Set Multimeter to Diode Mode: Turn the dial to the diode setting.
- Remove LED from Strip: Carefully desolder the LED from the strip.
- Test LED: Place the red probe on the anode and the black probe on the cathode.
- Check Reading: The multimeter should show a forward voltage drop. If it shows OL, the LED is faulty.
Troubleshooting Common Issues
LED strip lights can encounter various issues. Here are some common problems and their solutions:
- Dim LEDs: Check the power supply voltage and ensure it matches the LED strip’s requirements.
- Flickering LEDs: Inspect the connections and ensure they are secure. Check for any loose wires.
- Non-Functioning LEDs: Test for continuity and replace any faulty LEDs.
Verifying Power Supply Output
Ensuring your power supply is functioning correctly is crucial for the performance of your LED strip lights. Here’s how to verify it:
- Set Multimeter to Voltage Mode: Turn the dial to the DC voltage setting.
- Measure Output Voltage: Place the probes on the output terminals of the power supply.
- Compare Voltage: Ensure the output voltage matches the LED strip’s requirements.
Testing LED Strip Connectors
Connectors can sometimes be the source of issues. Here’s how to test them:
- Set Multimeter to Continuity Mode: Turn the dial to the continuity setting.
- Test Each Connector: Place the probes on the terminals of each connector.
- Check for Beep: If the multimeter beeps, the connector is functioning. If not, it may need replacement.
Inspecting the LED Strip for Physical Damage
Physical damage can affect the performance of your LED strip lights. Here’s what to look for:
- Burnt Areas: Indicate overheating or electrical issues.
- Broken Connections: Check for any loose or broken solder joints.
- Bent or Cracked LEDs: Inspect each LED for physical damage.
When to Replace Your LED Strip Lights
Knowing when to replace your LED strip lights can save you time and effort. Here are some indicators:
- Multiple Faulty LEDs: If several LEDs are not functioning, it may be more cost-effective to replace the entire strip.
- Persistent Issues: If troubleshooting doesn’t resolve the problems, replacement may be necessary.
- Physical Damage: Extensive physical damage may warrant a new LED strip.
Tips for Maintaining LED Strip Lights
Proper maintenance can extend the lifespan of your LED strip lights. Here are some tips:
- Regular Cleaning: Keep the LED strip free from dust and debris.
- Secure Connections: Ensure all connections are tight and secure.
- Avoid Overloading: Use the appropriate power supply to prevent overloading the LEDs.
- Monitor Temperature: Avoid placing LED strips in areas with extreme temperatures.
Conclusion
In conclusion, mastering the art of testing LED strip lights with a multimeter is an invaluable skill that can save you both time and money. By understanding how to measure voltage, continuity, and resistance, you can quickly diagnose and resolve common issues such as dimming, flickering, or non-functioning LEDs. This comprehensive guide has equipped you with the knowledge to identify faulty LEDs, verify power supply output, and ensure proper LED polarity, all while emphasizing the importance of safety and proper tool usage. Whether you’re a DIY enthusiast or a professional, these skills will help you maintain your LED strip lights in top condition, ensuring they provide vibrant and efficient illumination for years to come.
Regular maintenance and timely troubleshooting are key to extending the lifespan of your LED strip lights. By following the steps outlined in this guide, you can prevent minor issues from escalating into major problems, thereby enhancing the overall performance and reliability of your lighting system. Remember to keep your LED strips clean, secure all connections, and avoid overloading the power supply. With these best practices, you can enjoy the full benefits of your LED strip lights, from energy savings to aesthetic appeal. So, take charge of your lighting maintenance today and ensure your LED strip lights continue to shine brightly.


