


Superior Expertise
Harnessing 20 years LED lighting manufacturing for unparalleled quality.
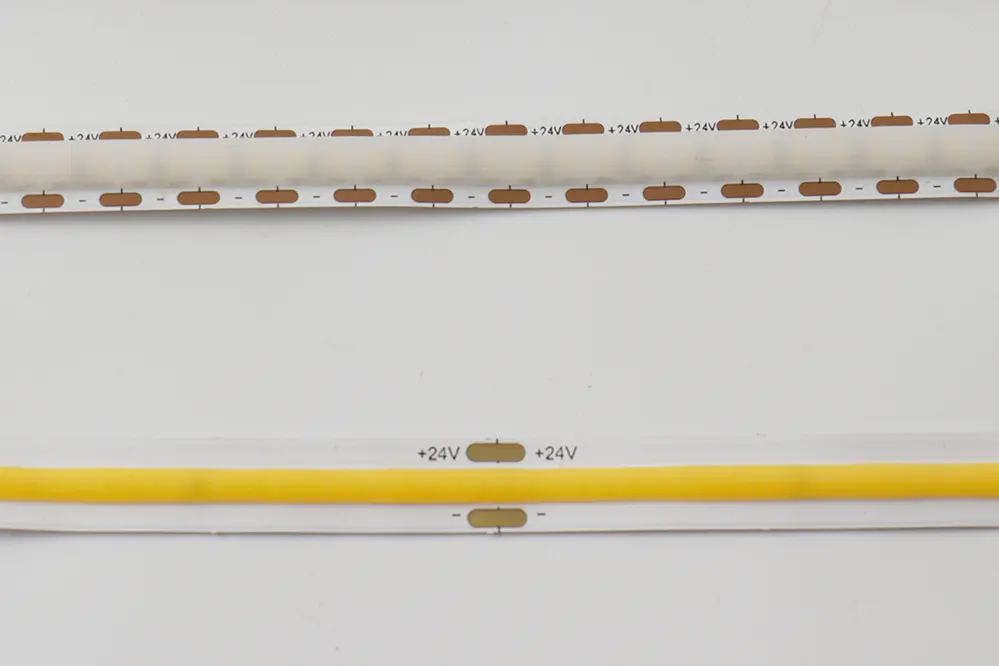
Upgrade your lighting with Unitop’s advanced LED strip lights. Durable, efficient, and customizable for diverse applications.
Illuminate your space with Unitop’s premium LED neon strips, combining vibrant colors with exceptional flexibility and performance.
Unitop: Illuminating Your World since 2005. We bring excellence to every LED strip light and neon strip we supply. No matter your role in the industry, we’re committed to lightening up your journey with our innovative solutions. Choose Unitop, choose quality!
View more...Trusted Manufacturer: Delivering top-tier products and services that exceed expectations.
Harnessing 20 years LED lighting manufacturing for unparalleled quality.
ISO9001 certified factory providing a notable 3~5 years quality warranty.
Strong professional R&D team fosters continuous product innovation.
Tailored customized solutions to meet all your unique project requirements.
Advanced systems produce up to 1.5 million meters of LED strips monthly.
Embrace small orders & support businesses from small beginnings.
Providing 12x7 worldwide support for all before or after-sales queries.
Sustainable, biodegradable materials for eco-friendly production.
Unitop Factory Certifications: Showcasing Quality, Innovation, and Excellence Across Industries


Real feedback from real customers. Discover their stories


LED Lighting Product Customization Has Never Been Simpler
Over 20 years in LED lighting manufacturing and OEM services, suggesting a wealth of knowledge and a proven track record.
Collaborations with industry giants like Philips, Osram, Cree and others showcase a strong industry presence.
A robust supply chain is critical for maintaining product quality and ensuring timely delivery.
Comprehensive customization options, including LED types, CRI, CCT, brightness, and dimensions, are essential for meeting diverse needs.
The capability to transform ideas into tangible designs and PCB layouts is key for bringing visions to life.
The ability to imprint a brand logo on the product or packaging is important for maintaining brand identity.
A priority on customer needs is crucial for establishing long-term business relationships.
A global footprint and experience with international clients are important for understanding diverse market needs.
Providing design drawings within a week and samples within three weeks demonstrates a commitment to efficiency.
A commitment to lighting up your brand with expertise and dedication suggests a partner who will go the extra mile to ensure satisfaction.


Collaborating With Industry Leaders for Sustainable Lighting Solutions


Elevate Your Space with Our Lighting Solutions


All You Need to Know: Frequently Asked Questions on Our Company and Products
Expert Insights: Our blogs cover everything you need to know about LED lighting.
SCOB vs. COB LED Strips 2025: Compare brightness (140lm/W), length (30m), and customization. Discover which high-performance LED strip wins for your project!
read more...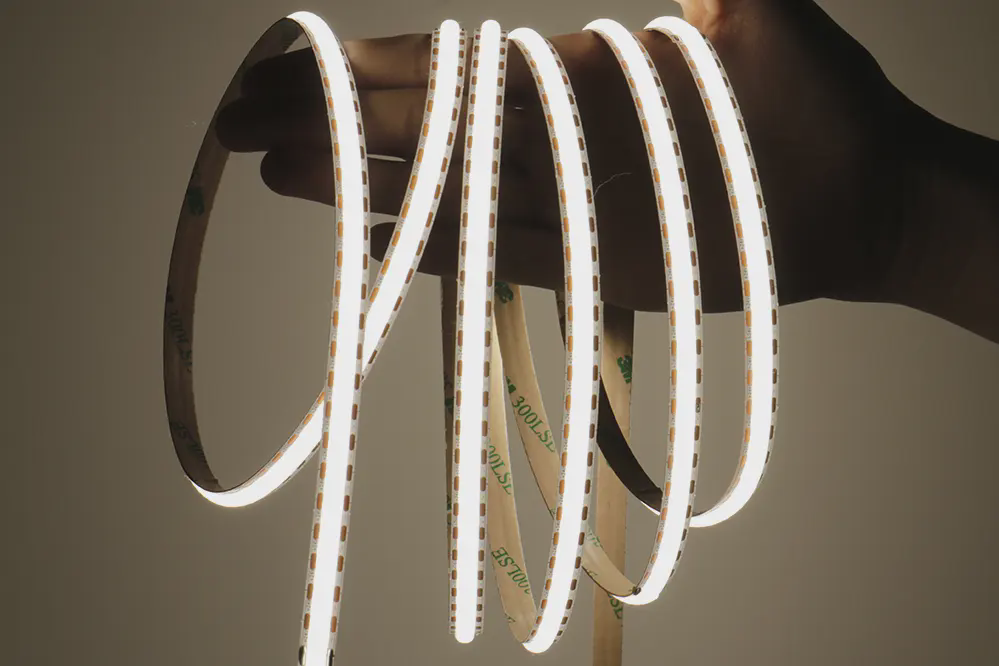
Explore the future of LED strip lights: denser chips, higher brightness, and longer lengths. Discover top trends shaping efficient, seamless lighting solutions.
read more...
Are you ready to revolutionize your home’s interior with the brilliance of LED strip lights? Stair lighting with LED strips is not just a trend; it's a transformative approach to enhancing both the
read more...
Trust Unitop (China) Co., Limited for top-quality LED strips with 20+ years of OEM/ODM experience. Exported to 50+ countries. Contact us for customized solutions.