Have you ever wondered what the best way to remove LED strip lights is without leaving a trace? This question often puzzles many homeowners who have embraced the vibrant glow of LED lighting. While these lights offer a modern touch, their removal can be daunting if not approached correctly.
Many people mistakenly believe that simply peeling off the strips will suffice, only to find unsightly residue or damage left behind. This common misconception can lead to frustration and unexpected repair costs, highlighting the need for a well-informed approach.
Understanding the best way to remove LED strip lights is not just about aesthetics; it’s about preserving the integrity of your home. Proper removal techniques can save you time, money, and effort, ensuring your drywall remains pristine.
In this article, we’ll explore the essential steps, tools, and tips needed to remove LED strip lights effectively, whether they’re attached to wallpaper or painted walls. From understanding adhesive types to mastering removal techniques, we’ve got you covered.
So, if you’re ready to transform your space without the hassle, dive into our comprehensive guide and discover the secrets to a flawless LED strip light removal.
Tools Needed for Removal
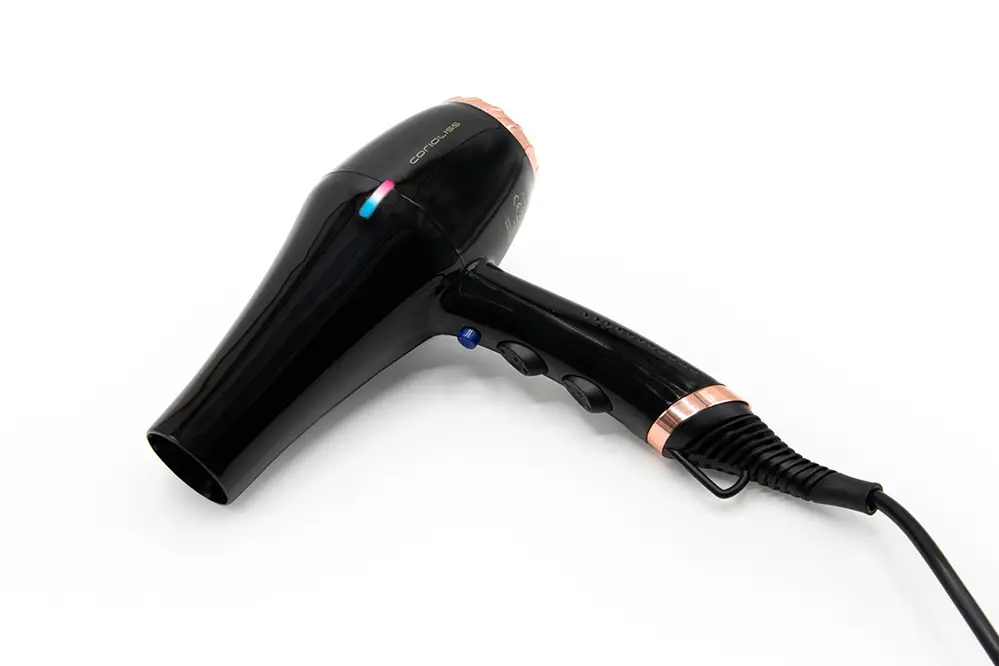
Embarking on the path to safely remove LED strip lights necessitates a strategic selection of tools, each serving a pivotal role in easing the transition away from your existing setup without compromising your paint or space.
Essential tools include a hairdryer or heat gun, which aids in loosening the adhesive.
Furthermore, protective gloves can shield your hands from potential scrapes, protecting you during the task.
A plastic scraper or spatula, preferred over metal options to avoid damage, is another useful tool.
Rubbing alcohol or a dedicated adhesive remover should be at hand to clean any residue, ensuring your surface is left pristine.
Lastly, a microfiber cloth will be invaluable for giving the surface a final polish, reflecting a flawless and unhindered backdrop ready for your next creative endeavor.
Preparing the Area for Removal
Before embarking on the journey to gracefully remove LED strip lights, it’s imperative to prepare the area meticulously, ensuring your space is ready for the transformation ahead.
Gather necessary cleaning materials beforehand, which simplifies and streamlines the process.
This ensures that once you’ve successfully removed the strips, any lingering residues or minor imperfections can be quickly addressed. Lay down protective coverings over surfaces like carpets or furniture to prevent accidental damage, spills, or stains during the removal process.
With the area efficiently safeguarded and organized, you’re set to proceed confidently, knowing each step taken is one toward revitalizing your space. This preparation paves the way for a smooth and seamless transition, allowing your creativity to shine through unbounded by disruptions or lingering traces of the past. Ready to breathe new life into your surroundings? Let’s proceed with confidence and optimism.
Detaching the LED Strip Safely
In the quest to discover the best way to remove LED strip lights, adherence to safe practices will open doors to a seamless and gratifying experience. Successfully detaching LED strips requires an understanding of their delicate structure, empowering you to maintain their integrity while freeing them for future use.
Begin by turning off the power supply to prevent accidental shock. This is a critical first step that ensures personal safety and maintains the integrity of both the lights and the surrounding area.
Next, gently pry the LED strip away from its surface, starting at one end. Use a plastic card, such as a credit card or a similar non-abrasive tool, which prevents damage.
Slowly work your way along the strip to minimize stress on the adhesive backing. Moving deliberately guarantees a clean removal, preserving both your wall and the strip for potential redeployment or safe disposal.
Equipped with the right tools, removing LED strips doesn’t have to be daunting. A hairdryer can safely warm the adhesive, making it more pliable and easier to detach without leaving residue.
Embrace the newfound space and possibilities that emerge once the LED strips are safely removed. With the area clear, opportunities for redesigning and reinvigorating emerge, while maintaining a walkthrough grounded in best practices and safety.
Removing Adhesive Residue
After successfully detaching the LED strip, addressing adhesive residue is the next key step to restoring your surface to its pristine state. Begin by gently applying a small amount of rubbing alcohol or an adhesive remover designed for household use. These solutions, applied with soft cloths, effectively break down and lift stubborn residue, ensuring that your walls or surfaces remain unblemished.
Consider testing the solution on a discreet area first to avoid any unintended damage. Successful removal transforms your space, empowering you to envision and achieve new decor possibilities.
Best Products for Adhesive Removal

Smartly choosing adhesive removers, an arsenal of specialized formulations, ensures efficient adhesion-breaking. Opting for these top-tier products can make a world of difference in preserving surface integrity.
In navigating the options for a clean result, products like “Goo Gone” stand out. This is not just a tool but a trusted ally, providing peace of mind with each meticulous swipe.
Goo Gone dominates with a residue-free, citrus-based formula that is eco-friendly yet powerful.
Effective adhesive removal allows you to embrace the freshness of a clean start, unmarred by unsightly smudges or marks. Employing these products will not merely erase traces of adhesive but will liberate your creative spirit, readying your space for new, invigorating transformations.
Handling Power Connections
Securing a safe environment is paramount when removing LED strip lights, and the first step is disconnecting all power sources.
Switching off your main breaker guarantees safety during this delicate task.
Ensure that no electrical current flows through the circuit you’re working on by using a multimeter to confirm a lack of voltage. This measure not only protects you from electric shock but also safeguards the integrity of your LED light system.
To smooth the journey, consider marking the existing connections with labels, as this simplifies future installations. Incorporating clear photographs or diagrams of the wiring configuration can serve as an invaluable reference, eliminating guesswork and ensuring a seamless reconnection process. This mindful approach to handling power connections fosters confidence and sets the stage for successful project completion, easing you toward novel lighting endeavors.
Avoiding Damage During Removal
Choosing the right tools, such as mounting clips, is crucial.
When embarking on the task of removing LED strip lights, the pacifying assurance of having appropriate tools cannot be understated. A dependable set of plastic tools reduces the risk of marking or denting surfaces, while heat guns serve to mellow stubborn adhesive residues, promoting gentle detachment. Deliberate, steady techniques echo throughout your steps in prevention, safeguarding the surface where your creative aspirations will next unfurl.
Use patience to guide your actions.
In cases where the adhesive remains persistent, gentle heat can be your ally in loosening grip. Utilizing this unwinding effect, paired with patience, sets the stage for a safe separation without collateral damage.
Lastly, revisit installation instructions for specific adhesive insight, layering expertise with foresight for damage-free removal. This method peppers tranquility into the reconciliation of present demands with future possibilities, creating a harmonious balance that propels you to manifest new brilliance in your envisioned environments.
Cleaning the Surface After Removal
Once your LED strip lights have been removed, turning to the task of cleaning the surface is vital.
It is essential to remove any remaining adhesive and paint to ensure the surface is pristine and ready for future applications. Begin by gently wiping the area with a damp cloth to clear dust and lighter residues that may have settled.
For more stubborn remnants, consider employing a non-abrasive cleaner or adhesive remover. Ensure that you test any cleaning solution on a hidden area first, preventing potential discoloration or surface damage.
The goal is to restore the surface to its original condition without compromising its integrity, even if you notice paint peeling in some areas. This careful attention to detail allows you to uphold the aesthetic of your space while preparing it for its next transformation.
This process instills confidence and opens a canvas for your next creative endeavor.
Tips for Reusing LED Strip Lights
When you remove your LED strip lights, seeing their potential for reuse can open new possibilities and inspire fresh ideas.
First and foremost, to maximize their lifespan as a secondary lighting solution, examine the condition of the adhesive. Should the adhesive be inadequate, invest in double-sided tape or hook-and-loop strips to secure the lights onto their new surface without compromising their functionality. This approach not only maintains their utility but also ushers in new creative opportunities for interior spaces.
Additionally, you might consider using a portable power bank to bring your LED strips to life outdoors. By incorporating such flexibility, you have the potential to create a whimsical ambiance for evening events, treating LED strips as versatile, reusable assets showcasing your inventive spirit.
As another possibility, explore different placement options like embedding the LED strips within shadow boxes or under cabinets to create unobtrusive lighting accents. Such reimagined placements breathe new life into your previously used lights, turning the familiar into something distinct and refreshing for your environment. With these imaginative applications, each LED can contribute to a continuous cycle of transformation, turning any space into an ever-evolving masterpiece.
Common Mistakes to Avoid
Rushing the removal process often leads to damage.
One of the most common mistakes when removing LED strip lights is not being patient. Many enthusiasts are eager to see the final results, but haste can damage the strip or the surface it adheres to. Instead, taking time and using appropriate tools ensures a smooth and damage-free removal process.
Ignoring proper preparation can complicate removal.
Failing to gently lift the strip can lead to adhesive mishaps.
Start by warming the adhesive with a hairdryer—this makes it pliable and easier to remove without tugging harshly. Additionally, keep the hairdryer at a safe distance to avoid overheating any sensitive components. Employing a careful, steady approach will preserve both the lights and the mounting surface.
Another common oversight is neglecting to clean the surface before reapplying the strips. Residual adhesive or grime can affect the new adhesive’s grip, potentially leading to uneven lighting or strips detaching over time. Ensure surfaces are cleaned thoroughly with appropriate solutions, allowing for optimal adhesion and a pristine finish.
Best Way to Remove LED Strip Lights from Walls
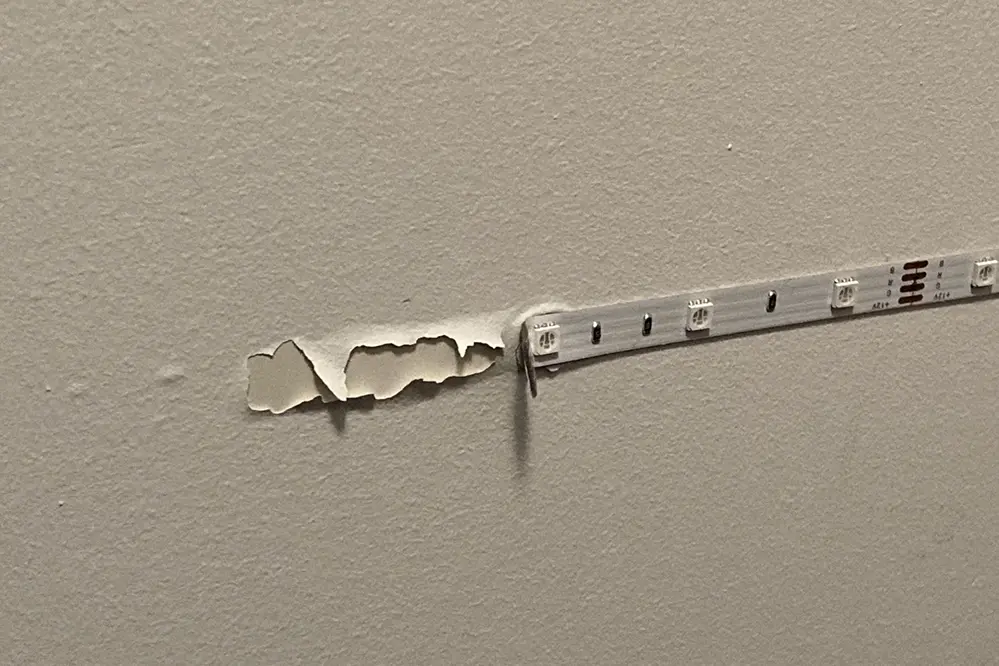
Removing LED strip lights from walls requires a blend of patience, precision, and technique for optimal results.
Recent years, innovative technologies, like LED strip lighting, transformed living spaces into dazzling expanses, offering the perfect balance between ambiance creation and functional lighting. However, when it’s time to remove these vibrant strips, it’s crucial to approach the task with mindfulness and care to preserve both the LED strips and your wall surfaces.
The cornerstone of removing LED strips without leaving a trace lies in understanding the interplay of heat and adhesive. Gently warming the strip’s adhesive using a common hairdryer softens the bond, preventing abrupt detachment that could damage or distort the paint beneath. It’s a skillful practice that ensures your room is left immaculate and ready for its next aesthetic transformation.
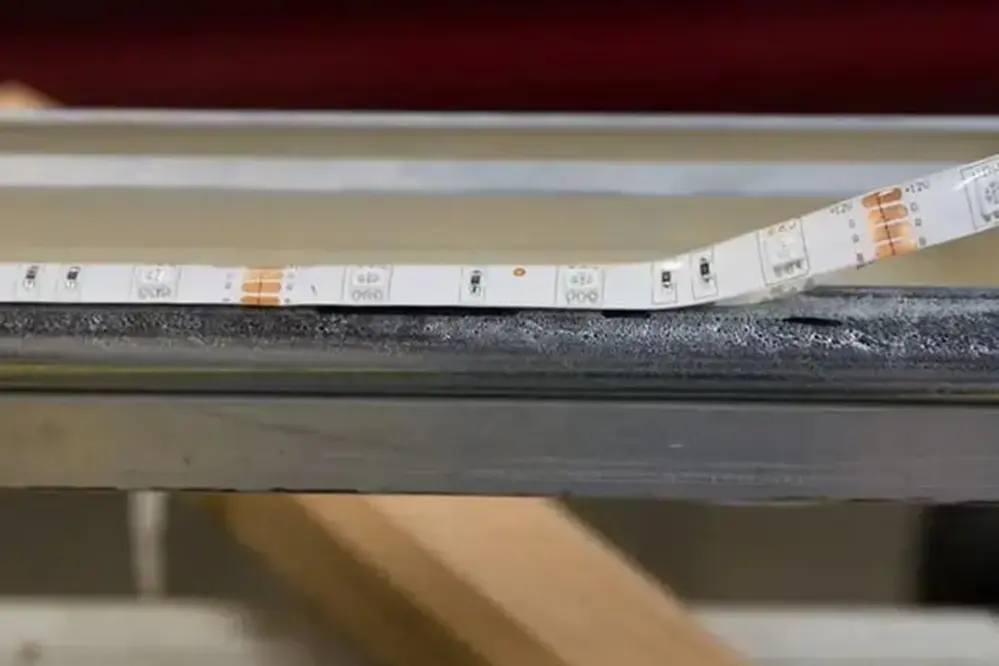
Once the adhesive is sufficiently warm, begin lifting the strip from one end. Use a slow, continuous motion, applying even pressure to minimize stretching or tearing the LED strip. This methodical approach not only safeguards the integrity of the strip but also ensures that residues are minimized, thereby maintaining the pristine nature of the wall.
Embrace this process with confidence; each step brings you closer to a refreshed space poised for its next dazzling display.
Removing LED Strips from Furniture
Elevate your decor with precision and care.
When it comes to removing LED strips from furniture, patience and preparation are your best allies. The first step is to assess the adhesive strength of the LED strips mounted on your chosen furniture surfaces, which can vary across different material types. Importantly, ensure some space to maneuver as you delicately release the LED strips, protecting both the furniture finish and the LED unit itself.
Heating may aid in this process.
A gentle application of heat, such as from a hairdryer, can soften the adhesive. This technique allows for a smoother detachment, preserving the surface of cabinets, desks, or any wood finish from unnecessary damage. Carefully pull the strip at an angle to reduce stress on both materials.
Look beyond the immediate task to the broader vision of your transformed space, armed with cutting-edge insights and techniques through 2023 and beyond. This knowledge empowers you to master both practical applications and sophisticated design elements, paving the way for new installations that will breathe life into your living area with ease and ingenuity.
Environmental Considerations and Disposal
Be mindful of sustainable practices.
LED strip lights represent an advancement in energy efficiency. Once they have served their purpose or are being replaced, it’s crucial to consider the environmental impact of their disposal. Fortunately, many components of these lights can be recycled, ensuring that the environmental footprint remains minimal. Responsible practices in recycling electronics contribute profoundly to a healthier planet.
Check local recycling guidelines.
LED lights often contain valuable materials, and disposing of them correctly ensures sustainability. Place old LED strips in designated electronic waste recycling bins to promote eco-friendly practices.
Our evolving awareness of environmental issues encourages conscientious disposal of technology, including LED lights, in 2023 and beyond. By participating in recycling programs, we not only extend the life of valuable resources but also champion the cause for future generations, preserving our planet’s health and biodiversity.
Troubleshooting LED Strip Removal Issues
Removing LED strip lights can sometimes pose unexpected challenges due to their adhesive nature. However, worry not, as armed with the right knowledge, these issues can be overcome with ease.
Occasionally, the adhesive may stubbornly resist removal, creating some frustration. In such instances, gentle heat, such as from a hairdryer, can soften the adhesive, offering a manageable solution.
To prevent any damage to surfaces during removal, use a plastic spatula or an old credit card to carefully dislodge the strip without scratching. Vim and patience are the keys to preserving both the surface and the strip in optimal condition.
For adhesive residue lingering after the strip is gone, a small application of adhesive remover or isopropyl alcohol can be effective. Apply gently with a cloth, allowing a moment for the solution to act before wiping away residue. If you’re left with persistent traces, repeating the process in delicate increments should gradually cleanse the surface thoroughly.
Conclusion
Navigating the removal of LED strip lights can indeed be a seamless endeavor with the proper approach. Armed with techniques such as applying gentle heat and using non-abrasive tools, one can patiently but effectively release the adhesive without compromise. Employing a methodical approach not only protects your surfaces but also retains the condition of the LED strips themselves, should you wish to repurpose them.
In addition to removing the lights, eliminating any residual adhesive is crucial to maintain the aesthetics and integrity of your surfaces. Simple solutions like isopropyl alcohol or specialized adhesive removers can delicately dissolve stubborn residues. Remember, patience is just as vital during this phase to ensure everything is left immaculate.
Ultimately, the best way to remove LED strip lights involves utilizing both technique and patience. Approaching each step calmly and methodically will safeguard your surfaces while ensuring your LED strips are removed and any residue is thoroughly cleaned. As you wrap up your removal tasks, you’ll find success lies in methodical, thoughtful execution.
Armed with this insightful knowledge, leaping into future projects involving LED replacements or adjustments becomes not only possible but exciting. Your newfound expertise is bound to fuel further creativity, embodying the endless potential in every DIY endeavor.
