
Are you wondering if you can put LED light strips on wood? You’re in the right place. As experts in the field, we have the definitive answer and practical tips to help you achieve a seamless installation.
You can confidently install LED light strips on wood surfaces. This combination not only enhances the visual appeal but also adds functional illumination, making it a versatile choice for various applications.
Read on to discover the step-by-step process, expert tips, and innovative ideas to transform your wooden surfaces with LED light strips. Let’s illuminate your space with elegance and creativity!
Understanding LED Light Strips

LED light strips are revolutionizing how we illuminate our living and working spaces, blending captivating design with practicality.
Composed of countless small LED emitters mounted on a flexible strip.
They provide a versatile lighting solution capable of producing various colors and brightness levels, enhancing any ambiance.
Whether for accentuating architectural elements or creating an inviting atmosphere, these strips swiftly adapt to any environment. By understanding how these innovative lighting options work, one can utilize them to transform interiors elegantly and efficiently.
Benefits of Using LED Light Strips on Wood
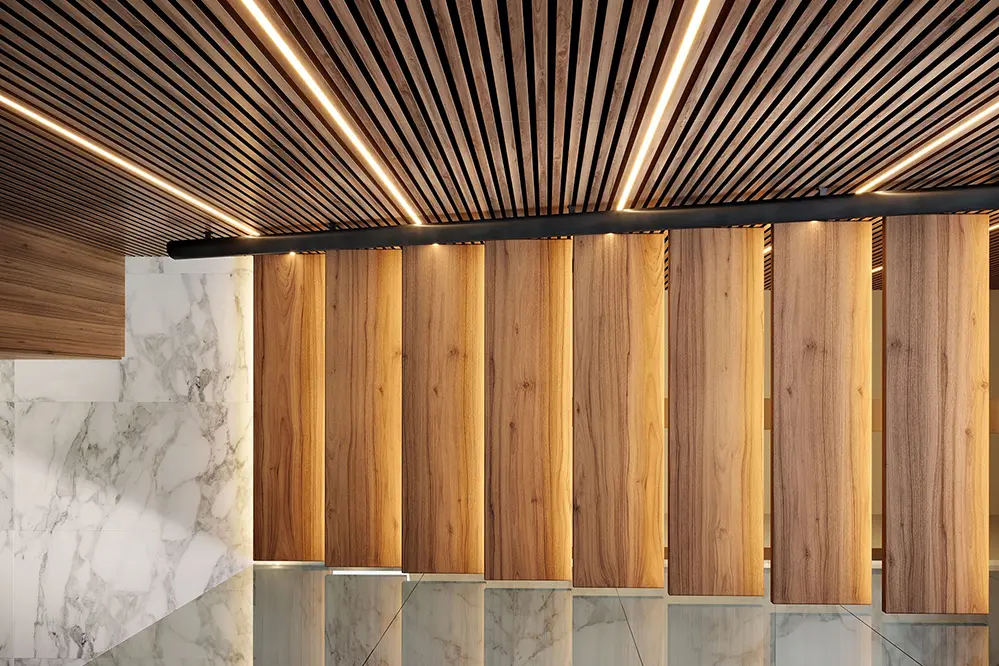
Applying LED light strips to wooden surfaces can create a visually stunning effect, seamlessly blending natural textures with modern illumination design.
One notable benefit is the enhancement of aesthetic appeal.
These strips highlight the wood’s natural grain and color, giving rooms a sophisticated and elegant appearance.
Moreover, they offer considerable versatility, enabling both ambient and task lighting (essential in dynamic working and living spaces).
Their energy efficiency is a critical advantage, offering substantial savings on electricity bills and reducing environmental impact.
Additionally, the durability and longevity of LED strips make them an investment that resists wear and tear, maintaining their charm and functionality for years without frequent replacements.
Ultimately, integrating LED strip lights onto wood’s surface is a smart way to elevate interior design. Such synergy of technology and natural material projects innovation and timeless elegance.
Types of LED Light Strips Suitable for Wood
Navigating the myriad choices of LED light strips, one might wonder, what types are best suited for illuminating wooden surfaces? Fear not, for the possibilities abound, each bringing a unique touch to your decor.
One prominent choice is the flexible LED strip, ideal for curved surfaces.
These strips can easily contour around edges, highlighting intricate wooden designs and corners.
Also popular are rigid LED strips, which are often used under cabinets.
These rigid strips offer a more structured lighting solution, emphasizing straight lines and clean edges on wooden furniture pieces.
Opt for water-resistant LED strips for exterior wood applications, ensuring longevity and reliable performance even in humidity.
Ultimately, the selection of suitable LED strips depends on the wood’s application and desired aesthetic outcome. With the right choice, your wooden surfaces will shine with a harmonious blend of nature and technology.
Preparing Your Wood Surface
Before you embark on your LED lighting project, surface preparation of your wood is paramount for optimal adhesion and longevity.
Firstly, it is essential to thoroughly clean the wood surface of any dust, debris, or wax residues. This step ensures that the adhesive backing of the LED strips bonds effectively with the wood. Use a gentle cleaner suitable for wood, and dry the area completely.
Secondly, inspect the wood for any imperfections such as cracks or splinters. Sand the surface smooth if necessary, providing a level plane for the adhesive to stick robustly. This preparation helps avoid any uneven application and enhances the aesthetic appeal of the LED light strips.
Finally, consider applying a primer or sealant, especially if the wood is unfinished. This layer not only protects the wood but also improves the adhesive’s grip. By taking these preparatory steps, you set the stage for a flawless LED installation that will illuminate your wood surfaces magnificently and endure the test of time.
Tools and Materials You’ll Need
Gathering the right tools is essential.
Firstly, you’ll need the LED strip lights, which come in various lengths and brightness levels. Make sure to choose one that fits your specific lighting requirements and aesthetic preferences. Also, don’t forget to have an appropriate power supply to ensure your LED strips operate smoothly.
You’ll need a tape measure.
Accurately measuring the wood surface is key. Be meticulous in this step – an exact fit not only enhances the visual elegance of the installation but also ensures even illumination throughout.
Furthermore, you should have adhesive tape or mounting brackets. These tools help secure the LED strips firmly to the wood, preventing any sagging or detachment. High-quality adhesives are vital for maintaining the longevity and stability of your installation.
Lastly, a cleaning solution, a soft cloth, and sandpaper will be indispensable. These materials are critical for preparing the wood surface, allowing the adhesive backing of the led strip lights to bond flawlessly. An electric drill might also be needed for more permanent fixtures, ensuring that your beautiful LED setup remains intact and reliable.
Measuring the Area
Before you begin, gather your tools, including a tape measure, pen, and notepad to jot down dimensions and observations.
First, use the tape measure to get a precise reading of the wood surface where the LED light strips will be applied. Ascertain both the length and width, documenting these details in your notepad to prevent any oversight.
Additionally, take into account any irregularities or unique shapes of the wood surface. For instance, if your wood has curves or angles, mark these specifics as they will influence how you cut and place the LED strips.
By meticulously recording your measurements and observations, you will facilitate a seamless application process. This attention to detail will ensure your LED light strips are perfectly aligned, optimizing their aesthetic and functional impact throughout your space.
Cutting LED Light Strips to Size
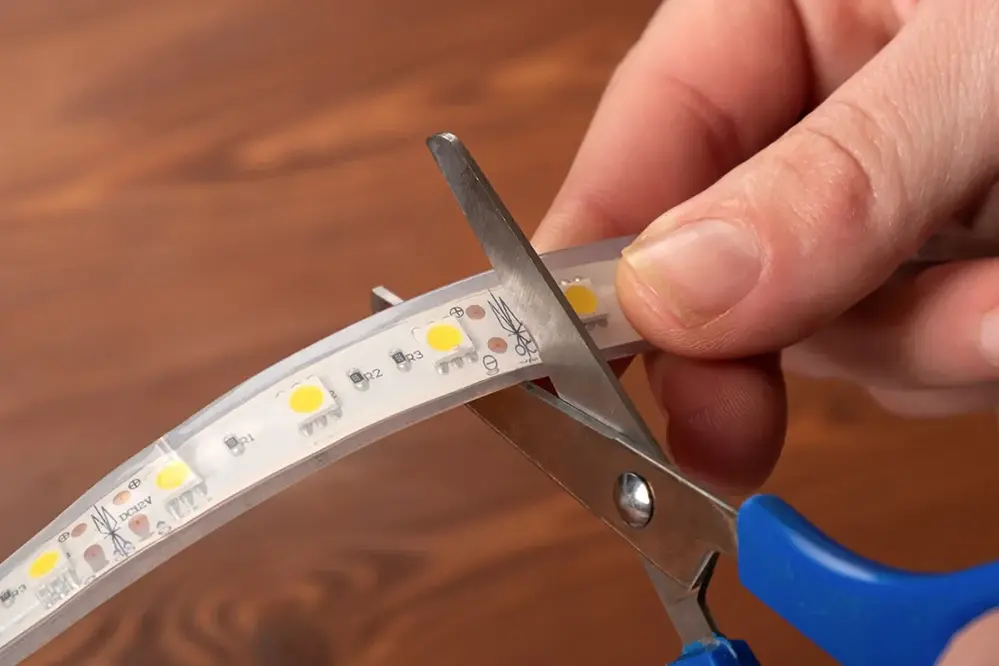
Cutting LED light strips is straightforward and necessary.
Precise measurements are vital for an accurate fit. When cutting LED strips, ensure that you only cut along the designated lines—which are typically indicated by small scissors or black dots. This will safeguard the electrical circuits needed for the LEDs to function. Always use appropriate cutting tools to achieve clean and accurate cuts.
Use sharp scissors or a utility knife.
This will prevent jagged edges that might hinder effective adhesion or cause electrical issues later. Consistency and precision are crucial in this step.
To finalize your cuts, confirm the lengths by briefly plugging in the strips to see if they light up – this reassures you that the circuits remain intact and that the voltage and lumens are correctly distributed. If they work, you’re ready to adhere them to the wood surface.
Cutting your LED strips to the exact specifications ensures optimal performance and a polished appearance. By adhering to these methodological steps, you can confidently create a stunning and reliable LED light display that enhances your wood surfaces with elegance and brilliance.
Installing LED Light Strips on Wood
Installing LED light strips on wood is a straightforward process that is awe-inspiring and practical.
To get started, make sure your wood surface is clean and dry, as this enhances the adhesive’s grip. Utilize adhesive-backed LED strips, which adhere readily to the wood, or employ mounting brackets and screws if necessary.
Opt for “non-waterproof” or “non-weatherproof” strips when working indoors to avoid unnecessary sealing layers. This simplifies the installation process and ensures a lasting bond with the wood surface.
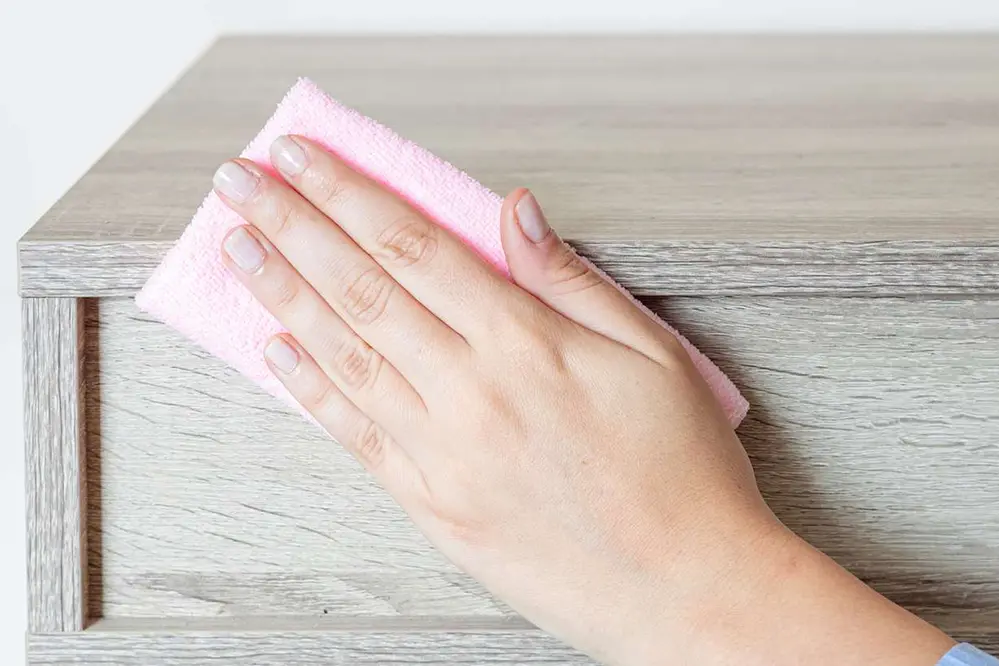
Cleaning the Wood Surface
A pristine wood surface significantly extends the lifespan of your LED lights. Removing dust and debris enhances adhesion, ensuring your LED light strips stay firmly in place.
Use a soft cloth to wipe away any loose particles, followed by a “tack cloth.” This step is crucial as a sticky surface ensures maximum bonding efficiency.
Clean surfaces can improve adhesive performance by up to 30 percent.
Apply a gentle wood cleaner for a deeper clean, allowing it to dry completely before proceeding. This guarantees that the adhesive will bond effectively, providing a seamless and enduring installation. Happy illuminating!
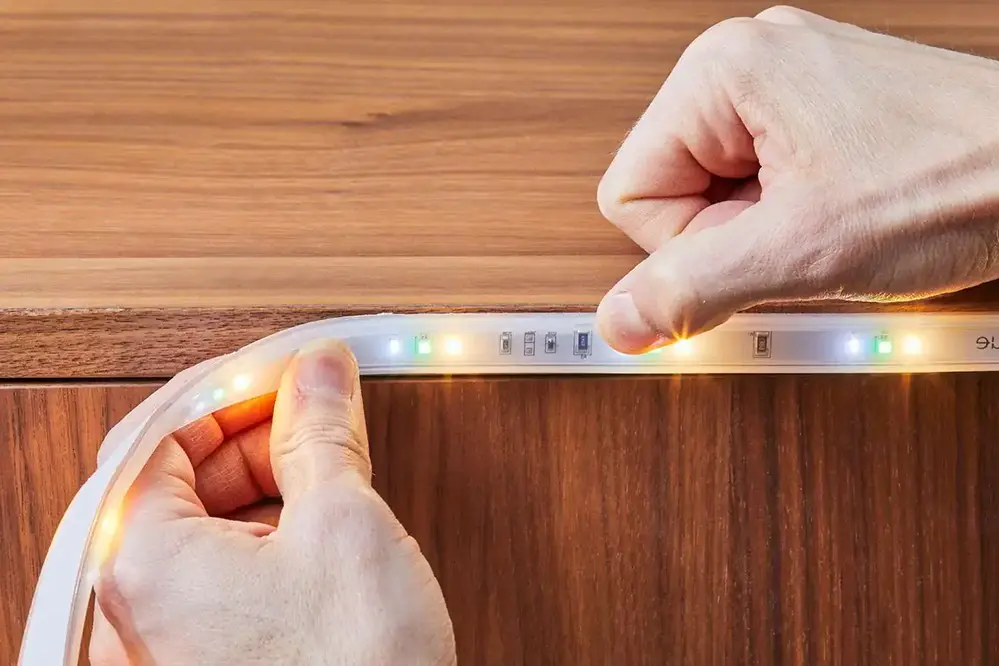
Applying the Adhesive Backing
Carefully peel off the protective layer to reveal the adhesive backing on your LED light strip, ensuring it remains free from dust.
Firmly press the adhesive side onto the clean wood surface, following the path you’ve marked out.
To enhance adhesion and longevity, take your time to press down each section of the strip, ensuring that it’s snugly attached to the wood.
Remember, a well-applied adhesive backing is crucial to maintain the LED strip’s position on the wooden surface; if necessary, use additional adhesive options such as double-sided tape or mounting clips for extra security. This meticulous approach ensures that your installation remains flawless for years to come.
Securing LED Light Strips with Clips or Mounts
Clips and mounts offer additional security.
When adhesive alone may fall short, clips, and mounts provide a stable alternative. These small but mighty accessories are ideal for scenarios where long-term durability and reliability are priorities. Furthermore, they are very effective in maintaining a neat and polished look, complementing your sophisticated design.
Clips securely fasten LED strips.
Opt for clips that match your LED strip dimensions and use screws or nails to anchor them firmly. Position the clips along your desired path, allowing for seamless light distribution.
Mounts can also be invaluable tools. They not only secure your LED light strips firmly in place but also make future adjustments a breeze. They are particularly helpful in professional or high-traffic environments where optimal functionality is essential.
By integrating clips or mounts, you empower your LED light installation to withstand various mechanical stresses, ensuring that your creative vision shines brilliantly over time. Their strategic utilization amplifies the resilience, offering you peace of mind and an impeccable lighting solution.
Connecting the Electrical Components
Before embarking on the electrical work, gather your components and tools to ensure a smooth process and successful outcome.
To begin, it’s highly advisable to opt for a high-quality power supply, capable of supporting the total wattage your LED strips will require. Equally vital is using connectors designed specifically for LED strips to ensure a secure and efficient connection. These connectors will link your LED strips to the power source, forming the backbone of your system.
Next, it’s crucial to prep the ends of your LED strips by carefully removing a small section of the adhesive backing. This exposes the copper connectors, making them accessible for linking with the connectors. Precision is key here as you want the connections to be both snug and reliable, ensuring the LED strips perform optimally.
Finally, mounting the power supply in a safe, accessible location is essential. Be conscious of ventilation, ensuring that the power supply has enough space around it to dissipate heat. Once connected and powered on, your LED light strips should illuminate your wooden surfaces beautifully, a testament to your meticulous planning and execution.
Hiding Wires for a Clean Look
Creating a polished space involves managing wires well.
An elegant solution is to use wire hider channels. These sleek, concealable tracks allow you to run the wires discreetly along the wood surface, blending in seamlessly. Moreover, painting the wire channels to match the wood color ensures an even more subtle integration.
Cord management is crucial.
You can also route wires behind furniture – an easy and practical alternative to using wire hiders. Or, consider adhesive cable clips, which are particularly effective on wood in maintaining order.
Lastly, invest in quality cable organizers such as zip-ties and velcro wraps. These simple yet highly effective tools will help keep your wires from tangling, ensuring they remain unobtrusive and lines stay clean. The satisfaction of a beautifully illuminated, clutter-free display can’t be overstated.
Testing Your LED Light Strips
Before installing your LED strip lights, ensure they function correctly by connecting them and checking for consistent illumination.
Begin by carefully unrolling the strips on a flat, clean surface. Connect the LED strips to a power source, following the manufacturer’s instructions. Observe the entire length of the strip for any inconsistencies in color or brightness, correcting any issues before proceeding with the installation to ensure impeccable results.
Simultaneously, test the adhesive backing. Press a small section of the strip onto a similar wooden surface to check its holding strength. If the adhesive is subpar, you might need to consider additional securing methods to maintain the desired placement on your wooden surfaces.
Finally, assess any remote control or dimming features if present. Verify that all controls work smoothly before installation, as troubleshooting these features post-installation can be cumbersome. This step ensures that your lighting setup will not only look magnificent but also function seamlessly, providing a warm, inviting ambiance to your space.
Tips for Maintaining LED Light Strips on Wood
Adhering to a meticulous maintenance regimen is vital for the longevity and aesthetic preservation of your LED light strips on wood.
Periodically dust the strips and surrounding wood to avoid buildup.
Inspect the adhesive periodically to ensure it hasn’t degraded; if necessary, reinforce with stronger adhesive tapes to prevent any peeling or drooping, maintaining the pristine look.
Regularly test the functionality of your LEDs, taking note of any dimming or flickering. If you detect any anomalies, address them promptly to avoid further complications. Proactively staying ahead with these simple checks can significantly prolong the life and vibrancy of your LED installations.
Creative Ideas for Using LED Light Strips on Wood

Infusing your space with unique and creative touches is easier than ever with LED light strips. Their flexibility allows them to contour seamlessly around the edges of furniture, elaborate wood carvings, or recessed shelving, adding a radiant, modern aesthetic to any room.
One fantastic idea is to install LED strips underneath floating shelves.
Embedding LED lights in wooden headboards creates an enchanting ambiance.
Create a stunning backlit frame around wall-mounted artworks or photographs.
Consider integrating LED strips into the toe-kicks of wooden cabinets to illuminate floors subtly.
You can also use LED strips to accentuate wooden stairs, providing safety and a chic look.
Ultimately, the only limit is your imagination. With LED light strips, the possibilities for elevating your wooden surfaces are boundless.
Conclusion
You can confidently install LED light strips on wood, blending modern lighting with traditional surfaces for a stunning aesthetic transformation. This combination not only enhances visual appeal but also adds functional illumination, perfect for accentuating furniture contours and creating captivating backlit artwork frames.
Embrace this innovative approach to elevate your space with elegance, functionality, and boundless creativity. By adhering to proper installation guidelines, you ensure a seamless process that maximizes the synergy between LED light strips and wood, lighting up your environment with sophistication and style.
For those looking to achieve the perfect blend of LED light strips and wood, consider reaching out to Unitop, a professional Chinese manufacturer of LED strip lights and LED neon strips. With their expertise and high-quality products, Unitop can help you transform your space with precision and style. Trust in their experience to provide the best solutions for your lighting needs, ensuring your wooden surfaces are illuminated with elegance and functionality. Contact Unitop today and take the first step towards a beautifully lit environment.


