Have you ever found yourself in a dimly lit room, struggling to see clearly, only to realize your LED strip lights have stopped working? Knowing how to test an LED strip with a battery can save you from such frustrating moments. LED strips are a popular choice for home and office lighting due to their energy efficiency and versatility. Surprisingly, a simple battery test can quickly diagnose issues, ensuring your space remains well-lit and inviting.
Understanding how to test LED strips with a battery is crucial for maintaining their functionality and longevity. According to recent studies, LED lighting can reduce energy consumption by up to 75% compared to traditional incandescent bulbs. This not only benefits the environment but also significantly cuts down on electricity bills. By learning to test your LED strips, you can ensure they continue to provide these advantages without interruption.
Embark on this enlightening journey to discover easy steps for testing your LED strips with a battery. Whether you’re a DIY enthusiast or just someone looking to keep their lighting in top shape, this guide will equip you with the knowledge you need. Dive in and illuminate your world with confidence and ease.
Gather the Necessary Tools
To begin testing your LED strip with a battery, gather specific tools to ensure accuracy. What essentials will maximize your efficiency and elevate the success of your testing?
Recent years, many advancements have simplified the process of checking LED strips, requiring only a handful of tools. A reliable multimeter, sturdy wire cutters, and quality electrical tape are indispensable, ensuring safe and accurate testing.
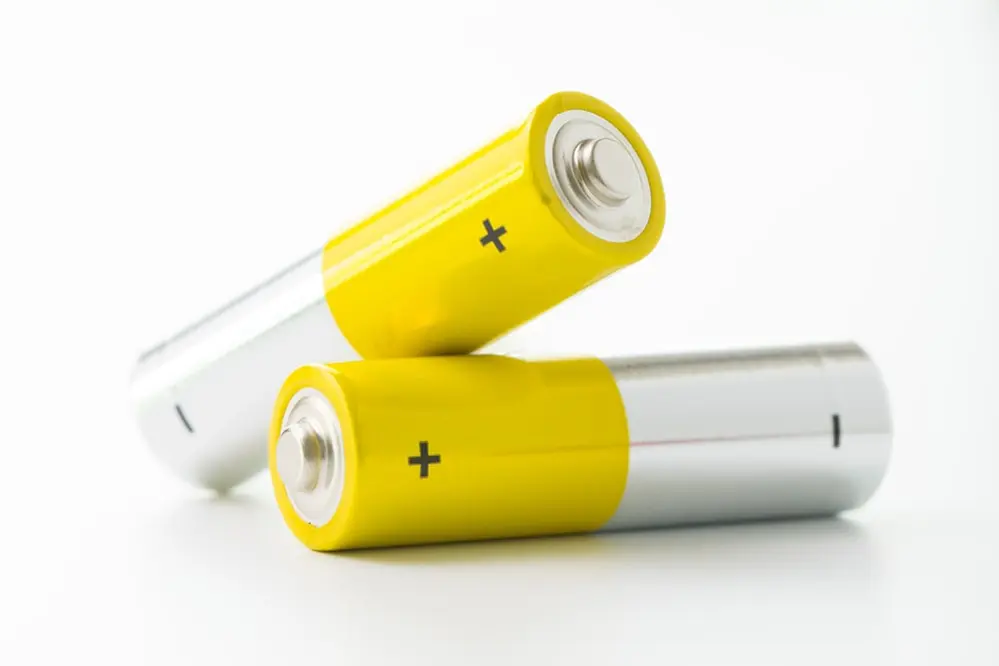
Also, it’s a good practice to have a compatible battery nearby, preferably one that matches the voltage of your LED strip. This will prevent overloading and ensure the longevity of your lighting equipment.
Consider the terminals on your battery as well, making sure you have alligator clips or connectors that securely fasten to them, reducing the risk of any inadvertent disconnections during testing.
By equipping yourself with the right tools, you pave the path for an efficient, seamless testing process, ensuring your LED strips are ready to shine.
Understand LED Strip Specifications

Understanding the specifications of your LED strip is essential before attempting any testing. How do these specifications influence the performance and compatibility when using a battery?
Recent years, LED strips vary widely, offering diverse features like different voltages, wattages, and color temperatures, which can impact their brightness and efficiency. Familiarize yourself with the datasheet or manual that accompanies your LED strip to uncover these details.
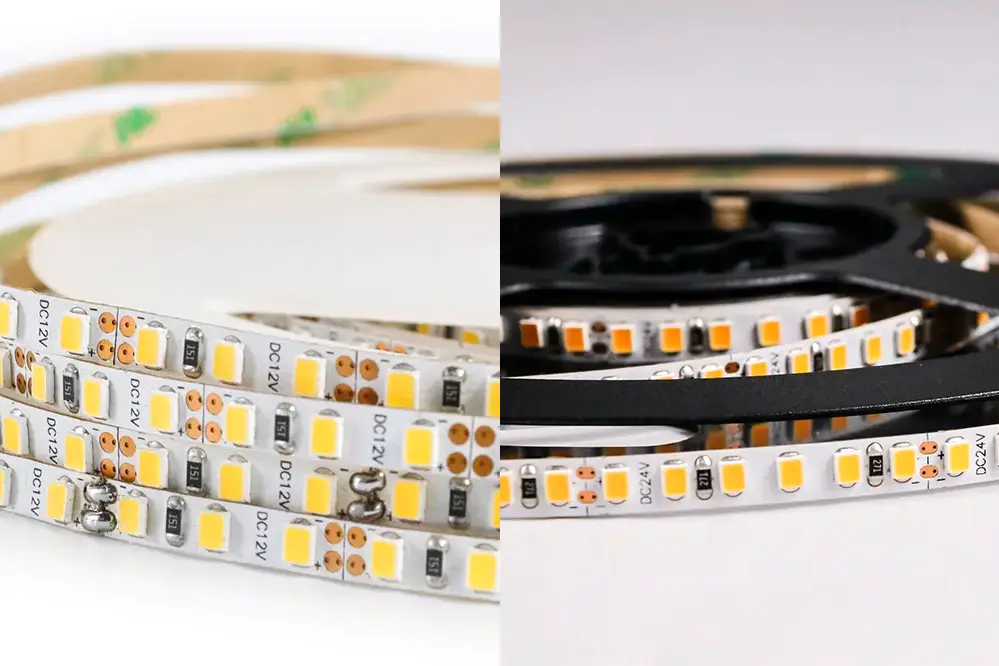
One of the key specifications to consider is the voltage. Most LED strips operate on either 12V or 24V, and using a battery that matches this voltage is crucial to avoid damaging the LEDs. Check the power consumption to ensure your battery can sustain the strip for your intended duration.
Additionally, pay close attention to the strip’s current requirements, typically measured in amperes. Knowing this figure will guide you in selecting a battery with sufficient capacity to power the LED strip without compromise or interruption in its performance.
Understanding these specifications instills confidence, enabling you to test your LED strip effectively while safeguarding its functionality.
Check Battery Compatibility

Before embarking on the journey to test an LED strip using a battery, there’s a vital checkpoint: battery compatibility. Ensuring synergy between the LED strip’s specifications and the battery’s power capabilities is paramount.
Start by confirming that your battery’s voltage matches the LED strip’s. Voltage alignment protects the strip’s internal components.
Next, ensure the battery can deliver the current needed by the LED strip. This is usually listed in the strip’s specifications or manual.
Consider the capacity of the battery to sustain current draw; you’ll want uninterrupted illumination. This will guarantee optimal performance and longevity.
Investigating these factors empowers you to select the ideal battery without compromising the LED strip’s design and functionality, ensuring it shines brightly.
Ultimately, this preparatory step is key to success. With careful selection, your battery will illuminate your LED strip with remarkable vibrancy.
Preparing Your Workspace
Before diving into testing your LED strip with a battery, create an organized, clutter-free environment to maximize focus and efficiency.
Begin by selecting a well-illuminated area with a flat surface to lay out your tools and components. A clean space not only minimizes the risk of losing small parts but also allows for effortless movement and easy accessibility to your materials. Having a designated area for testing ensures that your concentration is directed solely toward the task, optimizing accuracy and effectiveness.
Additionally, make sure to have a power supply nearby, even though you will be using a battery. By including necessary tools like a multimeter, wire cutters, and insulating tape within arm’s reach, you’ll be prepared to address any situation that may arise during the testing process.
Finally, consider implementing organizational aids such as labeled containers for small hardware pieces, planning materials, and cables. This structure will not only enhance efficiency but also foster a harmonious workflow, allowing each piece of the testing puzzle to fit seamlessly into place. Your meticulous preparation translates into a smoother testing experience, fueling your confidence as you progress.
Connecting the Battery to the LED Strip

Start by identifying the positive and negative connections on both the battery and the LED strip. Most LED strips and batteries will have clearly marked terminals, typically using distinct symbols or color-coded wires. By ensuring the correct alignment, you set the stage for a successful test, instilling confidence in your execution.
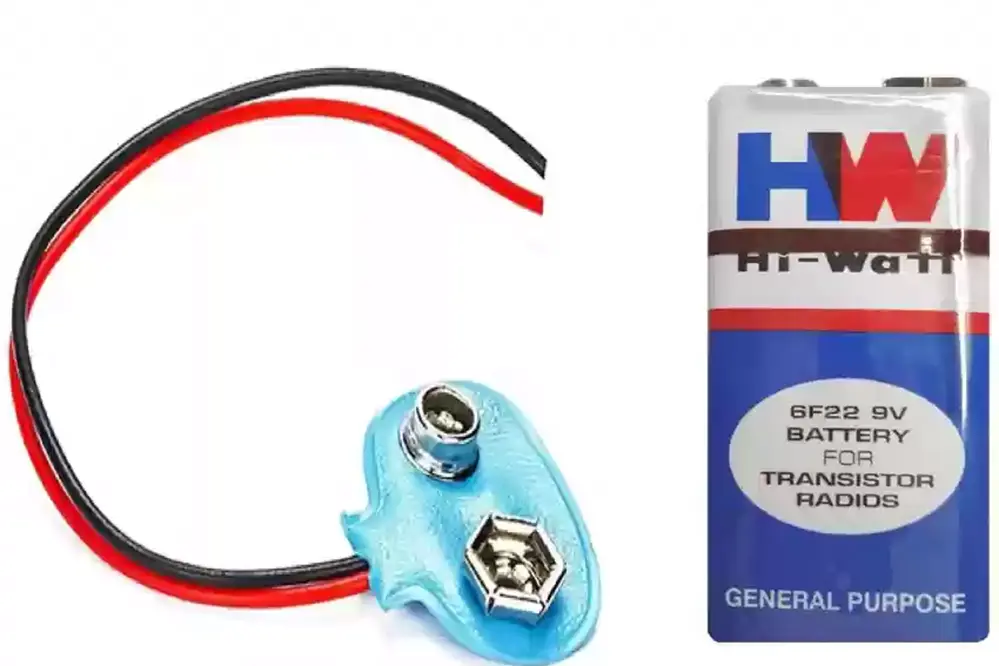
For a straightforward connection to a 9-volt battery, attach a “battery snap”. This acts as a bridge between the battery and the strip, simplifying the electrical setup. With the battery snap in place, connect the red wire to the positive terminal of the LED strip, ensuring a tight bond, while attaching the black wire to the negative side. This precise alignment will illuminate your LED strip, confirming its functionality and your adept handling in the setup process.
Identifying Positive and Negative Leads
When testing an LED strip with a battery, pinpointing the positive and negative leads is crucial. Typically, these are marked by distinct symbols or contrasting wire colors that guide your connections effectively.
In electronic circuitry, the positive lead is often termed the “anode” while the negative is the “cathode.” This knowledge ensures your LED strip’s components are connected without inadvertent mix-ups.
LEDs illuminate only when the correct electrical polarity is maintained, emphasizing the importance of precise lead identification.
Confidence grows when you approach this task meticulously: familiarizing yourself with the wiring symbols before proceeding. This vigilance ensures your LED strip test goes smoothly, lighting up your project with newfound success.
Ensuring Proper Contact
Achieving a flawless connection between your LED strip and battery is essential for a successful test. Proper contact, therefore, is the cornerstone of verifying your setup’s effectiveness.
Secure connections prevent interruptions in electrical flow that can hinder your LED experiment. A consistent current is vital for accurate testing outcomes.
Ensure that both ends of the wire are firmly attached to their respective battery terminals. This step eliminates potential loose connections.
Utilize alligator clips or similar tools, which offer a reliable grip and excellent conductivity, to enhance the connection.
Despite appearances, loose connections may create flickering lights or prevent the LED strip from lighting altogether. It’s crucial to double-check all interactions for optimal results.
Thus, by diligently ensuring proper contact, you’ll unlock the full potential of your LED strip. This assiduous attention to detail exemplifies the hallmark of a competent and forward-thinking DIY enthusiast.
Testing LED Functionality
The brilliance of your LED strip awaits unveiling; your next-step involves seamlessly bridging the LED and battery’s power, thus activating the illumination.
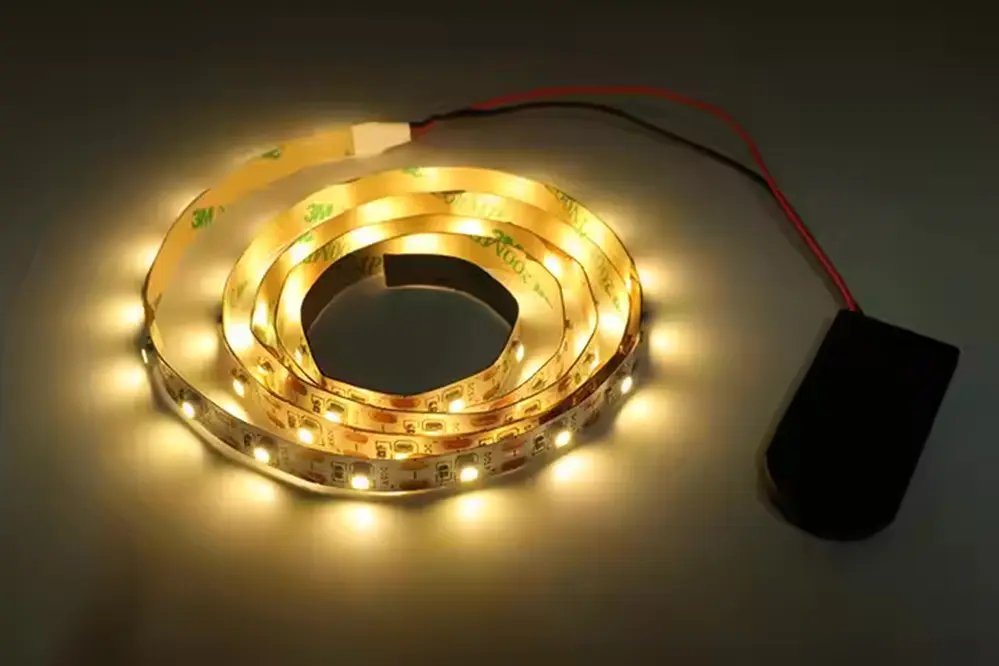
To achieve this, gently connect the corresponding positive (usually red) and negative (typically black) wires to the respective terminals, ensuring no misalignment, which can inadvertently reverse the current and affect functionality. The instant glow lets you witness a successful LED-to-battery relationship and engage with the visually inspiring aura of efficient electricity.
In this scenario, “current-flow” and “light-glow” are interconnected as signals of the ‘achieved functionality’.
Observing Light Emission
The moment your LED strip brightens up is both fascinating and affirming, marking the success of your efforts.
- Glow Intensity: Observe the brightness and color uniformity.
- Response Time: Note how quickly the LEDs light up.
- Consistency: Check for flickers or inconsistent lighting.
- Discrepancies: Identify any sections that remain dark.
Each of these elements gives clues about the LED strip’s overall health and connectivity.
Encourage curiosity and attentiveness in every step, transforming this observation into a learning journey.
Checking for Uniform Brightness
Taking a moment to scrutinize brightness uniformity is a critical step in ensuring your LED strip is functioning at its best.
To begin, it’s essential to set up a controlled testing environment where ambient lighting is minimal, allowing the LED’s glow to be observed without interference. Connect the LED strip to your battery once again and carefully examine each segment, considering both the hue and brightness. Avoid distractions and maintain focus to ensure you notice even the slightest variations that might indicate issues.
Significantly, if you observe sections with diminished brightness or color shifts, it might suggest faulty connections or individual LED deficiencies. Inconsistent lighting in your LED strip is a sign something may need addressing, prompting necessary adjustments to secure full functionality and visual harmony.
Finally, by consistently checking for uniform brightness, you enhance not only the aesthetic qualities of the LED strip but also its performance and reliability. This proactive approach builds assurance that your installation will exhibit vibrant, consistent illumination and ensures a mesmerizing display that stands the test of time. Cultivating this habit empowers you to maintain an impeccable LED setup, encouraging innovation and fostering confidence in your electrical prowess.
Troubleshooting Common Issues
As you embark on testing your LED strip with a battery, occasional challenges might arise, necessitating quick solutions.
Fluctuations in brightness, flickering, or total outages may signal issues with connectivity or power supply. Always ensure your connections are secure and that the battery has sufficient charge to deliver consistent power, eliminating fundamental discrepancies swiftly and efficiently.
The terms “troubleshooting” and “innovation” often walk hand in hand on this enlightening journey.
LED Strip Not Lighting Up
When encountering an LED strip that refuses to illuminate, take heart—solutions abound, and the journey to brilliance is well within reach with a structured approach to diagnostics.
Firstly, confirm that the battery you are using is fully charged. An insufficient power supply is a common cause of illumination issues.
Moreover, inspect the wiring connections between your LED strip and battery. Loose or incorrectly installed wires can prevent electrical current from flowing properly.
Additionally, ensure that the polarity is correct; LED strips are sensitive to the correct alignment of positive and negative connections, which can affect functionality.
It is also wise to check the strip itself for visible damage or defects. Any breaks, cracks, or signs of burn marks may halt the transmission of light across the strip.
Ultimately, if the LED strip remains dark, do not despair. Reassessing each element afresh can offer deep insights and guide you towards novel solutions, illuminating new paths to success.
Uneven or Flickering Lights
Encountering uneven or flickering lights can be unsettling.
Flickering, uneven lighting often pertains to a power mismatch. Your LED strip might be receiving too much or too little voltage, leading to inconsistent illumination. Furthermore, ensure that the battery you employ aligns correctly with the strip’s voltage requirements, as voltage fluctuations can create erratic light behavior.
The integrity of solder joints requires inspection.
This ensures a seamless energy flow — the failure of which can precipitate in flickering or uneven luminescence. Address these areas with careful attention, and regard any abnormal heat levels as warning signals that the circuit demands rectification.
Take this phenomenon as an opportunity to delve into forward-thinking maintenance practices, setting the stage for enhanced longevity of lighting solutions. By addressing root causes with methodical precision, you unlock the LED strip’s true potential, eager to transform mere functionality into an exceptional display of efficiency and brilliance.
Safety Precautions
When testing an LED strip with a battery, it’s crucial to prioritize safety. Start by ensuring a clean workspace free from conductive materials that could cause a short circuit. Create a controlled environment to establish a reliable testing process, requiring clear focus and minimal distractions.
Always disconnect power before connecting or disconnecting the LED strip. Handling connections with live power can lead to electrical shocks or damage to the components. Utilize a suitable battery that matches the voltage requirements to prevent overheating or overloading the strip, which could otherwise cause damage or even a fire hazard.
Additionally, wear insulated gloves while handling electrical components to shield against unexpected electrical discharges. Be cautious, as small oversights can pose significant hazards, affecting the longevity of the entire setup. Using tools specifically designed for electronic work can further mitigate risks and enhance maneuverability during the testing phase.
Before initiating the test, double-check the connections and ensure the battery is in good condition. Damaged batteries may leak or explode, presenting unnecessary dangers. A thorough inspection helps avert potential mishaps and upholds the long-term reliability and safety of the lighting system.
Finally, remain vigilant throughout the process and keep fire-protection measures readily accessible. Safety overrides all other considerations, prioritizing well-being and the integrity of your equipment. Emphasize precautionary principles to inspire a conscientious and high-standard approach to testing your LED strip with a battery.
Remember, the spirit of innovation thrives when one’s security is preserved. Implementing robust safety measures serves as a cornerstone for successful trials and fosters confidence in your abilities to handle complex lighting projects with assuredness and flair.
Choosing the Right Battery Type
Opt for practicality and compatibility with your LED strip.
When embarking on a mission to illuminate your space with LED strips using a battery, it’s crucial to pick the right type. Not all batteries are created equal, and their specific characteristics influence performance, duration, and safety of your setup. Ideally, refer to the voltage and current specifications of the LED strip, as using an incompatible battery could limit brightness or lead to unintended failures.
The basics of choosing the appropriate battery involve understanding ratings.
Consider power output capacities—if the strips require higher power to function optimally, a more substantial battery is necessary. Conversely, for shorter lighting durations or to power less intensive strips, a smaller, more portable option will suffice.
As you analyze your requirements, remember that technological advancements have granted us efficient rechargeable batteries, underscoring their importance in 2023 and beyond for environmentally conscious choices. Sustainability merges with innovation through battery selection, merging your creative vision with the robustness of advanced energy sources.
Maintaining LED Strips
Keep reliability at the forefront.
Ensuring the longevity of your LED strips begins with regular maintenance. This can include gentle cleaning to avoid dust accumulation, which can affect luminescence and heat dissipation, factors that are paramount for consistent functionality. Additionally, checking for any signs of wear or damage allows you to address potential issues before they compromise the vibrant allure of your setup.
Attend to any flickering promptly.
Be mindful of maintaining optimal adhesive strength – as this ensures your LED strips remain securely attached to their surfaces – and make it a habit to inspect for and rectify any loose connections.
Moreover, understanding environmental impacts, such as temperature and humidity variations, can guide you in making informed decisions on appropriate use and storage conditions. These simple yet profound steps towards maintaining your LED strips will not only extend their life but also provide unwavering brilliance, inspiring creativity and innovation in every illuminated space.
Best Practices for Repeated Testing
To achieve consistent results, ensure your testing setup mirrors the initial conditions each time.
This consistency, in terms of environmental factors and resource availability, allows the evaluated results to remain uniform, bolstering the reliability and accuracy of your accumulated data. Prepare a systematic approach whereby each variable of your testing environment is meticulously documented, enabling you to replicate conditions effortlessly.
Furthermore, minor variations can skew your data inaccurately. By standardizing your approach, you create robust experimental conditions that mitigate inconsistencies and enhance your insights, a concept increasingly crucial as you delve into more complex testing scenarios.
Lastly, it is vital to incorporate regular reviews of your testing protocols to adapt to evolving knowledge or technology advancements. This forward-thinking stance not only maintains the relevance of your testing techniques but also propels a culture of continuous improvement, reflecting a commitment to excellence and innovation in your pursuits.
Benefits of Battery-Testing LED Strips
Testing LED strips with a battery is advantageous.
This method offers the flexibility and convenience of quick diagnostics. By using a battery, you can test the lights independent of complex electrical setups, making it an accessible choice for both novices and seasoned enthusiasts. Consequently, this empowers you to swiftly identify any malfunctions or defects, thereby saving valuable time and resources.
Assess faults without comprehensive arrangements.
Battery-testing eliminates the need for – or the potential hassle from – addressing circuit complexities or on-site wiring errors. It provides a straightforward, low-risk process for verifying functionality.
Embarking on battery-testing promotes sustainable practices through energy efficiency initiatives, embracing the very spirit of our forward-thinking 2023 landscape, where the drive toward eco-friendly solutions is at the forefront. This transformative approach helps ensure your projects are aligned with progressive energy-saving standards and reduces excessive electricity usage.
Conclusion
To sum up, testing an LED strip with a battery is a remarkably straightforward process.
By following the outlined steps, you not only simplify your testing procedure but also enhance your understanding of your LED strips’ functionality. This approach allows you to rapidly detect and address any issues, ensuring your projects proceed smoothly and without unnecessary delays. Embracing this method strengthens your skills and empowers you to make more informed decisions.
Ultimately, this technique exemplifies the power of simplicity in solving complex problems. With a battery in hand, you possess the capability to instantly evaluate your LED strips, aligning with energy-efficient practices that contribute positively to both your projects and the environment.
Your journey towards mastering LED technology promises innovation, efficiency, and success. As you gain confidence in these testing techniques, you unlock new potential for creative applications and sustainable solutions, furthering your commitment to cutting-edge practices that enrich both your personal and professional endeavors.


