

“Lighting is an essential element in creating a mood and transforming a space,” says renowned interior designer Kelly Wearstler. Learning how to connect LED strips to a dimmable driver is a key step in achieving this transformation. This guide will provide you with the knowledge and confidence to master this task.
The impact of proper lighting extends beyond mere aesthetics; it influences productivity, relaxation, and overall well-being. Whether in residential or commercial settings, the ability to customize lighting to suit various needs is invaluable.
Ready to discover the secrets to perfect lighting? Join us as we delve into the step-by-step process of connecting LED strips to a dimmable driver, ensuring your spaces are illuminated to perfection.
Gathering Materials and Tools
Before embarking on the task of linking LED strips to a dimmable driver, it is essential to gather all necessary materials and tools.
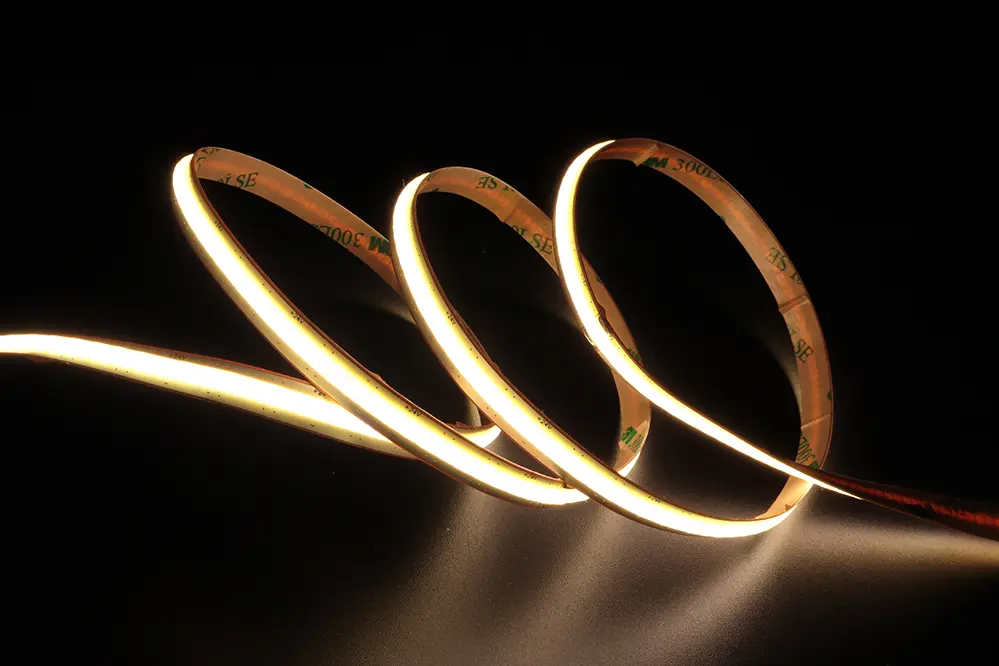
Start by procuring high-quality LED strips. Select the appropriate length for your desired application.
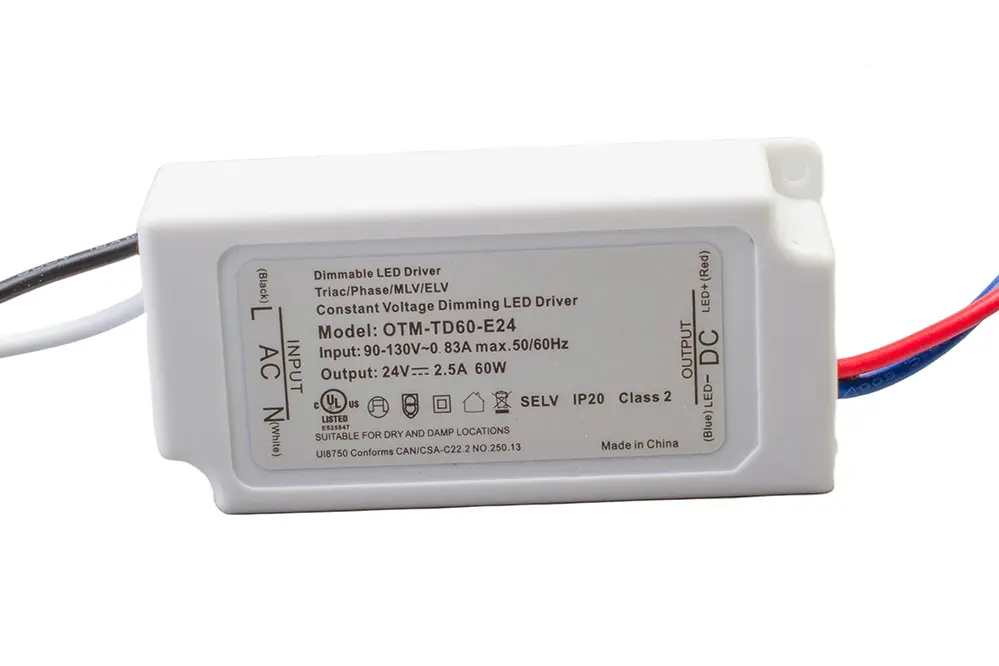
Next, source a compatible dimmable driver for the LED strips. Ensure its specifications align with the LED strip’s voltage and wattage.
Prepare wire strippers, electrical tape, and a reliable power supply. These will be instrumental in ensuring a seamless connection.
Additionally, have a screwdriver handy for any fastening or adjustments that might be required during the installation process.
Finally, consider safety equipment such as electrical gloves. Maintaining a keen focus on safety will safeguard the integrity of the entire endeavor.
Understanding LED Strips and Dimmable Drivers
LED strips are versatile, innovative lighting solutions.
These strips consist of small LED emitters mounted on a flexible circuit board. They are designed to offer various illumination options by being easily adhered to surfaces, curved, or trimmed to specific lengths. Moreover, they can be used for accent lighting, task lighting, or even as primary light sources, depending on the application’s nature.
Dimmable drivers control LED brightness.
A dimmable driver serves as the essential interface between the LED strip and the power supply. Not only does it regulate the voltage and current that reaches the LEDs, but it also allows users to adjust the brightness levels according to their preference and needs.
Combining LED strips with dimmable drivers maximizes versatility and efficiency. This pairing ensures gradual dimming without flicker, promoting an optimized and comfortable visual experience. Selecting the right dimmable driver, therefore, is pivotal in harnessing the full potential of LED strips.
Understanding these components empowers users to create dynamic lighting environments. Whether for ambient lighting in residential spaces or functional illumination in commercial settings, mastering the connection of LED strips to dimmable drivers paves the way for a new realm of customizable lighting solutions.
Planning Your LED Strip Layout
The layout step is paramount.
Taking the time to properly plan the LED strip layout is crucial. This phase involves not only the aesthetic considerations of the final visual impact but also the technical logistics of connecting each section. Thoughtful planning can prevent future frustrations and ensure a seamless integration of the LED system with the dimmable driver.
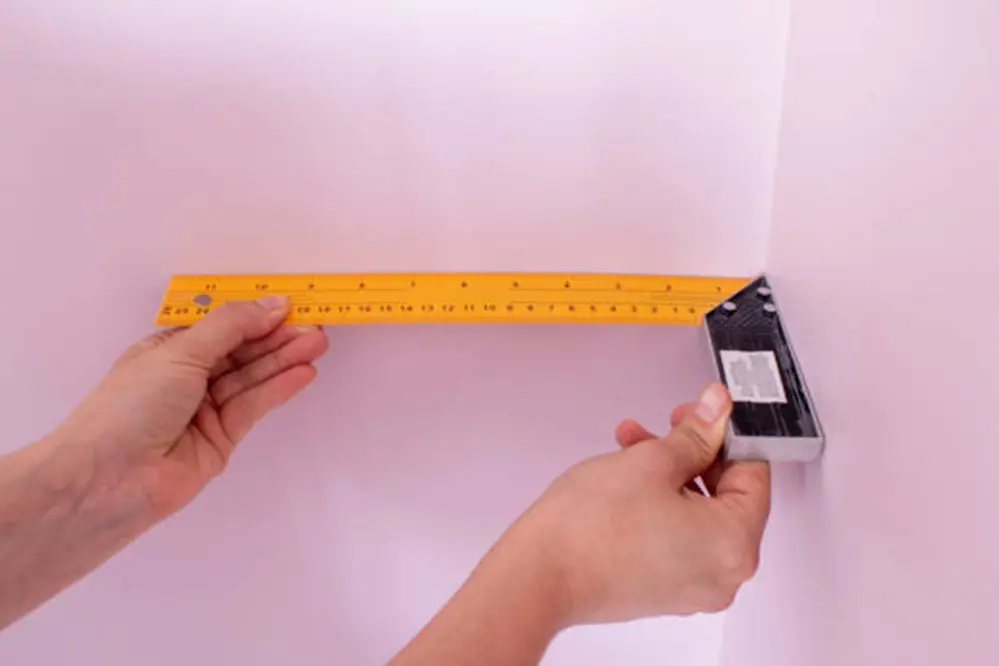
Accurate measurements are vital.
Plotting out where each strip will go, how it will be connected, and ensuring even coverage of light across the entire area can save time and money. It’s essential to map out the exact pathway and calculate the required lengths of LED strips to avoid dead zones.
Ensure the power source is accessible.
Identifying the optimal positions for both the LED strips and the dimmable driver is key. By carefully considering the location of power outlets and the feasible routes for wiring, one can guarantee a clean and efficient setup.
Adhering to these planning stages establishes a thorough foundation that paves the way for a successful installation. Advanced preparation results in an end product that is both functionally brilliant and visually stunning.
Ensuring Electrical Compatibility
Before commencing any installation, verifying electrical compatibility is crucial to avoid complications and ensure the longevity of the LED strips.
First and foremost, it is necessary to check that the voltage of the LED strips matches the output voltage of the dimmable driver. For example, if the LED strips are rated for 12V, the driver must also have a 12V output. Inconsistent voltages can cause flickering or even damage the components.
Additionally, consider the driver’s power capacity relative to the total wattage of the LED strips. This involves calculating the cumulative wattage of all strips connected together and ensuring the driver can support it without overloading. It’s advisable to leave a margin of at least 20% to ensure reliability.
Lastly, evaluate whether the dimmable driver is compatible with the specific type of dimming control you intend to use. Different dimming methods, like TRIAC or PWM, require corresponding compatible drivers. Ensuring this will provide smooth, consistent dimming and enhance the overall user experience. Proper compatibility assessments pave the way for a successful and efficient lighting project.
Calculating Power Requirements
Determining the power requirements for connecting LED strips to a dimmable driver is a critical step.
First, one must ascertain the total length of the LED strips.
Next, calculate the power consumption based on the strip’s wattage per meter. Multiply this figure by the total length to find the total wattage needed. Adding a 20% buffer ensures the system operates efficiently, avoids overheating, and grants reliability.
An accurate power requirement calculation safeguards against potential issues such as flickering or premature burnout. Thus, investing time in precise calculations pays dividends in ensuring a stable and long-lasting lighting solution.
Connecting the LED Strip to the Power Supply

Connecting the LED strip to the power supply requires careful attention to ensure optimal functionality. They should begin by confirming the power supply’s voltage matches that of the LED strip.
They will then connect the positive wire from the LED strip to the positive terminal of the power supply.
Following this, they must connect the negative wire from the LED strip lights to the power supply’s negative terminal, ensuring a secure and tight connection for efficient power delivery and consistent illumination.
This precise connection not only guarantees the LED strip will function correctly but also prolongs the lifespan of the components by preventing any electrical issues that could arise from improper assembly. If necessary, consulting the manufacturer’s guidelines can provide additional assistance to ensure every connection meets the required standards for safe operation.
Connecting the Driver to the Power Source
Connecting the driver to the power source is a crucial step, requiring precision, adherence to instructions, and a keen understanding of electrical connections to ensure everything functions seamlessly.
First, they should ensure the power source is turned off to avoid any hazards.
Next, they must identify the input wires on the dimmable driver, typically marked as LINE (L) and NEUTRAL (N).
The LINE wire from the driver needs to be connected to the positive terminal of the power source.
Similarly, the NEUTRAL wire should be securely connected to the negative terminal of the power source, ensuring a solid connection.
Additionally, they may want to utilize a wire connector to maintain a tight and secure fit, ultimately protecting the connection from accidental disconnections.
Finally, it is essential they double-check all connections to confirm the driver is correctly connected to the power source. This thorough verification process will pave the way for successful LED strip installation.
Cutting and Splicing LED Strips
Cutting and splicing LED strips require careful attention to detail and a steady hand to ensure optimal performance.
To cut an LED strip, one needs to find the designated cut lines typically marked by small scissor icons and cut precisely along these lines.
When splicing two sections of the strip together, use soldering tools or compatible connectors designed for LED strips, ensuring the polarity matches to avoid any operational issues.
Properly executed, these procedures allow for customizable LED strip configurations, providing tailored lighting solutions.
Securing LED Strips to the Surface
Once all connections are established, attention turns to securely mounting the LED strips to the desired surface. Proper attachment ensures consistent lighting performance.
Begin by cleaning the surface where the LED strips will be mounted. This step is crucial.
Next, remove the adhesive backing from the LED strip, ensuring the tape is exposed evenly. This reveals the sticky surface.
Carefully press the LED strip onto the cleaned area, ensuring alignment per the planned layout. This prevents misplacement.
For added stability, consider using additional mounting brackets or clips, especially in areas prone to movement. This ensures a firmer grip.
In conclusion, dedicating time to secure the LED strips properly will enhance both the longevity and the aesthetic appeal of the installation.
Wiring the Dimmable Driver
The first step in wiring the dimmable driver involves preparing the necessary tools and materials, such as wire strippers, connectors, and the driver itself, ensuring everything is within reach.
Remember to switch off any power sources before beginning, as a safety precaution.
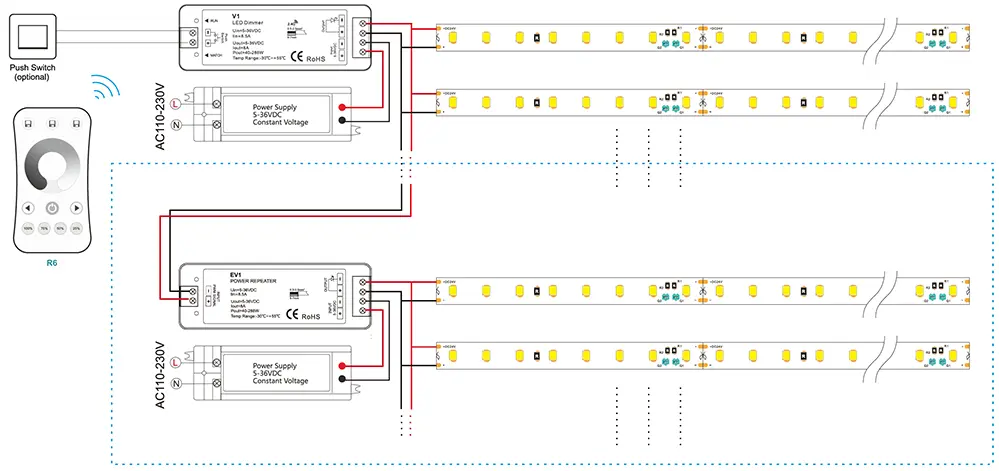
Once you are ready, identify the input and output terminals of the dimmable driver, typically labeled clearly for easy identification. Connect the live and neutral wires from the power supply to the input terminals following the manufacturer’s guidelines, ensuring a snug and secure fit.
Next, connect the positive and negative wires from the LED strips to the corresponding output terminals on the dimmable driver. Double-check all connections to confirm there are no loose wires, which could lead to performance issues or potential hazards. Finally, with everything securely in place, reapply power and test the dimming functionality to ensure optimal operation.
Testing Connections and Functionality
After completing the wiring process, the critical step is ensuring that all connections and functionality of the LED strips and dimmable driver work perfectly.
Begin by restoring power to the dimmable driver and the connected LED strips.
Carefully inspect each connection point to confirm there are no signs of loose wiring or damage.
If everything appears to be in order, proceed to test the dimming function of the led driver.
Use the dimmer switch to gradually adjust the brightness level from the lowest to the highest setting, observing how the LED strips react.
Finally, take note of any irregularities in the dimming process, addressing them immediately. Thorough testing ensures a smooth, efficient, and long-lasting lighting setup.
Troubleshooting Common Issues
Despite following the installation instructions carefully, there might be instances where unexpected issues arise, necessitating troubleshooting to maintain smooth operation.
One common problem is flickering lights, often caused by loose connections.
If the LED strips do not dim properly, consider checking the dimmable driver’s compatibility with the LED strips.
Sometimes, the dimmer switch might not be suitable for the specific type of dimmable driver used.
Another issue to watch out for is uneven light distribution, which can occur if the LED strips are not consistently adhered to the surface.
In cases where the LED strips refuse to light up, ensure the power supply is properly connected and functional. Addressing these common issues promptly ensures the longevity and efficiency of the lighting system.
Setting Up Dimming Controls
Setting up dimming controls allows users to tailor the lighting ambiance to their preferences and needs.
To achieve this, it is essential to choose a compatible dimmer switch that works seamlessly with the dimmable driver, ensuring the electrical specifications match. Understanding the different types of dimming technologies, such as TRIAC, ELV, and 0-10V, will aid in selecting the appropriate dimmer for the setup.
Additionally, proper wiring is crucial to a successful installation. By connecting the dimmer switch to the dimmable driver correctly, one ensures that the LED strips will function smoothly and respond to adjustments without any glitches.
It is highly recommended to follow the manufacturer’s instructions when installing dimming controls. Simple yet meticulous steps, like verifying connections and avoiding any potential overloads, are fundamental to the system’s reliability and performance. Having a clear understanding of the steps bolsters confidence, leading to a successful outcome.
Installing Heat Dissipation Measures
Proper heat dissipation is crucial when installing LED strips to ensure longevity, reliability, and performance. Incorporating heat sinks into the setup is a widely recognized method for achieving this.
Heat sinks increase the surface area, promoting efficient heat transfer and dissipation. This prevents the LED strips from overheating and degrading.
By installing aluminum heat sinks directly under the LED strips, one can significantly reduce thermal accumulation. Aluminum is favored for its excellent thermal conductivity properties.
Thermal tape or adhesive is often employed to affix the LED strips to the heat sink. This ensures firm contact and efficient heat transfer.
Consider positioning the LED strip lights in areas that allow for natural air flow. Proper ventilation complements the dissipation process, further protecting the LEDs.
Ultimately, taking these measures will safeguard the LED system’s integrity. Ensuring effective heat management maximizes performance and prolongs the lifespan of the lighting setup.
Maintenance Tips for Longevity
Regularly inspecting the LED strips for any signs of wear, such as discoloration, is the first essential step to ensure longevity and consistent performance.
Simple visual checks can often reveal underlying issues that may develop into significant problems.
Moreover, dust accumulation can hamper heat dissipation, so it is advisable to clean the LED strips periodically.
Using a soft cloth can prevent scratches and maintain the protective layer on the LEDs.
Regular monitoring of the dimmable driver’s output ensures it remains within the optimal operating range, thereby preventing overheating or underperformance.
Finally, checking the connections at least once a year will accommodate early detection of loose wires. Proactive upkeep fosters a reliable and efficient LED lighting system.
Conclusion
Connecting LED strips to a dimmable driver is a practical and empowering task that allows individuals to achieve tailored lighting solutions. By understanding technical specifications and ensuring proper connectivity, one can enhance living or working spaces with innovative lighting technology, promoting clarity and control in LED systems. Embark on this journey with confidence for a well-lit future.
For individuals seeking professional assistance or high-quality products, consider reaching out to Unitop, a reputable Chinese manufacturer of LED strip lights and LED neon strips. With their expertise and unwavering commitment to excellence, Unitop can provide tailored solutions to meet your lighting requirements. Whether for residential, commercial, or industrial applications, their innovative products and exceptional customer service ensure a seamless experience. Establish a connection with Unitop to transform your spaces with cutting-edge LED technology and achieve the lighting ambiance you envision.


