Have you ever struggled with dull, uninspiring lighting in your home or office? Learning how to connect multiple LED strip lights can solve this common problem and revolutionize your space. Many people face the challenge of inadequate lighting, which can affect mood, productivity, and overall ambiance.
Addressing this issue is crucial because the right lighting can significantly enhance the quality of life. Studies show that well-lit environments can boost mental health and increase efficiency. Therefore, understanding how to connect multiple LED strip lights is not just a skill but a valuable investment in your well-being.
This guide will explore various solutions, from choosing the best LED strip lights to mastering the installation process. You’ll find practical tips and expert advice to help you achieve professional results.
Curious about how to transform your space with the perfect lighting setup? This guide will answer every question you have, providing valuable insights and step-by-step instructions that will guide you through this rewarding journey.
Understanding LED Strip Lights
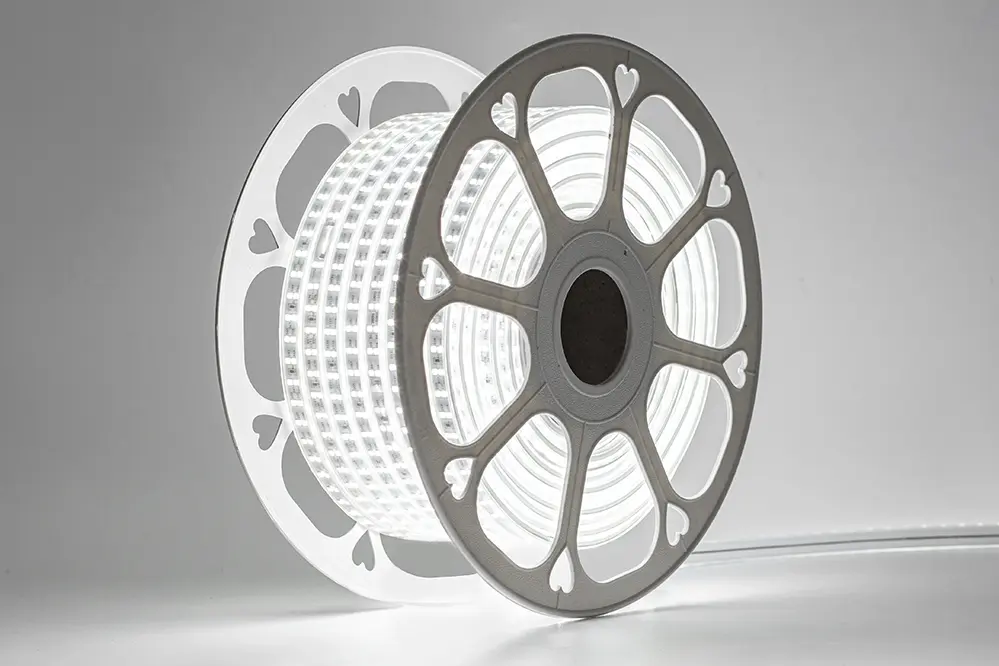
LED strip lights have revolutionized the way we illuminate spaces, offering incredible flexibility and efficiency.
Introduced in recent years, these innovative lighting solutions have quickly gained popularity, thanks to their compact design and vibrant colors. The ability to customize the length of the strips by cutting at designated points is a standout feature.
Moreover, it’s not just aesthetics; these lights’ energy efficiency contributes to eco-friendly practices. They consume significantly less power compared to traditional lighting while providing ample illumination.
When selecting the right LED strip lights, consider factors like brightness level, color temperature, adhesive backing, and waterproof rating. These attributes ensure you choose the best fit for your specific application.
In essence, understanding LED strip lights is not just about knowing their form and function, but also mastering their use to create dazzling, energy-efficient lighting environments.
Planning Your Setup
Before you embark on connecting multiple LED strip lights, a thorough and meticulous planning phase will be your cornerstone. Carefully design the layout and visualize where each strip will be placed to achieve optimal lighting effects.
Start by measuring the dimensions of the area you wish to illuminate. This step is critical, as it ensures that the LED strips fit accordingly and avoids unnecessary wastage. Once these measurements are in hand, outline the route for the strips, considering the proximity to power sources and any potential obstacles that might hinder installation.
Choosing the Right LED Strip Lights
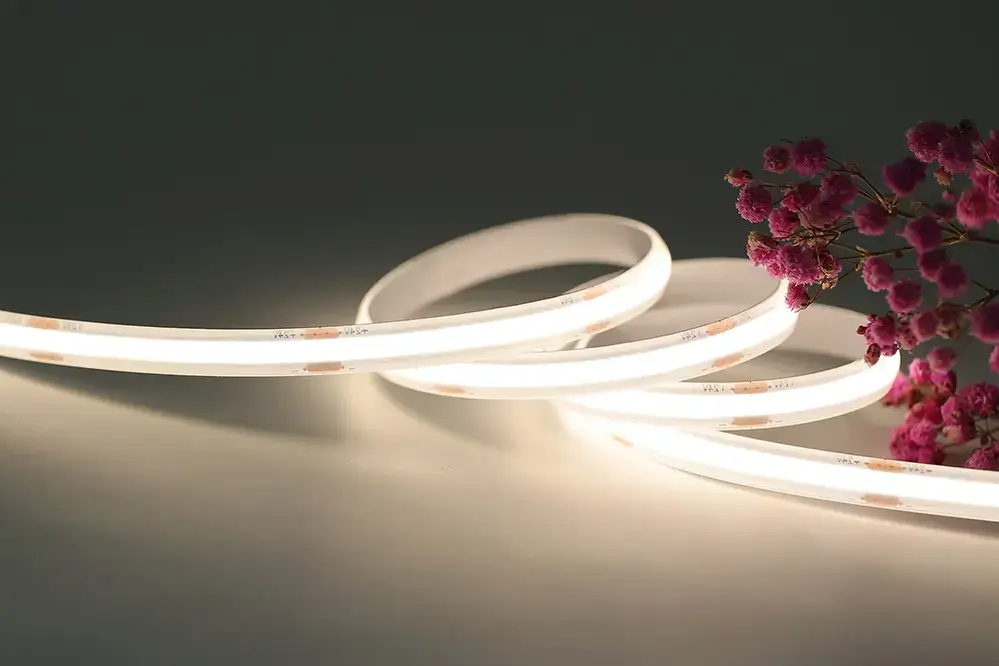
Selecting LED strip lights involves a delicate balance of several key attributes. Focus on brightness, color temperature, and adhesive quality to ensure your choice perfectly aligns with your vision.
Pay attention to the waterproof rating of the LED strips if they’ll be used in moisture-prone environments. This feature extends their durability, ensuring longevity and consistent performance.
LED strip lights with higher lumens per watt are more energy-efficient and deliver brighter illumination.
Lastly, consider the voltage and compatibility of the strips with your power source. This ensures the seamless integration of multiple strips without overloading the system, leading to a flawless lighting experience. Embracing these considerations will empower you to create a stunning, vibrant ambiance, elevating your space to new heights.
Measuring and Layout
Precision is key when planning your layout.
Begin by measuring the space where you intend to install the LED strip lights. The exact measurements will not only help in determining the required length but also ensure an optimal distribution of light throughout the area, avoiding dark spots or overlaps. Utilize a measuring tape and mark the measurements on the walls or surfaces for accuracy.
A blueprint of the project space aids in visualization.
It’s also crucial to account for where the power source is – plan your layout in a way that all LED strips can easily connect to it without causing unsightly cable clutter. Use pencil marks and masking tape to outline the proposed positioning of the strips on the surface.
These meticulous preparations will save significant time and ensure a flawless installation. As you measure and layout, remain confident that every step brings you closer to a successful, professional-grade lighting experience that enhances your space.
Types of Connections
Connecting multiple LED strip lights can be achieved through several methods depending on the configuration, desired length, and power requirements. You can connect them end-to-end, use splitters, or heat-solder; it is essential to choose the right connection to ensure seamless lighting effects and efficiency.
Using clips or connectors is often straightforward for beginners, while more advanced techniques like soldering allow for customized, flexible arrangements.
Soldered Connections
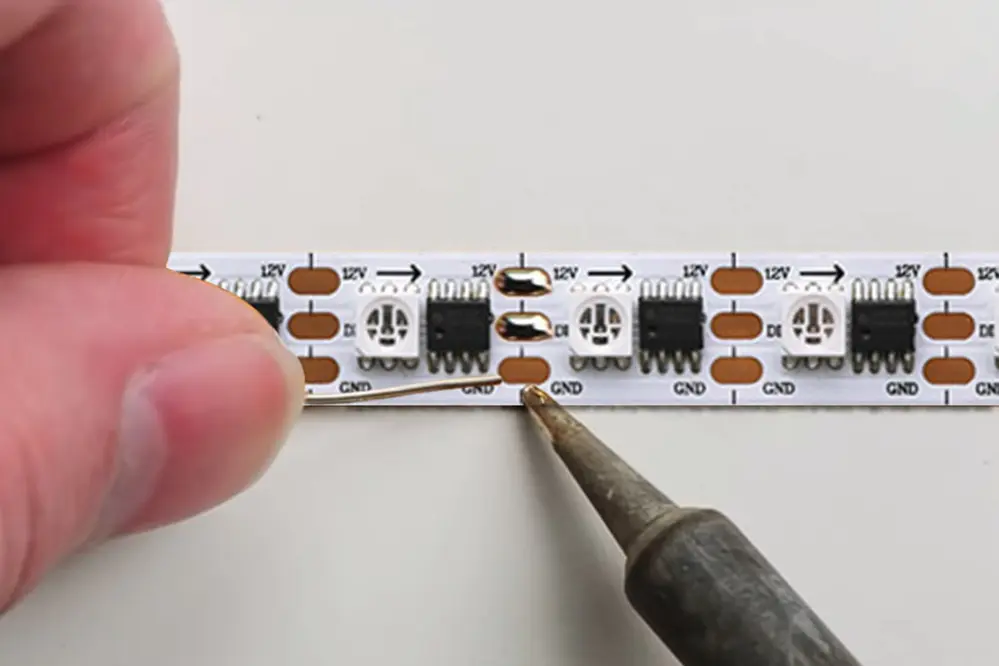
Soldering, while more advanced, offers superior reliability and can be made easier with the right soldering tips.
When you solder your LED strip lights, you gain a durable bond. This method involves melting a small amount of solder to join the strip’s contact points to appropriate wires, creating a permanent connection. Importantly, soldering ensures the electrical current flows seamlessly, thus reducing risks associated with loose or faulty connections.
A high-quality soldering iron is essential.
Ensure that you strip the wires clean – removing any insulation that could obstruct the soldering process. This careful preparation helps achieve firm, long-lasting joints that withstand regular handling and environmental factors.
With precise attention to soldering techniques, such as correctly tinning the wires and ensuring adequate heat application, your effort will substantially enhance the effectiveness of your LED strip lighting. This meticulous soldering process, reflecting a keen eye for detail and commitment to excellence, serves as a crucial extension towards achieving a state-of-the-art lighting solution.
Solderless Connectors
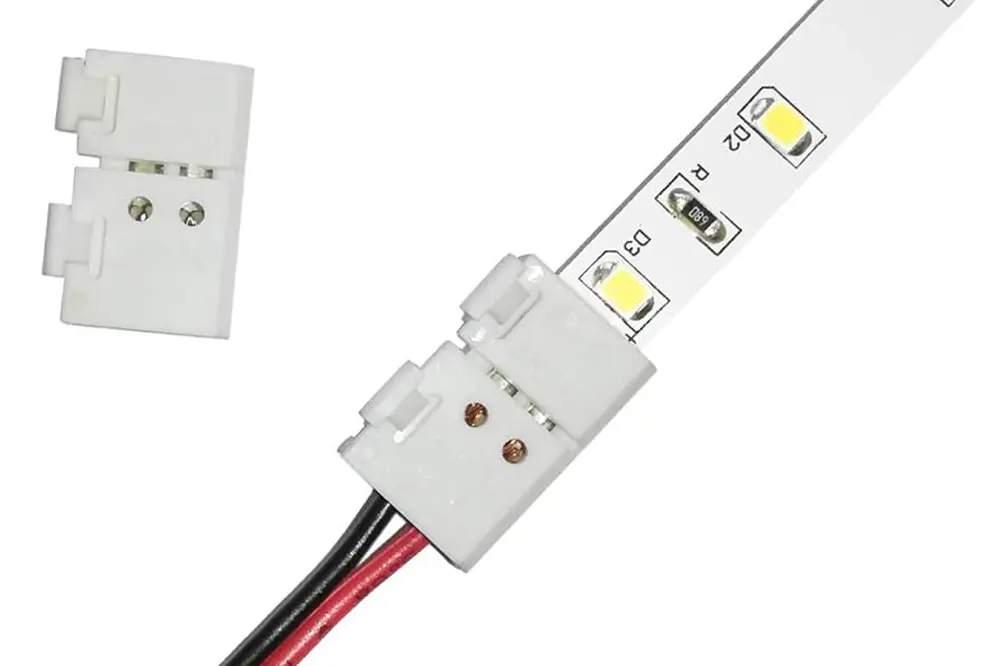
For those seeking a streamlined approach, solderless connectors offer a valuable solution for connecting multiple LED strip lights. These connectors allow you to join sections of your LED strips without needing to solder, making the process significantly easier and more accessible.
They are especially useful when working with limited tools.
Solderless connectors come in various forms, from clip-on to plug-and-play types, each designed to suit different applications and preferences. Their user-friendly nature means you can achieve secure connections quickly, enhancing the efficiency and ease of your lighting projects.
By using solderless connectors, you not only save time but also minimize the risk of creating imperfect connections. This method requires minimal technical expertise, making it a versatile option for both beginners and seasoned professionals alike. Always ensure proper alignment and a snug fit to optimize performance and longevity of your LED system.
Powering Your LED Strips
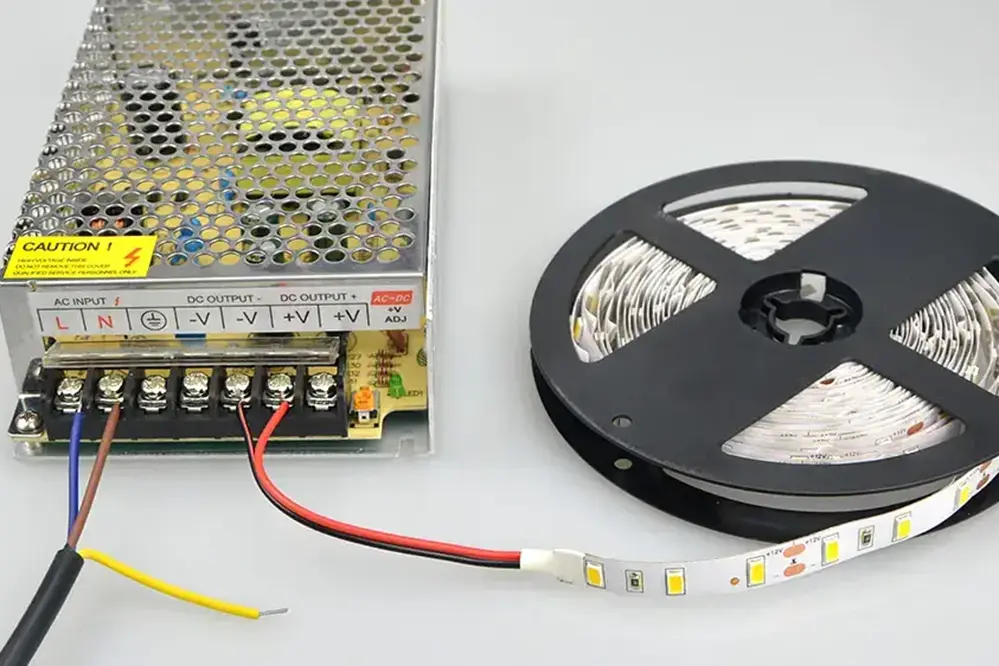
When it comes to powering your LED strips, selecting the appropriate power supply is vital for achieving consistent brightness and avoiding potential damage. Consider voltage, wattage, and amperage to ensure the longevity and efficiency of your setup.
Choosing the right power supply guarantees optimal performance and reliability, making your LED lighting project both efficient and inspirational.
Selecting a Power Supply
Choosing the correct power supply is paramount for your LED strip lighting project, as it influences performance, safety, and the overall lifespan of your installation.
First, determine the total wattage required by summing the wattage of all the LED strips you plan to connect.
Next, select a power supply with a wattage rating around 20% higher than your total wattage requirement to prevent overloading.
It’s essential to match the voltage rating of the power supply with the voltage rating of your LED strips, typically 12V or 24V.
Ensure the power supply can provide sufficient amperage to support the total current draw of your connected LED strips to maintain consistent brightness and functionality.
Additionally, consider the environment where the power supply will operate—choose options that are waterproof or have appropriate cooling mechanisms if needed.
Remember, taking the time to select the right power supply not only maximizes the efficiency and longevity of your LED setup but also ensures a harmonious and inspiring lighting experience.
Connecting the Power Supply
Ensuring optimal performance starts here.
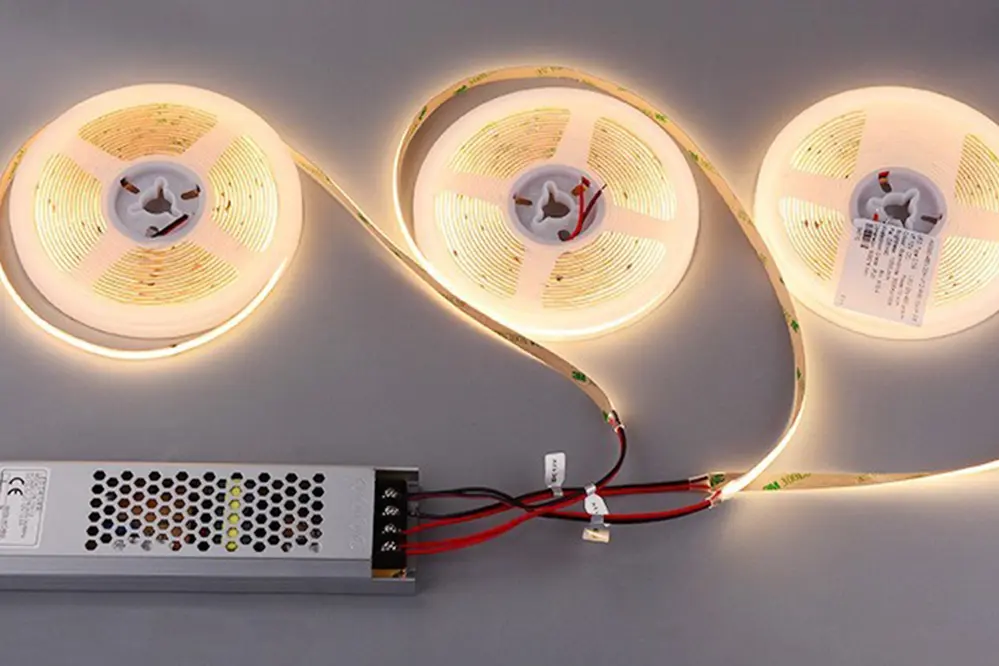
Before delving into connections, gather all necessary components, including a suitable controller if your LED system requires it. This includes the power supply, a connector or adapter for the LED strips, and a reliable multimeter to ensure stability. Thoroughly understand the specifications of both the power supply and the LED strips to facilitate a seamless connection process.
Double-check all power ratings.
Begin by turning off the power to prevent any accidental short circuits. Use a screwdriver if necessary to open any covers or fasten connections securely. Place your leads in the appropriate terminals and ensure the correct polarity alignment for positive and negative terminals.
To safeguard your setup, employ connectors designed explicitly for LED applications. These enhance connectivity and minimize potential electrical faults, boosting the overall durability of your lighting system. Finally, turn on the power supply and verify that each LED strip illuminates brightly, confirming successful connection and a luminous future for your project.
You can read this article on how to connect LED strips to power supply.
How to Connect Multiple LED Strip Lights
Initiating the connection of multiple LED strip lights requires meticulous planning and precision. Begin by identifying and acquiring all necessary connectors, ensuring they are compatible with your specific LED strips. Prepare the strip ends for connection by cutting and exposing the electrical contacts, being careful to maintain the correct orientation.
After verifying compatibility, align the strips, and affix the connectors securely. Connectors should snap into place or require minimal force to secure the contact points. Always double-check these connections to avoid any disruptions in the lighting system.
Series Connection
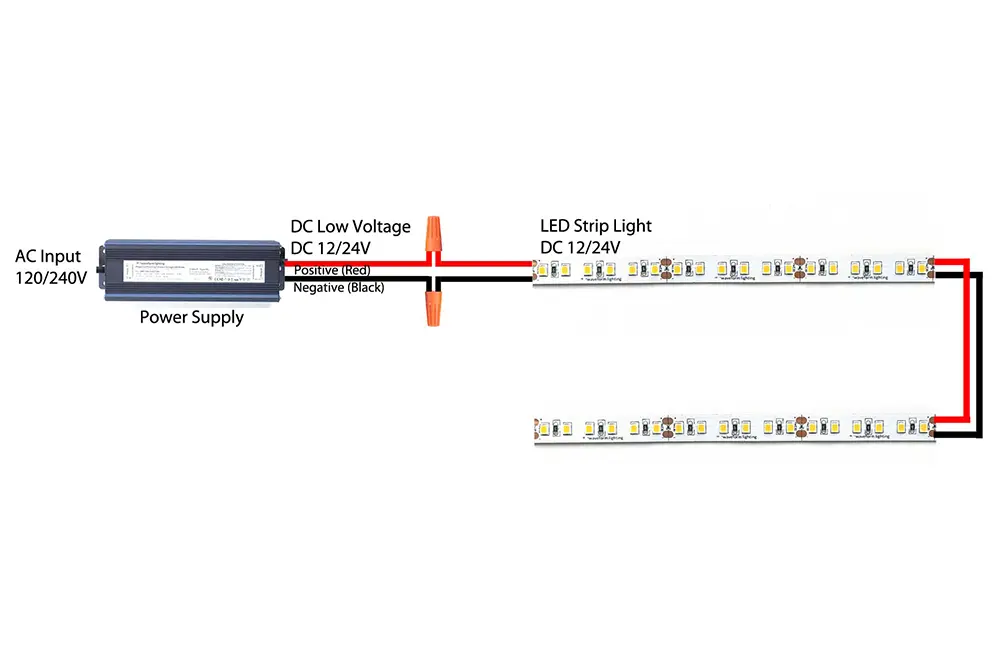
Connecting LED strip lights in series involves wiring them end-to-end, creating a continuous length of lighting.
- Ensure each strip’s voltage matches your project’s requirements.
- Strip insulation from the ends to expose copper contacts.
- Solder connections for optimal conductivity and security.
- Utilize heat shrink tubing to insulate and protect soldered points.
This method helps maintain a consistent voltage across all strips.
However, be mindful of potential voltage drop over long distances.
Successful series connections provide elegant, uninterrupted lighting solutions for expansive projects.
Parallel Connection

In contrast to series wiring, parallel connections are ideal when uniform voltage for each strip is a priority.
To initiate, you should connect each strip to a central power source rather than linking them sequentially, ensuring all strips receive the same voltage irrespective of length variances. This configuration allows the LED strips to function independently, mitigating the risks of voltage drops that often arise in series connections.
Additionally, this method is perfect for extending the reach of your lighting. By implementing parallel connections, you can add numerous strips with diverse lengths and maintain consistent brightness across your whole setup.
For larger installations requiring substantial power, parallel connections provide a scalable solution. Be certain to use adequate wire gauges, especially when connecting longer strips, to prevent overheating and ensure optimal current flow. This parallel architecture not only aids in brighter, more expansive illumination but also offers simplicity in troubleshooting and maintenance.
Troubleshooting Common Issues
Should your LED strip lights fail to illuminate, a myriad of factors might be influencing this behavior, prompting the question of what went wrong. Begin by verifying the power supply; unstable or insufficient voltage can impede effective lighting operations.
Inspect the wiring and connectors for loose or damaged connections, which often render the lights non-functional. Additionally, ensure each strip is compatible with the power output of your system. Beyond basic checks, consider the polarity of connections; inverted connections can thwart proper lighting. Finally, check that your dimmers or controllers are correctly configured to avoid undesired dimming or erratic performance.
Voltage Drops
Voltage drops with LED strip lights.
When connecting multiple LED strip lights, voltage drops are a common challenge. A voltage drop occurs due to the resistance encountered as electricity travels through the length of the strip. Consequently, sections of the strip farther from the power source may appear dimmer. Therefore, it is imperative to account for these drops when designing your lighting setup.
Consider voltage drop significant.
Strategically positioning power supplies and incorporating shorter strip segments can mitigate this. It’s also beneficial to use higher gauge wires that reduce resistance.
Use power boosters judiciously, ensuring balanced brightness.
By adopting these approaches, you ensure a consistent voltage supply across all sections, fostering an evenly illuminated environment. Attentive planning allows your setup to exude brilliance, empowering creativity, and amplifying the ambiance.
Inconsistent Lighting
Inconsistent lighting can significantly undermine the aesthetic impact of your LED strip lights. Fortunately, a proactive approach can avert these disturbances. Employ professional-grade connectors for secure, reliable joins, and verify compatibility among all components. Analyzing your power source is prudent to guarantee adequate and stable output across all connected strips.
Measure voltage precisely using a multimeter.
Position amplifiers or repeaters to rejuvenate signal strength, ensuring consistent performance. Incorporating advanced controls like DMX systems may offer further customization and uniform brightness.
Inferior components might compromise your setup’s overall reliability.
Investing in high-quality materials transforms your lighting project from ordinary to extraordinary, ensuring it remains bright and consistent throughout. Proper planning will reward you with a stunning display and long-lasting durability.
Adapt these methods for an enduring and radiant lighting experience. Meticulous attention to detail and wise investments will surely illuminate your path to success.
Conclusion
This journey illuminates how persistence and precision can pay off. Armed with newfound knowledge, you are now equipped to create stunning lighting setups that will elevate any space. The importance of quality materials and thorough planning cannot be overstated, as they lay the foundation for success. Harness your creativity and take the leap with confidence. This guide offers the tools you need to navigate this rewarding process seamlessly.
Embrace the challenge and transform your space into a beacon of innovation and elegance. With the right approach, connecting multiple LED strip lights can be a fulfilling and transformative experience. Let your vision shine brightly and inspire those around you. Every step you take not only brings you closer to a brilliant display but also solidifies your expertise.
For those seeking further support, consider reaching out to Unitop, a professional Chinese manufacturer of LED strip lights and LED neon strips. Our expertise can provide additional guidance and ensure your installation is flawless. Contact Unitop to elevate your lighting projects with confidence and precision.
