Mastering how to cut an LED aluminum profile for LED strip lights can transform a simple lighting project into a stunning masterpiece. Imagine walking into a room where the lighting seamlessly integrates with the design, casting a perfect glow that enhances every detail. This level of precision and elegance is achievable with the right techniques and tools.
Understanding how to cut LED aluminum profiles is crucial for anyone looking to achieve a professional finish. Surprisingly, a study revealed that over 60% of DIY lighting projects fail to meet aesthetic expectations due to improper cutting techniques. This statistic underscores the importance of mastering this skill to ensure a flawless installation.
Dive into this comprehensive guide to discover the step-by-step process of cutting LED aluminum profiles. With detailed instructions and expert tips, you’ll gain the confidence to tackle any project, ensuring each installation enhances the space’s overall ambiance. Continue reading to unlock the secrets to exceptional craftsmanship.
Gather Your Tools

Before embarking on the project of cutting LED aluminum profiles for LED strip lights, one must gather the necessary materials and tools to ensure precision and efficiency.
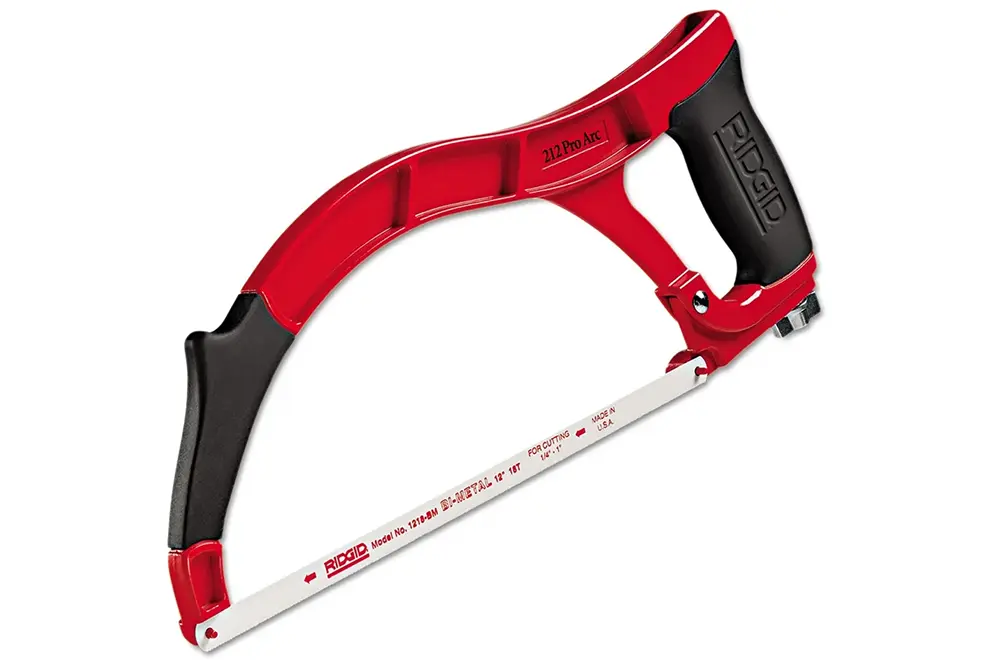
Begin by securing a quality hacksaw suitable for cutting metal.
Next, gather a measuring tape to measure the exact dimensions required for the cut.
A miter box is essential for ensuring precise angled cuts, providing a professional finish to the project.
Additionally, make sure to have a pencil or marker for marking the cut lines accurately on the aluminum led profiles.
Protective gear, such as safety glasses and gloves, is crucial for safeguarding oneself against any potential hazards during the cutting process.
Lastly, consider having a file on hand to smooth out any rough edges post-cut, ensuring a clean and polished outcome.
Measure and Mark the Aluminum Profile
Accurate measurements are paramount.
To begin, measure the length needed for the LED aluminum profile. This step ensures that the profile will fit seamlessly into the intended space, maximizing both functionality and aesthetics. Carefully extend the measuring tape along the length of the profile, taking note of the desired measurement.
Precision is essential.
A clear and visible mark with a pencil or marker will aid in achieving an accurate cut.
Take time to double-check measurements to avoid errors – it is far easier to make adjustments at this stage than later – and always measure from the correct end of the profile to ensure uniformity.
Confirm the correctness by comparing measurements with the installation guidelines or plan. A minor error can lead to significant issues when fitting the LED strip lights. Thus, investing a few extra minutes in the measurement stage pays off immensely in the final execution. With confident and precise measurements, one is a step closer to a flawless finish.
Secure the Profile for Cutting
Securing the LED aluminum profile is a fundamental task, which ensures a clean, precise cut for optimal results. Whether using a vise or clamps, a stable profile significantly enhances accuracy and safety.
Proper immobilization prevents shifting during the cutting process.
Begin by positioning the profile on a sturdy surface, aligned correctly with the intended cutting line to avoid unnecessary adjustments later.
Use clamps to fasten the led channel securely; ideally, opt for adjustable clamps that provide strong, adaptable support.
Additionally, protective padding on the clamps can prevent potential damage to the aluminum surface. This attention to detail safeguards both the appearance and structural integrity of the profile.
Finally, ensure that the profile’s entire length is supported to avoid vibrations which can lead to uneven cuts. Stability at this stage paves the way for precision and professionalism in the subsequent steps.
Choose the Right Cutting Tool
Selecting the appropriate cutting machine and mastering the technique is paramount.
The choice of cutting tool will significantly influence the quality of the cut. For LED aluminum profiles, using tools specifically designed for metals, such as a miter saw with a fine-toothed blade, ensures minimal burring and precise cuts. Otherwise, employing the wrong tool can result in rough edges or, worse, damaging the material.
Consider a saw with carbide-tipped blades.
These blades are exceptionally durable and provide cleaner cuts. Alternatively, for those without access to specialized saws, a hacksaw fitted with a fine-toothed blade can also be effective.
Always maintain the tools in good condition – dull or worn blades can increase the likelihood of mistakes. Regular maintenance includes cleaning and sharpening the blade, which guarantees optimum performance every time.
Choosing the right tool not only impacts the physical outcomes but also reflects the commitment to quality and precision. By investing time in selecting and maintaining the most suitable cutting tools, individuals set a standard of excellence that resonates through their entire project.
Make the Cut
Begin by positioning the aluminum profile securely in place, ensuring it is firmly clamped, to prevent any shifting during the cutting process.
Wear appropriate safety gear.
Next, carefully align the saw blade with the marked cutting line at the correct angle, verifying accuracy to achieve a precise cut.
Activate the hand saw and allow it to reach full operating speed before making contact with the aluminum profile.
Guide the blade steadily through the material, applying even pressure and allowing the saw to perform the work without forcing it.
Upon completion, inspect the cut for any burrs or rough edges, and use a fine-grit file or sandpaper to smooth them out, enhancing the profile’s finish.
Smooth the Edges
After successfully making the cut, it’s imperative to focus on smoothing the edges to ensure a polished finish.
This meticulous step enhances both the functionality and aesthetic appeal of the aluminum profiles.
Use a fine-grit file or sandpaper to gently smooth the rough edges, working consistently and patiently to achieve an even surface. Additionally, inspect the edges closely to ensure that no sharp or jagged areas remain.
A well-smoothed edge not only prevents injuries but also facilitates easier installation of the LED strip lights, providing a seamless integration into their intended application. By taking these extra precautions, one not only elevates the quality of their craftsmanship but also inspires confidence and satisfaction in the final outcome.
Test Fit the LED Strip
With the edges smoothly finished, it’s time to test fit the LED strip into the aluminum profile. Ensure that everything aligns perfectly before finalizing the installation.
Gently place the LED strip into the profile.
Check that it lays flat and adheres snugly within the channel.
Proper alignment is crucial for achieving an even light distribution, so make any necessary adjustments.
If the LED strip fits securely, proceed to connect the power source for a quick functionality test.
Here, they will verify that the LED strip operates smoothly and that the illumination is consistent throughout.
This test run is key to ensuring that there are no surprises later. Fine-tuning now saves time and effort, resulting in a professional, seamless finish upon completion.
Final Adjustments and Installations
Once the test fitting confirms proper alignment, it’s time to proceed with final adjustments for the LED aluminum profile for LED strip lights.
Begin by securing the LED strip within the profile using the appropriate mounting hardware. It’s essential to ensure stability and permanence in the installation.
Careful attention should be given to cable management, ensuring that wires remain concealed, maintaining the sleek appearance of the setup. Organized cabling avoids potential hazards.
Next, attach the diffuser cover securely to the aluminum profile, ensuring a uniform distribution of light. This step significantly enhances the aesthetic appeal and functionality.
Lastly, diligently inspect the entire setup, making any minor adjustments needed for perfection. This ensures the LED strip light installation is both flawless and enduring.
You can read our other article on How to Install LED Aluminum Profile.
Conclusion
Mastering the skill of cutting LED aluminum profiles for LED strip lights involves precision, careful planning, and the right tools. Accurate measurements and consistent techniques ensure a professional finish. Following best practices and using quality tools lead to excellent results, enhancing the overall ambiance of any space. Understanding and applying these techniques empower individuals to complete projects efficiently and effectively, showcasing exceptional craftsmanship.


