Have you ever stumbled in the dark, wishing for a subtle light to guide your way? Learning how to install toe kick lighting can solve this common problem, providing both safety and style to your home. This guide will help you navigate the installation process with confidence.
Addressing the issue of inadequate lighting is crucial for both safety and aesthetics. Proper toe kick lighting can prevent accidents and enhance the overall ambiance of your space, making it more inviting and functional.
There are various solutions available for toe kick lighting, from LED strips to neon lights, each offering unique benefits, including super bright LEDs that can significantly enhance visibility. In this guide, we’ll explore these options and provide detailed instructions on how to install them effectively.
Curious about how to achieve a professional finish? Stay with us as we delve into the tools, techniques, and tips that will make your toe kick lighting project a success. Your journey to a brighter, more beautiful home starts here.
Understanding Toe Kick Lighting

Toe kick lighting is an innovative feature.
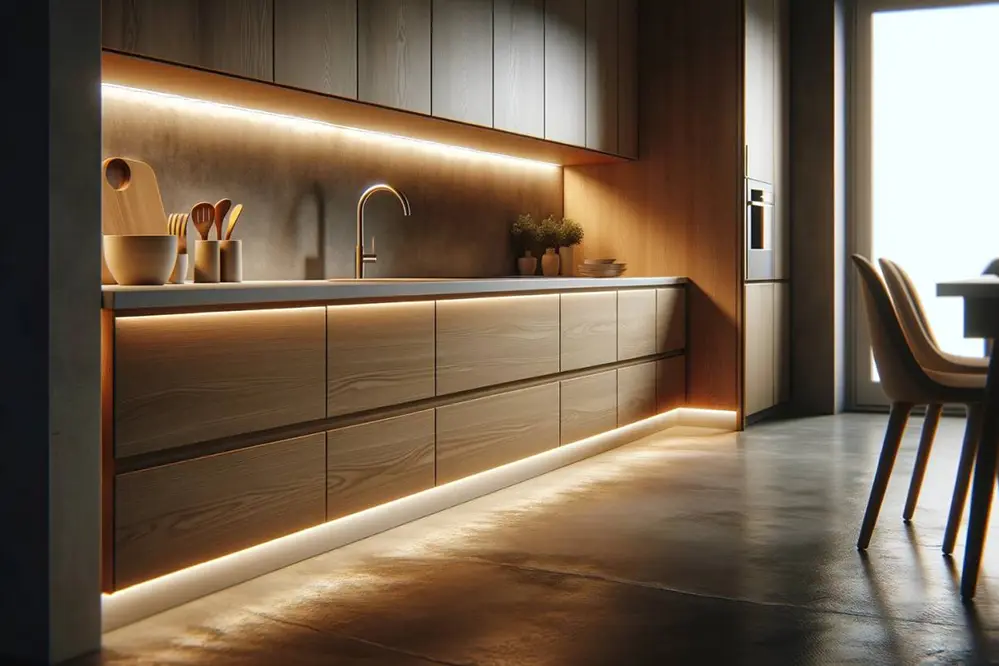
In the realm of interior design, toe kick lighting brings both function and form. Installed at the base of cabinets or furniture pieces, this type of lighting creates an ethereal glow that highlights and enhances architectural elements while providing subtle practicality. Additionally, it serves as an excellent night light without overwhelming the room.
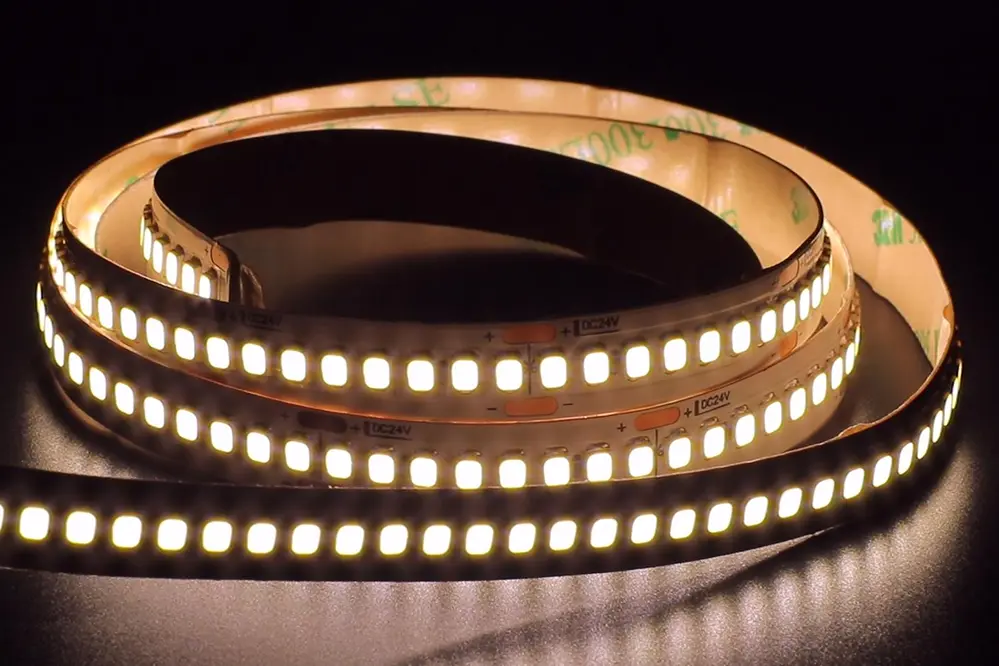
This lighting can be LED strips.
By virtue of their design, LED strips are efficient, versatile, and easy to install. These sleek, energy-saving lights provide consistent illumination and can be cut to size according to your needs, making them ideal for toe kick installations.
Toe kick lighting has gained significant popularity, and for 2023 this makes it even more appealing. Homeowners are increasingly seeking innovative ways to blend functionality with aesthetic appeal, and toe kick lighting is a perfect fit to modernize and enrich any living space.
Tools and Materials Needed

To embark on the exciting journey of how to install toe kick lighting, certain essentials are required to ensure precision and efficacy.
First and foremost, the basic necessities include a tape measure, utility knife, and a straightedge ruler. These fundamental tools are crucial for accurate measurements and clean, precise cuts, ensuring your LED strips fit perfectly to the designated areas underneath your cabinets or furniture.
Additionally, sourcing a high-quality LED strip light kit is imperative. Look for options that include connectors, mounting clips, and an adequate power supply. A soldering kit might also come in handy for establishing secure connections, particularly if customization or length adjustments are necessary.
Lastly, disposal gloves, wire nuts, and adhesive spray should be on your list. The gloves protect your hands during setup, while wire nuts ensure safe electrical connections. The adhesive spray helps in securing the LED strips steadfastly, avoiding any future detachments, and guaranteeing a long-lasting, brilliant installation.
How to Install Toe Kick Lighting
Installing toe kick lighting involves several straightforward steps that can transform any room’s ambiance, adding modern elegance and functional brightness.
To begin, start by measuring and cutting the LED strips to match the lengths of your cabinet bases or furniture toe kicks. Ensure the cut ends are appropriately prepared for connection, using connectors included in your kit, or soldering wires if necessary. Lay out your layout precisely before adhering to avoid any misalignments.
Afterwards, secure the LED strips in place using the adhesive backing or mounting clips provided. Mount the power supply and connect the strips, ensuring your connections are snug and secure.
Measuring and Planning
Measuring and planning are the linchpins to a seamless and dazzling toe kick lighting installation.
Precision in your measurements is key to avoid any dead spots or improper lighting distribution.
Begin by carefully measuring the lengths of your cabinet bases or the areas where you plan to install the lighting. This ensures you cut the LED strips accurately, matching the exact dimensions needed for a flawless fit.
Once measurements are taken, develop a detailed plan that includes layout and power supply locations. Proper planning is critical to foresee potential hurdles and streamline the installation, transforming any room with radiant and efficient illumination.
Preparing the Area
Before diving into the installation process, preparing the area is crucial to ensure a smooth setup.
Start by cleaning the surfaces where the toe kick lighting will be installed. Dust, grease, or debris can interfere with the adhesive’s ability to stick, compromising the longevity and effectiveness of your lighting installation.
After thoroughly cleaning the area, ensure it is completely dry. Moisture can also hinder the adhesive backing or mounting clips from securing properly, which might result in the lighting detaching over time.
Next, clear the workspace of any obstructions or items that could impede your installation efforts, including any unnecessary hardware that might clutter your working area. Moving appliances or personal items out of the way can prevent mishaps and will give you a seamless working area to install the lighting more efficiently.
Proper preparation sets the stage for a flawless installation, so take the time to prepare meticulously before starting.
Installing the Lights
With the area meticulously prepared, we can now move forward confidently to the installation phase.
- Measure the space where you plan to install the toe kick lighting to ensure accurate placement.
- Cut the light strips to the required lengths using appropriate tools to fit your measured sections seamlessly.
- Attach the connectors to the cut ends if your lighting system requires it, ensuring a secure and conductive connection.
- Apply the adhesive backing of the light strips onto the surface, pressing firmly to ensure they stick properly.
- Connect the power supply to the light strips and plug it into an accessible outlet.
- Test the lights to confirm everything is working before finalizing any concealment or decorative covers.
Ensuring a precise fit for your lighting strips is paramount for achieving a professional appearance and maintaining the ideal color temperature.
Finally, double-check all connections and alignment to guarantee a flawless and enduring result.
Connecting the Power
Now that the light strips are securely in place, it’s time to connect them to the power source.
- Locate a nearby outlet: Ensure it’s accessible and can handle the additional load.
- Use a power adapter: Connect the adapter to your light strip, following the manufacturer’s instructions implicitly.
- Secure the connection: Double-check that the connection is firm to avoid any potential issues.
- Plug in the adapter: Connect it to the chosen outlet and ensure the connection is stable.
- Switch on the power: Confirm that the lights illuminate as expected, indicating a successful connection.
By meticulously following these steps, you can ensure a reliable and efficient power connection.
This completes the installation, setting the stage for enhanced ambiance and practicality.
With everything connected, your toe kick lighting is ready to transform your space beautifully and functionally.
Troubleshooting Common Issues
Even the best-planned installations sometimes face glitches. Recognizing and addressing these promptly will keep your lighting in top shape.
Firstly, if the lights do not illuminate, ensure the power adapter is properly connected and the outlet is functioning. Check the light strip for any signs of damage, and double-check all connections. Re-secure all plugs and connectors to ensure a stable connection, and confirm that the power switch is on.
Occasionally, you might notice flickering or inconsistent lighting. In such cases, it helps to examine the power adapter for any potential faults or overheating. Ensure your transformer matches the strip’s requirements and inspect for loose or corroded connections that could disrupt power flow.
Moreover, if certain sections of the light strip are not functioning, it could indicate a connection issue or a defect in the strip itself. Carefully examine the non-functioning sections for any visible damage or disconnections. Replacing the faulty section, or re-soldering if necessary, can often restore full functionality. For persistent problems, consulting the manufacturer’s guide or seeking professional assistance ensures that you maintain the brilliance and efficiency of your toe kick lighting masterpiece.
Safety Tips and Best Practices
Embarking on a project to install toe kick lighting involves thoughtful preparation, adherence to safety, and a meticulous approach, ensuring an illuminating transformation for your space.
First and foremost, take care to switch off the power supply before commencing any electrical work.
Equally pivotal is wearing appropriate safety gear, such as gloves and protective eyewear.
When working with sharp tools, always handle with precision and ensure children and pets are kept away from the workspace.
Secure the installation area to prevent tripping hazards and ensure that all wiring is neatly organized and out of reach.
Testing the lighting system in a controlled environment before finalizing installation ensures that you identify any potential issues, safeguarding your investment and effort.
Lastly, while the excitement of seeing your space’s new look is exhilarating, patience throughout the process ensures a flawless and secure installation, ready to dazzle everyone who steps into your home.
Enhancing Ambience with Toe Kick Lighting

Toe kick lighting is a subtle yet transformative addition, breathing life and warmth into your home’s aesthetic. It illuminates spaces like the kitchen or bathroom in an elegant manner.
The strategic placement highlights lower cabinetry, providing a sense of depth and dimension.
Reflecting a modern touch, toe kick lighting creates an inviting atmosphere that enhances your home’s charm.
By emphasizing these recessed areas, it produces a soft glow that is both functional and visually appealing.
Furthermore, this type of lighting can act as a safety feature, offering visibility during the night, avoiding accidents.
Embrace the harmonious blend of practicality and sophistication that toe kick lighting offers, transforming your living spaces into a serene sanctuary.
Conclusion
By mastering the steps on how to install toe kick lighting, you can confidently transform your home’s ambiance, enhancing both functionality and aesthetics. Patience and precision during the installation process ensure a flawless and secure finish. The warm, inviting atmosphere created by your new toe kick lighting will not only beautify your space but also provide practical benefits, making your home more enjoyable and efficient.
Embrace the opportunity to innovate and let each project light up your home with creativity and care. The skills you’ve acquired will empower you to tackle future lighting projects with ease, continually improving your living environment. Keep pushing the boundaries of home improvement, and delight in the satisfaction of a job well done.
If you’re looking for top-notch LED strip lights and LED neon strips, you should definitely check out Unitop. They’re a professional Chinese manufacturer that makes the best stuff. Unitop has a ton of lighting options that can totally take your home projects to the next level. Give them a call today and let them help you bring your lighting dreams to life!


