

Many homeowners struggle with the challenge of how to install LED strip lights around corners, often finding it difficult to achieve a seamless and professional look. This common problem can turn a simple lighting project into a frustrating experience.
Addressing this issue is crucial because well-installed LED strip lights can dramatically enhance the ambiance and functionality of any space. Poorly executed installations, on the other hand, can detract from the overall aesthetic and even lead to technical issues.
Fortunately, there are several solutions and techniques available to help you navigate these challenges. From using flexible connectors to planning your layout meticulously, these strategies can make a significant difference.
Stay tuned as we explore these valuable insights and tips in detail, ensuring your LED strip light installation is both beautiful and efficient.
Gather Your Materials
The importance of having the right materials on hand cannot be overstated. Every item plays a crucial role in the seamless installation of LED strip lights around corners.
Begin by gathering the LED strip lights themselves. Ensure they are the correct length and brightness.
Next, gather corner connectors. These special connectors allow for a smooth transition around corners.
Additionally, you will need a pair of sharp scissors. These will help you cut the LED strip lights to your desired lengths.
Also, keep a power adapter and any necessary wiring at the ready. Connecting and powering your lights efficiently is essential for a lasting installation.
Finally, a measuring tape and adhesive backing are indispensable. These will ensure your LED strip lights are properly spaced and securely affixed.
With these materials in hand, you’re well on your way to achieving a stunning lighting setup. Confidence in your tools significantly enhances the outcome of any project.
Measure the Installation Area
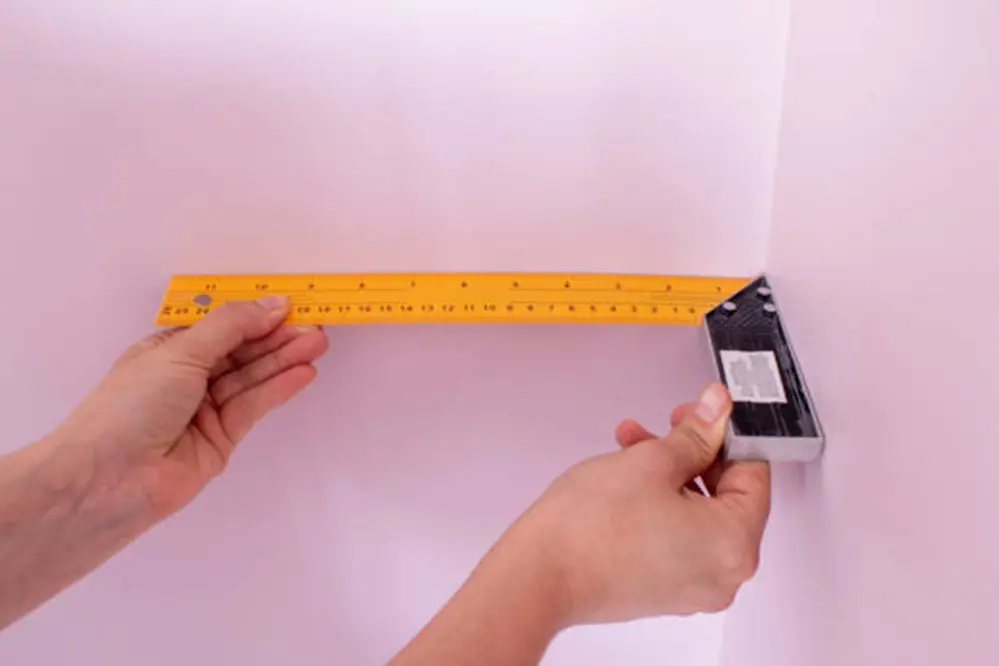
Accurate measurements are paramount when installing LED strip lights around corners.
Begin by measuring the entire area where the LEDs will be installed, including all corners and bends.
Use a reliable measuring tape to capture the length of each segment, ensuring you account for all angles and transitions.
Detail the measurements meticulously on paper. Mark key points where the corners intersect and where cuts will be necessary.
These initial steps ensure a smooth, professional installation process, eliminating guesswork and potential errors.
Cut the LED Strip Lights
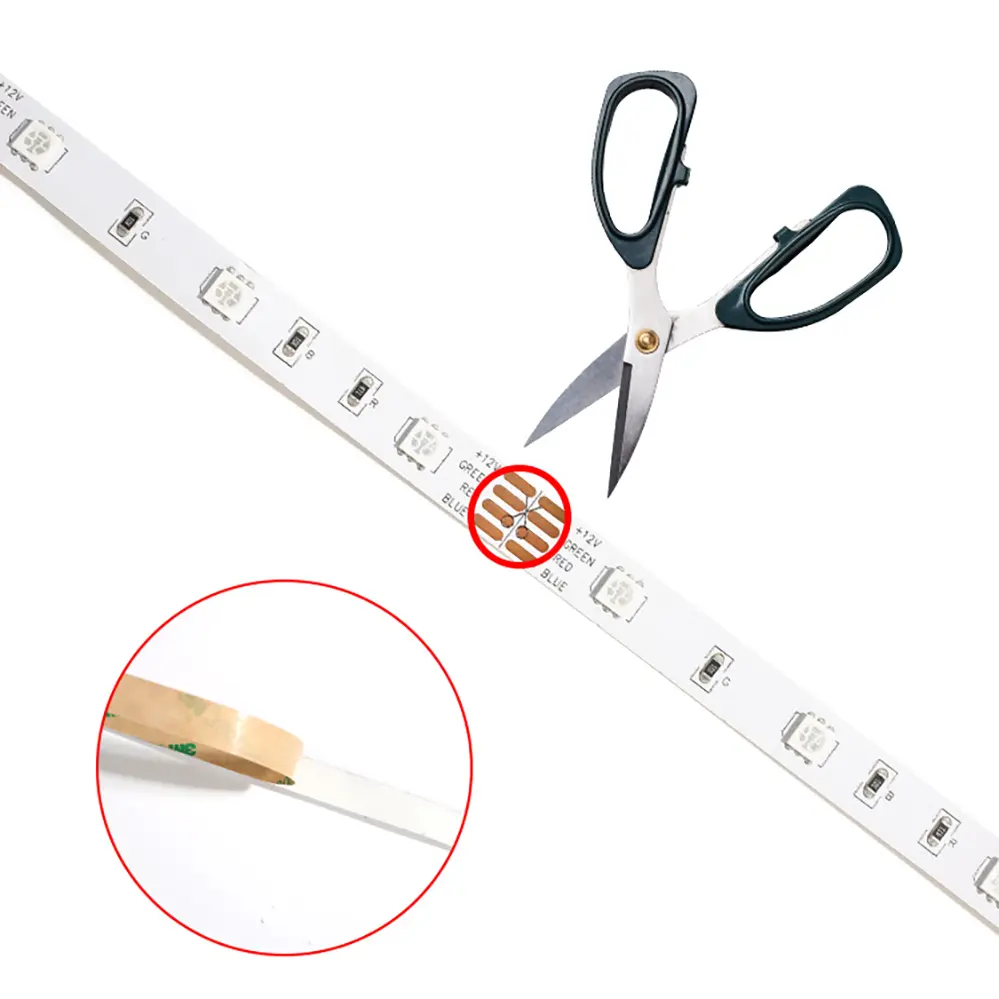
When approaching the task of cutting LED strip lights, precision and preparation are your allies.
To begin, it is crucial to locate the designated cutting points on the LED strip, typically labeled for easy identification. These markers indicate where you can safely cut without damaging the circuitry. Preparing your cutting tools, such as sharp scissors or a craft knife, will ensure clean cuts, vital for maintaining the integrity of the strip. Aim for accuracy to avoid connectivity issues in your lighting setup.
Moreover, cutting the LED strip lights at the marked points helps optimize their functionality. With each segment precisely trimmed, the electrical currents can flow seamlessly, ensuring that each section illuminates as intended. Remember, precise cuts are not just about appearance but also about preserving the operational effectiveness of the lights.
Finally, place the strip on a flat, stable surface before cutting. If the cutting points coincide with corners or bends, extra care is needed to maintain the integrity of the strip. A clear focus and a steady hand are your best assets to execute a flawless cut. This diligent approach fortifies the installation’s quality, delivering both aesthetic and functional benefits.
Test the LED Strip Lights
Before installing the lights, testing them ensures all sections are in optimal condition and function properly.
By verifying, one can detect any issues in a controlled setting, sparing the hassle of disassembling your installation later. Employ a suitable power supply, connecting the LED strips accordingly, and watch as they should light up uniformly, indicating a successful preliminary check.
The importance of this step cannot be overstated. It ensures all components are functioning correctly and reveals any defects immediately, allowing for quick replacements without delay.
In addition, if your setup includes advanced features like dimming or color-changing options, test them to confirm these functionalities work seamlessly. This proactive measure not only provides peace of mind but also guarantees that your installation will achieve the desired lighting effects and operational excellence.
Clean the Surface
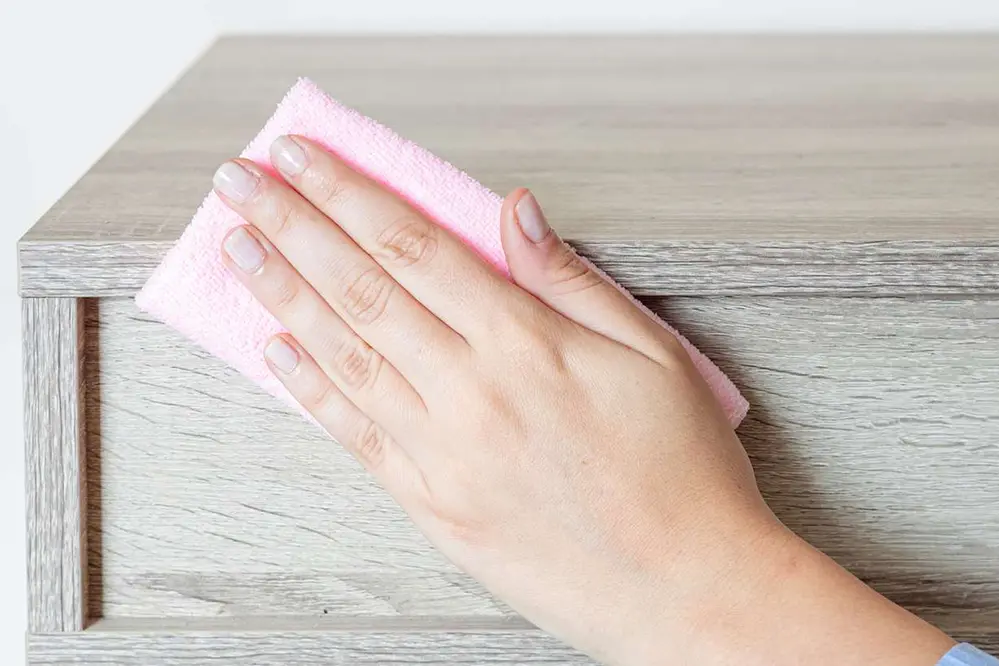
Ensuring the surface is impeccably clean before installation is paramount to the strip lights’ longevity and adhesion.
First, gather your essential cleaning supplies, including rubbing alcohol, a clean cloth, and mild soap.
Begin by gently wiping down the surface with the cloth and some soapy water to eliminate any dirt or debris. This primary step eradicates visible contaminants, fostering better adhesion.
After the initial cleaning, use rubbing alcohol to remove any residual soap or hidden oils that might compromise the adhesive. Allow the surface to dry completely, ensuring it is pristine before proceeding with the installation. This meticulous preparation guarantees a flawless and steadfast connection, optimizing the lifespan of your LED strip lights.
Prepare for Corner Installation
Before diving into installing LED strip lights around corners, one must thoroughly prepare for the task.
It’s essential to gather all necessary tools and materials.
These might include LED strip connectors, scissors, adhesive tapes, and a measuring tape. Preparation is key to ensuring a smooth installation process.
Next, identify the corners where the LED strip lights will be installed, marking them with a pencil or tape for precision. By doing so, they can accurately measure the lengths needed, ensuring a seamless and professional finish. This preparatory step is critical for achieving a polished and cohesive result.
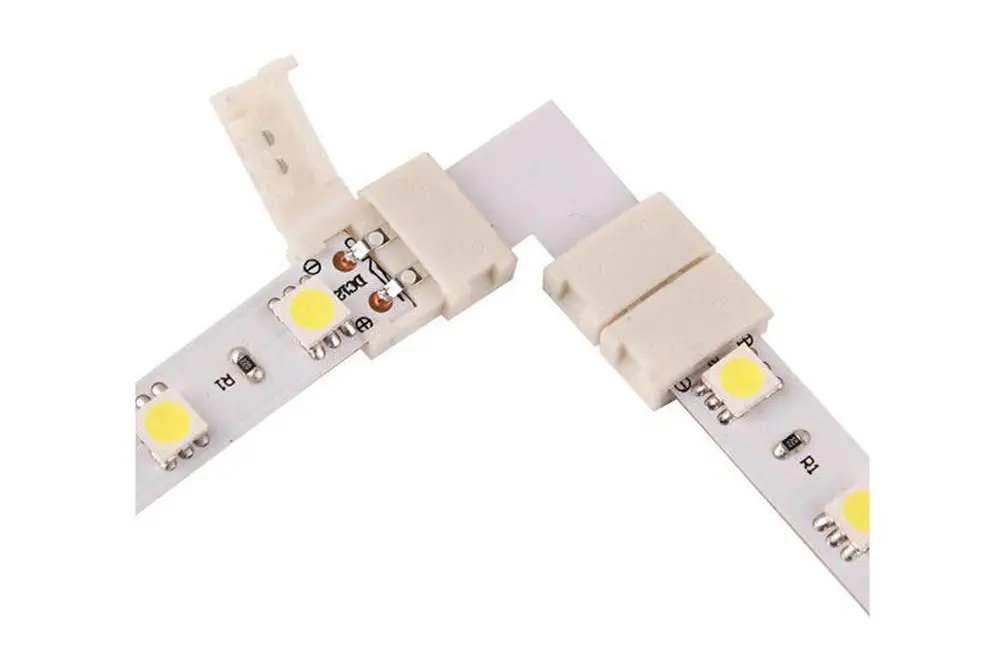
Use Corner Connectors
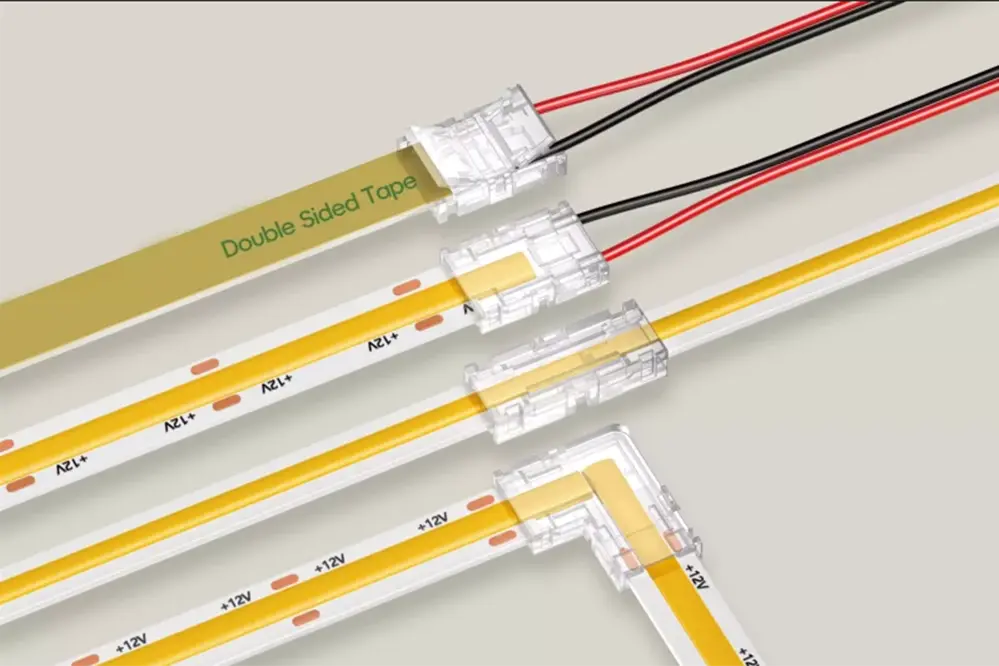
Corner connectors provide the flexibility required to navigate around corners without compromising the light’s continuity and aesthetics.
By utilizing corner connectors, one can achieve a professional-looking finish that maintains the seamless flow of the LED strip lights. These connectors are specifically designed to bridge gaps at right angles, making them the perfect solution for this task. Whether one is working with a 90-degree corner or something more complex, corner connectors ensure the power and illumination flow smoothly without interruption.
Interestingly, these connectors are relatively easy to use and install. They typically consist of two parts: the connector itself and a clip that attaches to the LED strip. The clip should be aligned carefully, ensuring the connectors on each end of the LED strip meet accurately to avoid any connection issues.
In conclusion, by leveraging the versatility of corner connectors, one can enhance the aesthetic and functional value of LED strip lighting. This small addition not only simplifies the installation process but also allows for a continuous and polished look that will impress. Engaging with corner connectors is a strategic approach to executing corner installations with precision and finesse.
Create DIY Soldered Corners
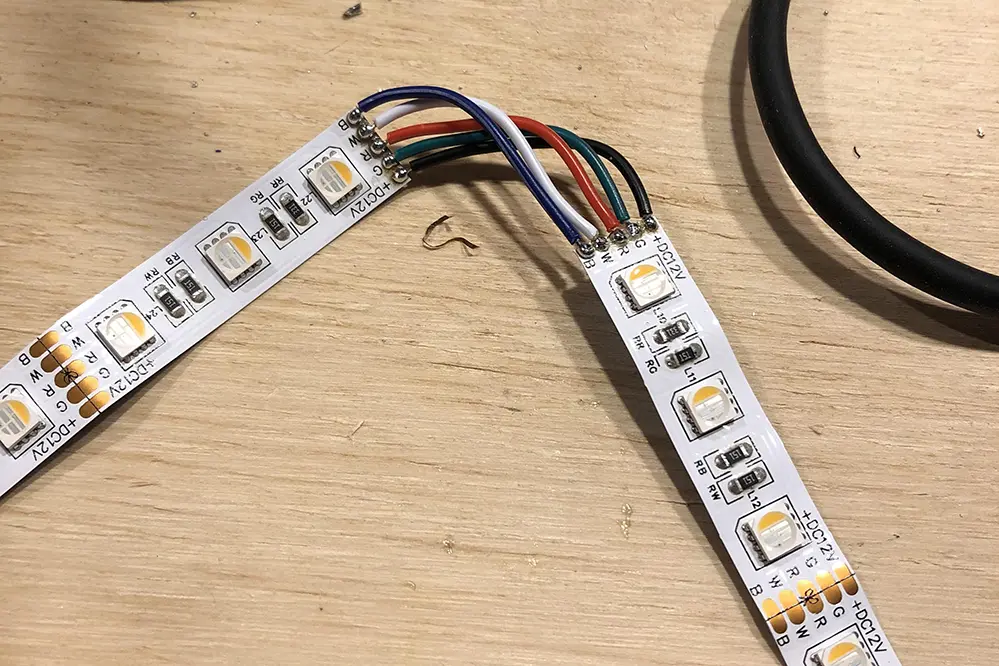
For those seeking a more tailored solution, DIY soldered corners offer an exciting alternative. By soldering, they can create custom angles and connections that suit their specific lighting setup.
Before beginning, one should gather all necessary materials and safety equipment. Precision is key when working with soldering tools and LED strips.
To start, they must cut the LED strip at the designated points, ensuring each section aligns perfectly. Then, the copper pads on the strips are carefully tinned with a fine layer of solder, establishing a reliable connection point.
With this preparation, they can proceed to attach flexible wires between the tinned pads, carefully soldering them in place to form the corner. For the best results, it is crucial to insulate each connection well, preventing any short circuits and ensuring a professional look. This method offers both flexibility and a high degree of customization for one’s LED strip lighting project.
Plan the Path
Before embarking on the installation process, proper planning is essential for success. They should visualize a clear pathway for the LED strips, considering all corners and junctions.
Mapping out the desired path ensures efficiency and precision. It minimizes errors and saves time during the actual installation.
They should identify and measure each corner that will require attention. This step is crucial for determining how many connectors or solder joints will be necessary.
Ensuring the pathway accommodates the room’s shape and structure is vital. This consideration helps in maintaining a clean, cohesive look.
Furthermore, advanced planning allows for better management of power sources and distribution. They will need to calculate the length and power requirements to guarantee proper functioning and safety.
Ultimately, the success of their project hinges on meticulous planning. It establishes a strong foundation, setting the stage for a smooth and professional installation process.
Peel Off Adhesive Backing
To begin, gently peel off the adhesive backing from the LED strip lights.
Exerting minimal force helps prevent any unintended damage.
Slowly work along the strip, ensuring the adhesive remains smooth. This will provide a firm attachment to the surface.
The careful removal of the adhesive revealing the sticky layer is a critical step. It ensures that the LEDs adhere perfectly to the designated surface, promoting a secure and stable installation. Additionally, a consistent, steady hand while peeling this backing is vital to maintain the integrity of the adhesive layer and guarantee a professional finish.
Apply the LED Strip Lights
Begin by positioning the LED strip lights on the surface.
Ensure the strip aligns with the planned path, including corners. Any misalignment at this stage could result in a less appealing installation. Therefore, careful attention to the planned trajectory is paramount for achieving both functional and aesthetic success.
Align the corners with precision, ensuring each ribbon bend is neatly shaped and secured, particularly focusing on any corner fold to maintain the integrity of the layout.
Carefully pressing down the strip along the entire length – including around the corners – is essential. Adequate pressure needs to be applied to guarantee maximum adhesion and prevent future detachment.
After application, assess the uniformity and adhesion quality meticulously. Making minor adjustments now can save extensive revisions later, preserving the integrity of their brilliant 2023 lighting vision. This diligence ensures the LED strip lights deliver both captivating illumination and sustained reliability throughout their usage duration.
Secure with Additional Fixings
Sometimes adhesive alone isn’t sufficient.
While LED strip lights come with a built-in adhesive backing, relying solely on this for long-term adherence around corners can be unreliable, particularly on textured or porous surfaces. Therefore, it is wise to use extra fixings, such as plastic clips or adhesive brackets, to provide additional support and ensure the strip remains securely in place.
Using fixings guarantees stability.
These additional fixings bolster the strip’s attachment, especially in areas prone to movement or higher temperatures.
Another tip is to place the fixings at regular intervals – say every foot – to maintain even pressure and prevent any section from sagging. This not only secures the strip but also preserves its original alignment, ensuring consistent illumination.
By complementing the adhesive with mechanical fixings, installers achieve a professional and resilient setup. Such thoughtful attention to detail not only enhances the visual appeal of the installation but also extends the longevity of the LED strip lights, solidifying their place as a signature lighting solution in any 2023 design project.
Connect to Power Source
Once the LED strip lights are securely in place, the next crucial step is connecting them to a reliable power source. This step ensures the LEDs will operate efficiently.
Start by locating the power supply unit that matches your LED strips.
Generally, these units come with user-friendly connectors designed for seamless integration with LED strips.
Carefully connect the power supply to the strip, ensuring that the polarity matches. Misalignment could damage the LEDs.
For a more secure connection, consider using a solder joint. This method offers durability and prevents accidental disconnection.
Next, plug the power supply into an electrical outlet. Verify the lights glow as expected, bringing your space to life with radiant illumination.
Test the Installation
Now that the LED strip lights are connected, it’s time to test the installation. Why is this step so vital?
In 2023, precision installations, particularly in lighting design, demand thorough testing to guarantee optimal performance and safety standards. Testing allows for the immediate identification of potential issues, ensuring a flawless finish and peace of mind.
Firstly, turn on the power and inspect the entire length of the LED strip lights. Ensure every segment is illuminated and there are no flickers or dark spots, signifying intermittent connections.
Pay special attention to the corners, where connections might be more prone to failure. Use this opportunity to adjust any misalignments or secure connections that appear loose, maintaining a consistent luminous effect throughout.
A successful test will reveal vibrant, uniform lighting, confirming the LED strip lights are installed correctly and set to transform any space they adorn.
Troubleshoot Common Problems
Encountering issues during installation can be frustrating, but it also presents an opportunity to learn and improve.
Firstly, if the lights fail to illuminate, ensure that the power source is functioning correctly, and all connections are secure. Loose connectors are a common culprit that can lead to intermittent lighting or complete failure. Verify that all connectors and adapters are firmly attached and properly aligned to ensure a smooth flow of electricity.
Sometimes, users may notice dim segments along the LED strips. This issue often stems from voltage drop, especially if the strip is too long. To rectify this, consider using an additional power supply or a power booster to maintain consistent brightness.
Finally, if the LED strip lights are not sticking properly to the surface, reassess the cleanliness of the area. Utilize rubbing alcohol to clean the surface before reattaching the strip with mounting brackets or additional adhesive if necessary. Addressing these common problems with confidence ensures a successful and lasting installation, transforming the space with consistent and vibrant illumination.
Enhance with Additional Features
Incorporate seamless corner connectors for a polished look around each bend. These connectors offer flexibility without compromising on the continuity of the light strip, ensuring a professional and visually appealing finish.
Integrate a smart controller to manage lighting effects. This device enables users to adjust brightness, color, and patterns effortlessly, enhancing the functionality and ambiance of the space.
Explore different mounting options such as aluminum channels. These not only provide physical protection for the LED strips but also enhance heat dissipation, extending the lifespan of the lights while providing a sleek, finished appearance.
Consider adding motion sensors to bring an interactive element to the lighting setup. Motion sensors can automatically turn the lights on and off as someone enters or exits a room, creating an engaging user experience while boosting energy efficiency. Through thoughtful enhancements, every corner can radiate with optimized brilliance and smart functionality.
Maintenance Tips
Regularly clean the LED strip lights to avoid dust buildup that may affect brightness and performance. Use a soft cloth dampened with a suitable cleaner, ensuring no water contact with the circuitry.
Check all connections periodically to ensure they remain secure, preventing potential malfunctions. This simple step can significantly extend the life span of the installation.
Inspect power supplies and controllers for any signs of wear or damage. Proactive maintenance of these critical components ensures consistent performance and prevents unexpected interruptions, safeguarding the integrity of the lighting system.
Test the functionality of any added enhancements, such as motion sensors or smart controllers, to confirm they are operating correctly. Should any issues arise, refer to the manufacturer’s guidelines, ensuring you perform any necessary calibrations or updates to maintain peak performance. By prioritizing regular upkeep, the LED strip lights will continue to illuminate with captivating brilliance.
Conclusion
Mastering the installation of LED strip lights around corners unlocks creative lighting possibilities, transforming spaces with personalized designs. With careful planning, flexibility, and the use of connector solutions, one can achieve seamless turns. Patience and precision ensure both aesthetic and functional perfection, enriching the ambiance and showcasing technical skill and creativity.
For those seeking professional assistance or high-quality products, consider reaching out to Unitop, a renowned Chinese manufacturer of LED strip lights and LED neon strips. With their expertise and top-tier products, Unitop can help bring any lighting vision to life, ensuring both quality and innovation in every project. By partnering with a trusted manufacturer, one can achieve stunning results that elevate any space with ease and confidence.


