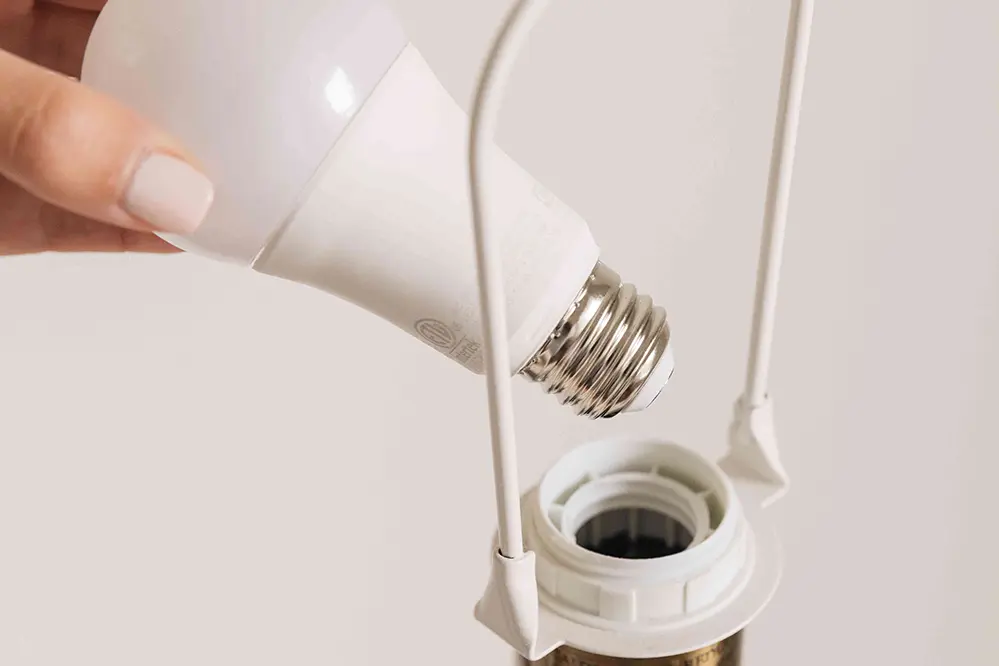
Have you ever wondered how to safely replace damaged or burnt-out LEDs without risking further complications? This common dilemma can leave many feeling frustrated and unsure of where to begin. LEDs, while energy-efficient and long-lasting, are not immune to wear and tear, and knowing how to address these issues is crucial for maintaining optimal lighting.
Many people mistakenly believe that replacing LEDs is as simple as swapping out a traditional bulb. However, the process can be more complex, involving specific tools and techniques to ensure safety and functionality. Misconceptions about LED longevity and replacement can lead to costly mistakes and even safety hazards if not handled correctly.
Understanding the significance of proper LED replacement extends beyond mere convenience. It impacts energy efficiency, cost savings, and the overall ambiance of your environment. By mastering this skill, you can enhance the longevity of your lighting systems and contribute to a more sustainable future.
In this article, we will cover essential topics such as identifying signs of LED damage, selecting the right replacements, and executing the replacement process safely. We will also discuss common pitfalls to avoid and tips for maintaining your LEDs in top condition.
Embark on this enlightening journey with us to discover the best practices for replacing damaged or burnt-out LEDs safely. Your path to brighter, more efficient lighting begins here.
Understanding LED Components
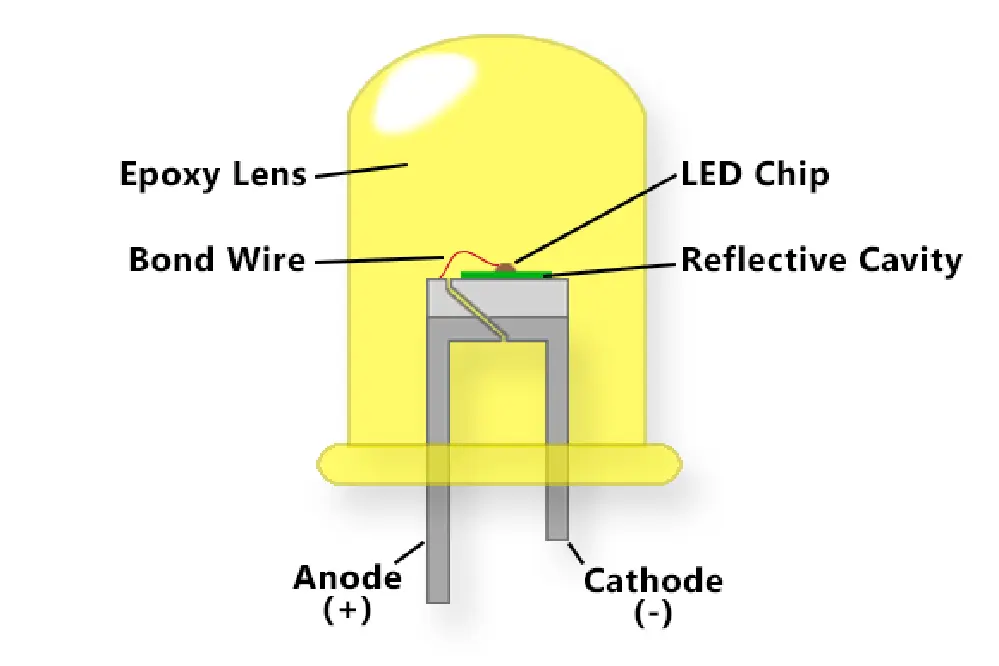
LEDs, short for Light Emitting Diodes, are pivotal components that revolutionize how we perceive illumination, with many homes and businesses embracing their use.
Understanding the parts ensures safe and efficient replacements.
Each LED consists of semiconductors that emit light when electricity passes through them. Encased in a housing of plastic, they are designed for efficiency, longevity, and brightness, making them an exceptional choice for numerous applications.
When replacing damaged or burnt-out LEDs, it’s vital to grasp the interplay between the diode, heat sink, and circuitry. Knowing these fundamentals allows you to tackle replacements with ease and precision, transforming setbacks into empowering moments of innovation and restoration. By learning about the “anatomy” of LEDs, you are well on your way to mastering their intricacies.
Identifying Damaged or Burnt-Out LEDs
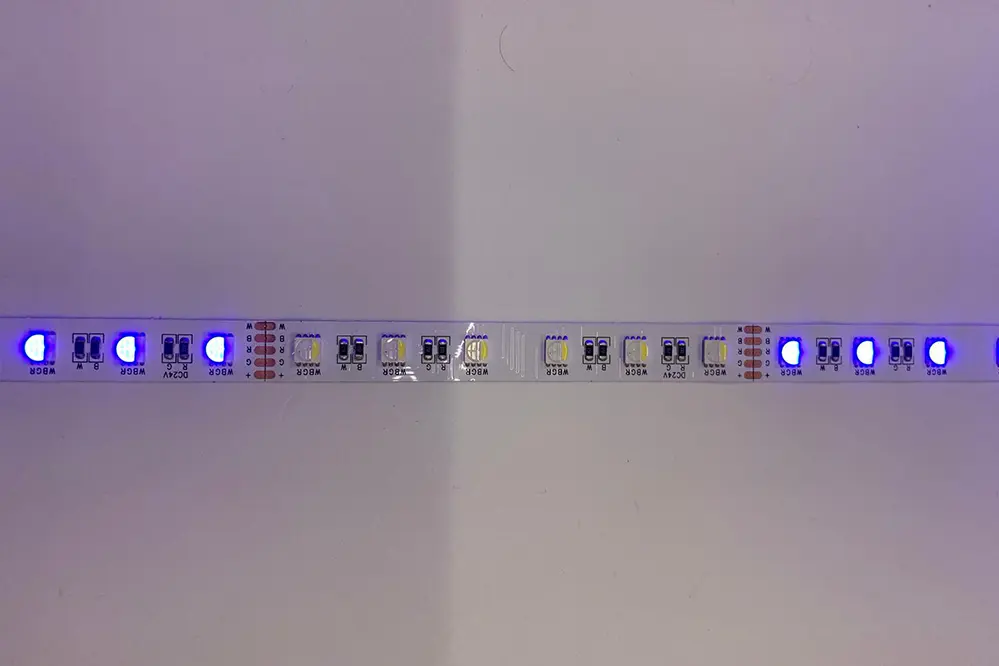
Spotting a malfunction within your LED setup demands a keen eye and a curious mindset eager for solutions.
A damaged or burnt-out LED often manifests as a telltale dark area on your lighting strip or fixture. Similar indicators of failure are flickering, inconsistent brightness, or complete unresponsiveness—all signs begging for immediate attention to restore the allure of your space.
Begin by observing their behavior in different conditions, such as varying power supply levels. Anomalies in performance under these circumstances often reveal the source of the imperfection: be it the LED itself, the power source, or the driver connected in the circuitry.
Once you’ve pinpointed these symptoms, it’s essential to delve into a thorough examination of the surrounding components. Ensure that tarnished connections, damaged wires, or environmental destruction haven’t exacerbated the issue. Doing so maximizes your readiness for the replacement process, while boosting your knowledge and confidence.
In identifying these indicators, you lay the groundwork for a seamless transition to new LEDs. Rejuvenating your lighting setup couldn’t feel more rewarding!
Gathering Necessary Tools
A thoughtful preparation step.
The first stride in the journey toward safely replacing damaged or burnt-out LEDs is assembling the right tools. This proactive measure not only enhances the efficiency of the task but also ensures that your workspace remains organized and focused. Notably, possessing a dedicated toolkit diminishes distractions and saves precious time during the process.
A reliable multimeter should be part of this toolkit.
Additionally, insulated screwdrivers and a soldering iron are essential for intricate operations requiring the utmost precision and care, especially when retrofitting new components into existing systems. These tools empower you to handle the delicate electronic components with increased control, ensuring that each step undertaken is both safe and precise.
Furthermore, securing protective gear like safety goggles and gloves is fundamental; these will shield you from unforeseen accidents while working with electrical components. With these tools and your resolve, you stand ready to transform potential setbacks into successful resolutions, illuminating your path forward with renewed vigor.
Safety Precautions for LED Replacement
Replacing damaged or burnt-out LEDs requires vigilance and adherence to safety protocols to protect yourself and the integrity of the electronics.
Begin by disconnecting power sources to avoid any risk of electric shock, a fundamental precaution that can’t be overstated. Verify that the power is completely off by using a reliable multimeter.
Equipping yourself with safety gear, such as goggles and insulated gloves, creates an additional layer of protection against accidental electrical contact or exposure to sharp components. Make sure your workspace is safe by ensuring it’s clean, well-lit, and free from obstructions.
Handle LEDs and related components with care to prevent any damage from static discharge. Using an anti-static wrist strap is a wise choice to dissipate static electricity safely.
With these precautions in place, you can approach the task of replacing damaged or burnt-out LEDs with confidence and clarity.
Disconnecting Power Supply
Ensuring a complete disconnect from the power supply is the first crucial step. This action protects both you and the LED components from potential hazards.
In 2023, according to industry experts, approximately 30% of electrical accidents occur due to improper power disconnection. Taking the time to double-check that all power connections are completely severed can dramatically reduce such risks.
Hence, it’s not only a step—it’s a commitment to security that safeguards your entire LED replacement endeavor. By approaching this initial phase with thoroughness, you lay a strong foundation for the smooth progression of the task ahead.
Once you’ve reached the power source, ensure all switches are in the off position, which often involves not just the main power toggle but also circuit breakers and any inline switches. This meticulous attention to detail ensures that latent power does not compromise your safety or the successful outcome of replacing damaged or burnt-out LEDs.
To inspire confidence in safe practices, consider utilizing a checklist to standardize your power-down process, reinforcing your commitment to excellence in LED replacement ventures.
Accessing the LED Fixture
Gaining access to the LED fixture is crucial.
Before you can embark on replacing damaged or burnt-out LEDs, you must first ensure that you have unobstructed access to the fixture itself. Often, this will involve removing covers or lenses that protect the LEDs. Carefully, take note of the way these components are configured to facilitate easy reassembly after replacement tasks are completed.
The method of accessing an LED fixture varies.
For most fixtures, this process is straightforward, requiring nothing more than a screwdriver to remove a few screws — but for recessed installations, a bit more finesse may be needed to safely disengage clip-in mechanisms.
Clear understanding and preparedness will make accessing the intricate inner workings of your LED assembly smooth and confident. With an eye toward innovation, we stand on the brink of enhancing our living and working spaces with every LED we replace, embracing the potential for luminous transformation as we hone our LED fixture access skills.
Removing the Damaged LED
With the fixture accessible, identify the damaged LED that necessitates replacement within your setup. Ensure all power to the fixture is disconnected to prevent any electrical hazards or shocks.
Using a reliable tool, gently pry the LED away from its mounting position. Precision and patience are your allies in this delicate maneuver.
Carefully take note of how the LED was originally orientated, as this knowledge will be critical during replacement. Pay attention to polarity indicators, ensuring you replicate the original configuration for efficient functionality post-replacement.
Embrace this opportunity to elevate your environment by reviving the light and upgrading your experience. In removing the damaged LED, you’re laying the foundation for eventual brilliance and efficiency, appreciating the meticulous nature of prosperity-driven maintenance. With every faulty removal, you’re advancing towards the ultimate goal – crafting a space that reflects innovation and proficiency.
Selecting a Replacement LED
When considering replacement options, ensure the specifications match the original LED to avoid functionality and performance issues.
First and foremost, it’s crucial to identify traits of a potential substitute LED that align precisely with the original, including brightness, voltage, and color temperature. By ensuring these attributes are consistent, you’re setting the stage for exceptional operational harmony. Equally important is the attention to compatibility with existing circuitry, safeguarding against potential electrical discrepancies.
Additionally, focus your search on a reliable manufacturer with a proven track record. By prioritizing quality assurance, you ensure the new components will not only restore your current setup but may even augment its effectiveness with enhanced longevity.
In this endeavor, you’re not just replacing LEDs; you’re embarking on a mission to beautify your environment with sustainable and forward-thinking solutions seamlessly. This meticulous attention to detail assures your lighting will exude a renewed vibrancy, invigorating the space and reflecting an unyielding commitment to excellence and progress.
Installing the New LED
With the selected LED in hand, initiate the installation process by first ensuring the power source is safely disconnected. Gently position the LED at the designated slot, ensuring precise alignment with necessary contacts.
Carefully secure the LED into place, using appropriate tools and techniques to prevent component damage. Once firmly positioned, reconnect the power source to test the installation.
Positioning the LED Correctly
Positioning the LED correctly is critical—misalignment can compromise both the performance and longevity of your lighting system.
Precise LED alignment not only optimizes light output, but can improve energy efficiency significantly.
Ensure the marked positive and negative leads on the LED match the corresponding points on the circuit board. This attention to polarity prevents potential damage to your setup, safeguarding your investment in quality components.
A proper fitment guarantees not just immediate functionality—but paves the way for enhanced environmental aesthetics, increased durability, and optimal light dispersion. Take the time to align with precision, and the outcome will illuminate your spaces with unmatched brilliance.
Securing the LED in Place
Securing your LED with precision ensures that electrical connections remain intact and components are safeguarded, giving you peace of mind.
Utilize tools such as a soldering iron carefully according to safety guidelines.
When soldering, ensure not to apply excessive heat, which might damage the circuit board or surrounding components. Furthermore, engage anchors or heat-resistant adhesive designed for electronic use, offering stability and maintaining integrity throughout your lighting system’s lifecycle.
Taking these deliberate steps guarantees that your LED remains resilient to vibrations or environmental changes, ensuring continuous, dependable operation. This meticulous approach not only extends the lifespan of your fixtures but also reinforces the confidence you have in your lighting innovations. Trust in the process, and let your creations shine unwaveringly.
Testing the New LED
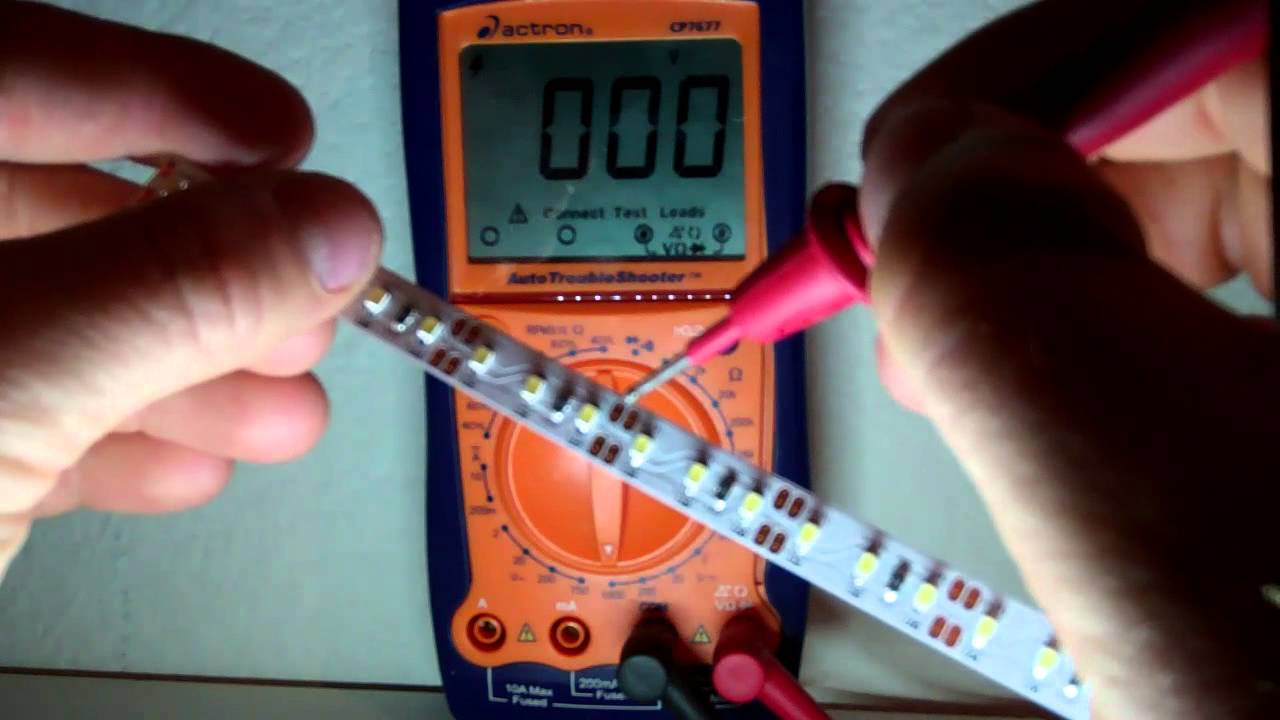
Once your LED is securely in place, it’s time for the exciting moment of testing its effectiveness and brightness.
To begin, recheck all connections using a multimeter to ensure accuracy. Switch on the power, carefully observing the LED’s response, which should be a steady, bright illumination indicative of successful installation. This moment of illumination is not just the light emitting diode signaling success, but a testament to your skillful efforts and understanding of intricate electrical systems.
Remarkably, troubleshoot any issues immediately if the LED does not light up. In rare cases, a connection might be loose, or a component may need reconfirmation. These quick checks can turn a temporary setback into an opportunity for honing diagnostic skills and showcasing perseverance.
By following these testing steps meticulously, you reinforce the foundation of your technical prowess and dedication to excellence. As the LED lights up, bask in the satisfaction of having turned potential into productivity, illuminating your path and inspiring the brilliance that lies ahead, proving your capacity to enhance spaces with both skill and vision.
Inspecting the Fixture After Replacement
With the newly installed LEDs shining brightly, examine the surrounding fixture for any signs of issues that may have arisen during the replacement process.
Carefully check, with an appropriately discerning eye, for any misaligned parts or unusual marks that could suggest underlying problems, ensuring that your inspection encompasses both visible aspects and possible concealed issues. This diligence not only prevents future malfunctions but also reinforces the long-term reliability of your lighting setup. Paying attention to fine details reflects not just a commitment to excellence but the anticipation of continued, seamless illumination.
Simultaneously, take time to perform a thorough inspection of the connections. Any overlooked minor discrepancies, such as a slightly loose wire or an imperfectly seated LED, could greatly impact the longevity and effectiveness of the fixture’s performance.
Finally, reassuringly ensure all fasteners are securely tightened, and confirm that each LED component holds firmly in place, as this precaution fortifies the entire system against unforeseen failures. This proactive approach to inspecting your work after replacing damaged or burnt-out LEDs underlines your commitment to precision, enhancing your craftsmanship and guiding your space towards a future of unwavering radiance and efficiency.
Troubleshooting Common Issues
Identifying the root of the problem is essential.
Before diving into complex solutions, begin with the basics. The first step is to check the power source and ensure connections are secure, as a simple reconnection might resolve the issue. Additionally, examine the dimmer settings if applicable, as incompatible dimmers may cause erratic LED behavior.
Sometimes, it’s a matter of incompatible components.
If flickering persists, consider the total load capacity. Ensure that the power supply unit matches the LED’s voltage and current requirements. Inconsistent power can lead to unexpected shutdowns or diminished LED performance.
Moreover, environmental conditions can affect LED functionality. Excessive heat or moisture can weaken LED resilience and efficiency, shortening their lifespan. Regular checks and mindful placement in temperature-controlled environments can aid in maintaining LED longevity. By proactive troubleshooting, you uphold not just operational integrity but also the durability and dependability of your lighting system.
Maintaining Your LEDs
Taking proactive steps today ensures the longevity and brilliance of your LED lighting system.
Effective maintenance is key to a seamless lighting experience that surpasses expectations, allowing for maximum efficiency. Routine inspections to identify wear and tear are vital to prevent long-term damage and ensure peak performance. Cleaning your LEDs with a soft cloth to clear dust and debris is another simple yet crucial practice that champions the vibrancy and functionality of your system.
Furthermore, keep humidity levels consistent to circumvent unnecessary strain on your LEDs. An inconsistent environment can accelerate the degradation process, leaving your LEDs vulnerable to early failure. Strategizing placement in locations with stable climate conditions is instrumental in preserving the integrity of your lighting arrangement.
In addition to meticulous upkeep, consider a periodic assessment of the power distribution system to manage the electrical demands of your LEDs. Such diligence amplifies their lifespan and mitigates potential hazards. Remember, the investment of time and a discerning approach to maintenance translates into many years of unparalleled lighting performance, illuminating your space with unwavering confidence and elegance.
Benefits of Replacing Damaged LEDs
Enhanced brightness boosts space ambiance and mood.
Taking action to replace those faulty LEDs opens the door to greater illumination. This minor endeavor not only revives your lighting arrangement by enhancing brightness but also restores the visual harmony of your surroundings. Consequently, it sets the stage for heightened productivity and veers you toward achieving an inspiring level of illumination.
This improvement uplifts the overall aesthetic appeal.
Replacing damaged LEDs also plays a crucial role in – not just improving energy efficiency by reducing power consumption – but also elevating lighting performance with next-generation technology.
This strategic endeavor leads to substantial environmental benefits by lowering carbon emissions, aligning you with crucial 2023 climate goals and enhancing your eco-friendly efforts. Also, proactive improvement safeguards long-term energy savings, reducing operational costs and ensuring sustainable lighting solutions for the future.
When to Seek Professional Help
Navigating the path of replacing damaged or burnt-out LEDs, confidence can lead to triumphant outcomes. However, a nuanced understanding of the process distinguishes success from unnecessary complications.
Consider the expertise needed for complex installations. If the LEDs are part of intricate designs.
Moreover, certain technical aspects like voltage considerations or circuit integrations may require expert intervention.
Given these intricate factors, enlisting the aid of a skilled professional becomes prudent, ensuring precision and safety.
Although a diligent DIY spirit can conquer many tasks, recognizing when to access the profound expertise of professionals is wise. Their comprehensive troubleshooting skills maximize both function and longevity.
Thus, embrace your instincts when expertise beckons, as professionals offer tailored solutions. These insights ensure that your lighting experience excels brilliantly.
Cost Considerations for LED Replacement
Evaluating the cost implications of replacing damaged or burnt-out LEDs is vital for achieving optimal results.
In 2023, LED prices remain comparatively stable, offering a cost-effective alternative to traditional bulbs. However, the initial expenditure may seem daunting.
Yet, it’s worth noting that LEDs’ efficiency significantly reduces electricity bills over time. This long-term saving often offsets the initial price, enhancing their appeal.
Additionally, the cost of the replacement itself depends on whether the task requires professional expertise or can be accomplished independently. Weighing the pros and cons of these choices is essential.
Ultimately, investing in quality LEDs promises enduring performance, proving both economical and advantageous in the long run.
Conclusion
Success is within your reach.
Replacing damaged or burnt-out LEDs may seem daunting at first glance. With the right information and careful attention to safety protocols, this task becomes a manageable challenge. Thus, equipping yourself with the necessary knowledge transforms potential complexity into a straightforward endeavor that brightens your space and your outlook.
Preparation empowers efficiency.
In taking action to replace LEDs, you’re not just engaging in a maintenance task—you’re extending the lifespan of your lighting system and contributing to energy conservation. The environment and your budget both benefit from such thoughtful choices.
Remember, prioritizing safety and precision fosters confidence and ensures optimal outcomes. Your commitment to quality and sustainable practices underscores an inspiring journey toward a future of illuminated success, embracing change with an invigorating zeal that not only lights up spaces but also fosters a brighter tomorrow.
