
Many homeowners struggle with finding the perfect lighting solution to enhance their living spaces. This DIY step-by-step installation guide for LED strip lights addresses this common dilemma, offering an easy and effective way to brighten up any room. LED strip lights have become a popular choice due to their versatility and energy efficiency.
Addressing the issue of inadequate lighting is essential for creating a comfortable and inviting home environment. Poor lighting can affect mood, productivity, and even the overall aesthetic of a space. By installing LED strip lights, you can overcome these challenges and enjoy a well-lit, stylish home.
There are various solutions available when it comes to LED strip lights, from different types and colors to various installation methods. This guide will provide insights into selecting the right LED strip lights for your needs and offer step-by-step instructions for a seamless installation process.
Curious about how to transform your home with LED strip lights? Keep reading to uncover valuable tips and tricks that will help you achieve a professional-looking setup and elevate your home decor.
Gather Necessary Tools and Materials
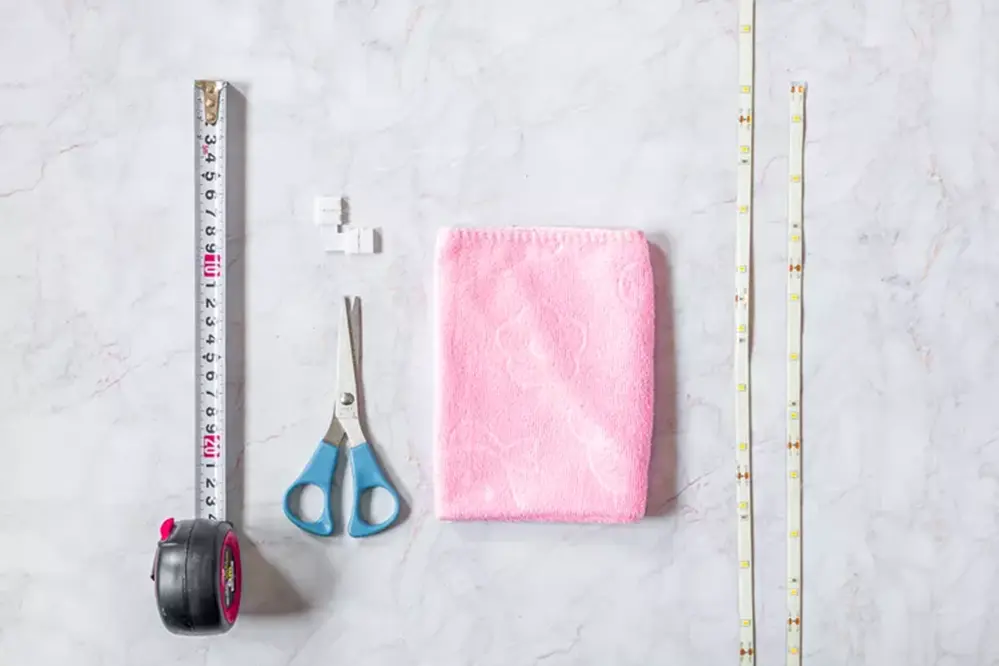
To embark on installing LED strip lights, the first vital step involves gathering essential tools and materials that will streamline the process. This initial preparation is paramount to ensuring success.
The required tools include a measuring tape, a pair of scissors, and a screwdriver.
Additionally, ensure you have electrical tape and a soldering kit (if your project involves intricate connections) on hand.
These materials will enable precise measurement, cutting, and securing of the strips, facilitating a seamless installation.
You should also consider acquiring LED connectors, which are indispensable for achieving a clean and professional finish, especially around corners or when joining multiple strips.
Lastly, don’t forget the power supply unit that’s rated to handle your chosen strips. Proper power management ensures your installation functions safely and efficiently.
Plan Your Layout

Before commencing the installation, meticulously planning the layout is paramount. A well-thought-out design boosts aesthetics and functionality.
To do so, identify the specific areas you want to highlight. Consider the ambiance you’re aiming to achieve and visualize how your lights will enhance each space.
Determine the “start-to-finish” points to ensure a smooth installation process.
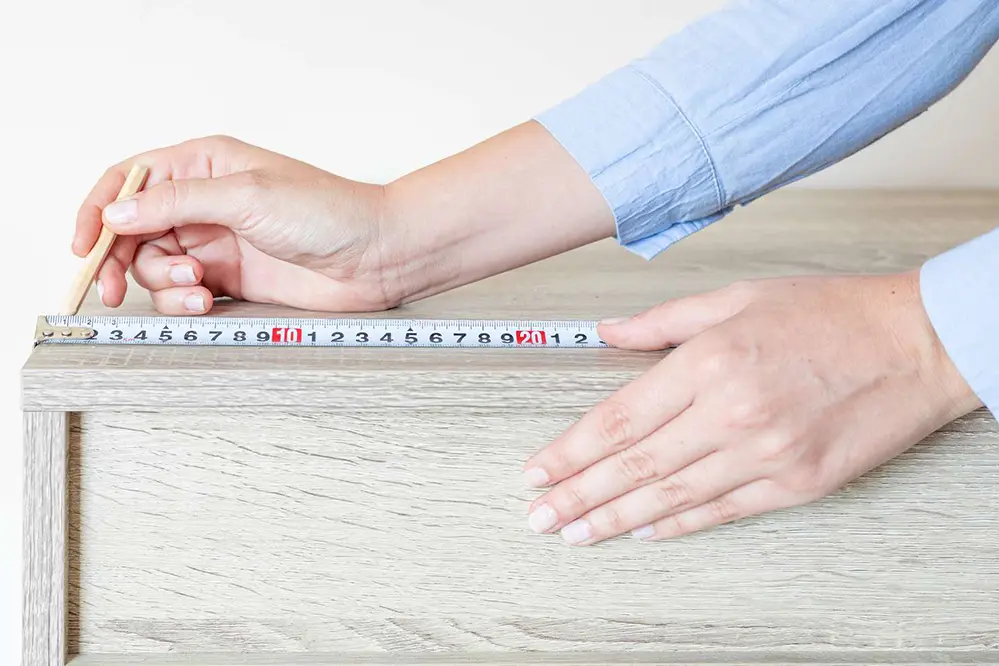
Measure the Area
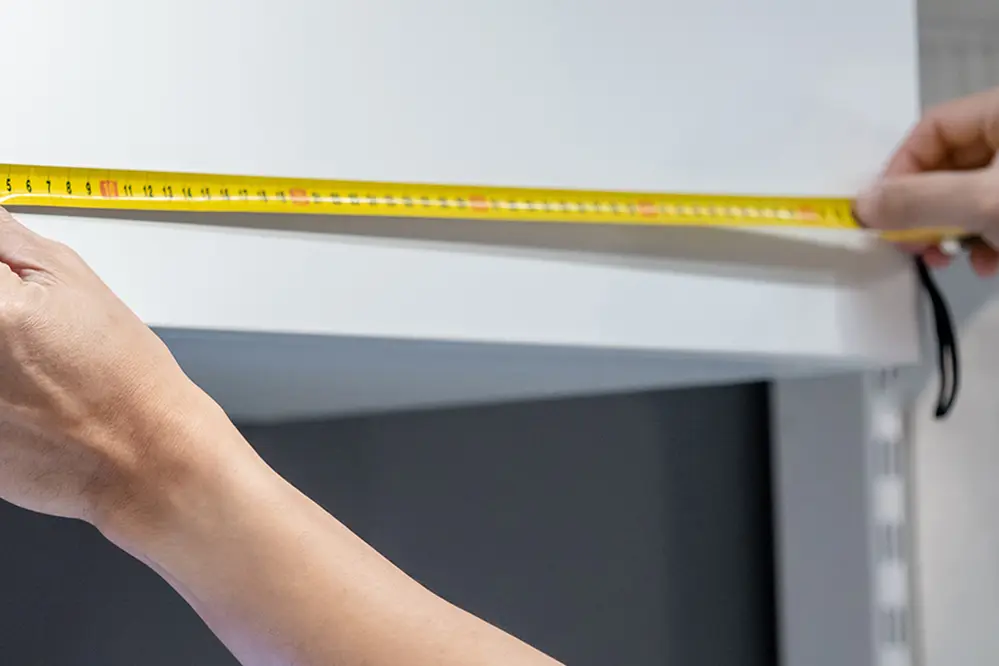
Before installing LED strip lights, it is essential to measure the area accurately. This preliminary step ensures a seamless installation.
Using a measuring tape, determine the length of the space. Make a note of any obstacles like corners or bends that may require special connectors.
Accurate measurements lead to efficient installation and optimal lighting effects.
Careful measurement reduces waste, keeping the project cost-effective. Additionally, it allows for precise placement, enhancing the visual appeal and performance of the LED strip lights.
Determine Power Source Locations
Identifying appropriate power sources is crucial for a smooth LED strip lights installation. Ensuring accessibility and safety is paramount.
- Locate nearby outlets: Identify power outlets closest to the installation area.
- Check for power availability: Ensure the outlets you plan to use are functional.
- Plan wiring paths: Determine the most efficient route for the wiring.
- Consider voltage requirements: Verify the compatibility of your LED strip lights with the power supply’s voltage.
- Evaluate potential obstructions: Account for any furniture or fixtures that may impede access to the power source.
A clear plan for power sources prevents hiccups during installation. Organized wiring ensures optimal performance and safety.
Thorough preparation at this stage guarantees a streamlined installation, resulting in a polished, professional finish.
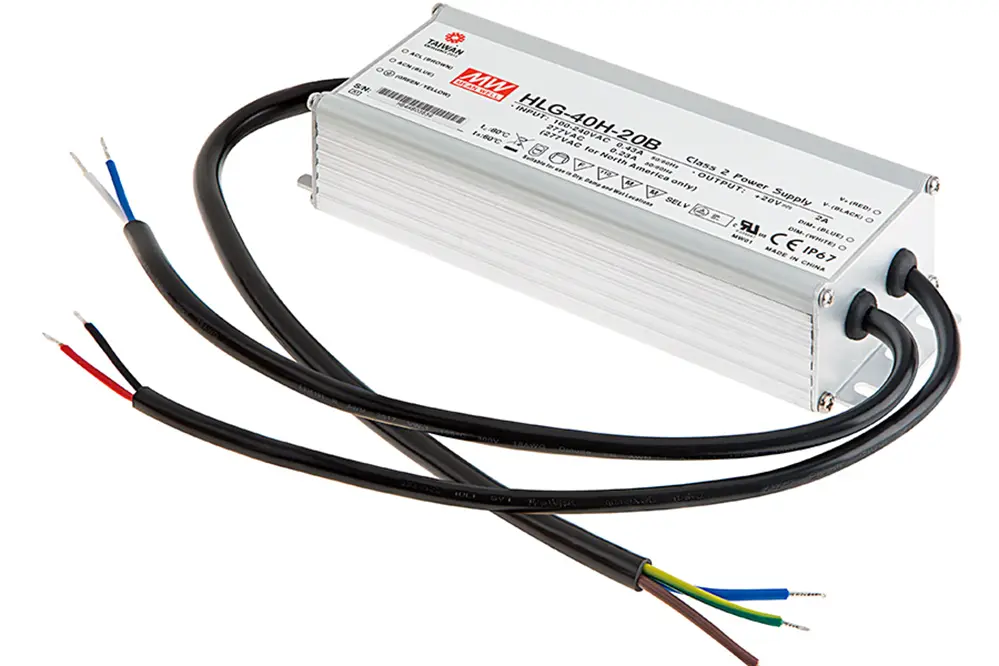
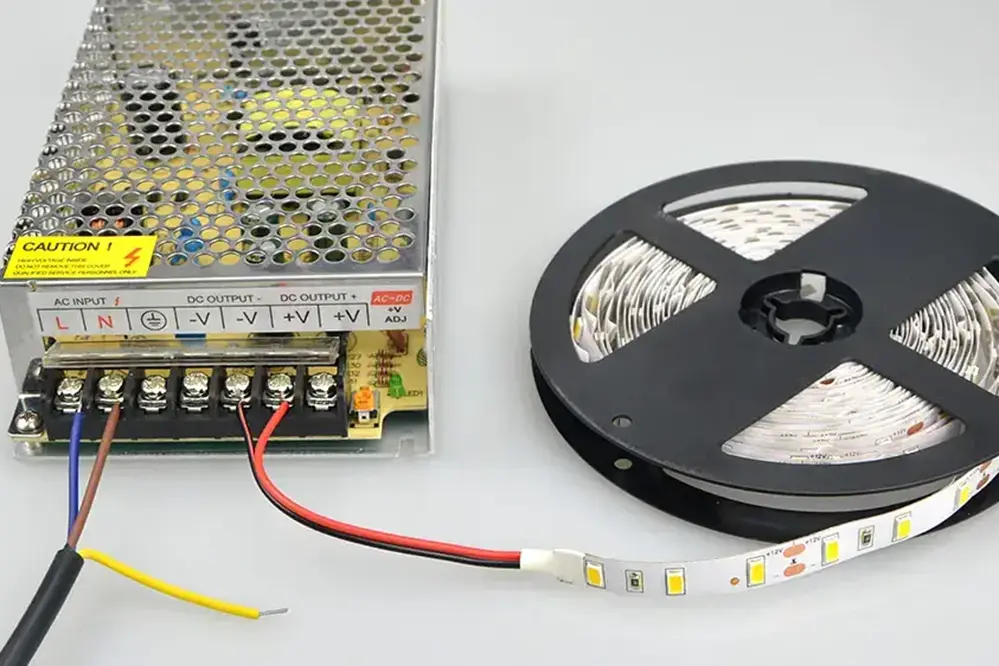
Install the Power Supply
With power source locations determined, it is time to confidently proceed with installing the power supply. First, ensure that all necessary components are at hand. Position the power supply near the identified outlet, making sure it is accessible for future maintenance. Securely attach it to a stable surface, preferably away from direct heat or moisture, to maximize longevity and performance. Connect the power supply to the LED strip lights following the manufacturer’s instructions, verifying all connections are snug and secure. A methodical approach here sets the stage for a smooth, successful installation, keeping the end goal of a vibrant, well-lit space always in sight.
Mount the Power Supply
The power supply unit is the heart of your LED strip lights. It ensures the steady flow of electricity necessary for optimal performance.
First, determine a suitable location for mounting the power supply, keeping it close to an electrical outlet yet away from direct heat and moisture. This location should also be easily accessible for future inspections or maintenance tasks. Organizing these elements at this juncture benefits both the installation process and the longevity of the LED lighting system.
Utilize screws or adhesive mounts, as recommended by the manufacturer, to secure the power supply. Ensuring a firm attachment prevents any undue stress on the cables and connections. Take time to align everything properly to avoid rework later and ensure an aesthetically pleasing outcome.
When connecting the power supply to the LED strip lights, double-check that all wire polarities and connections match the instructions provided. A flawless connection safeguards against electrical glitches, providing a consistent and reliable light output. Remember, safety and functionality go hand in hand.
Confidence in this phase sets a precedent for the rest of the LED installation. Ensure all connections are secure and the power supply is firmly mounted.
Connect to Power Source
After securing the LED strip lights in place, the next step is to connect them to the power source.
- Locate the power adapter: Find the adapter included in the LED strip light package.
- Connect the adapter: Plug the LED strip light connector into the adapter.
- Plug into an outlet: Insert the adapter plug into a suitable power outlet.
- Turn on the power: Use the switch on the adapter or the remote to turn on the LED strip lights.
Ensure all connections are firm and secure to prevent any interruptions in power supply.
Keep safety in mind by avoiding overloading the power outlet.
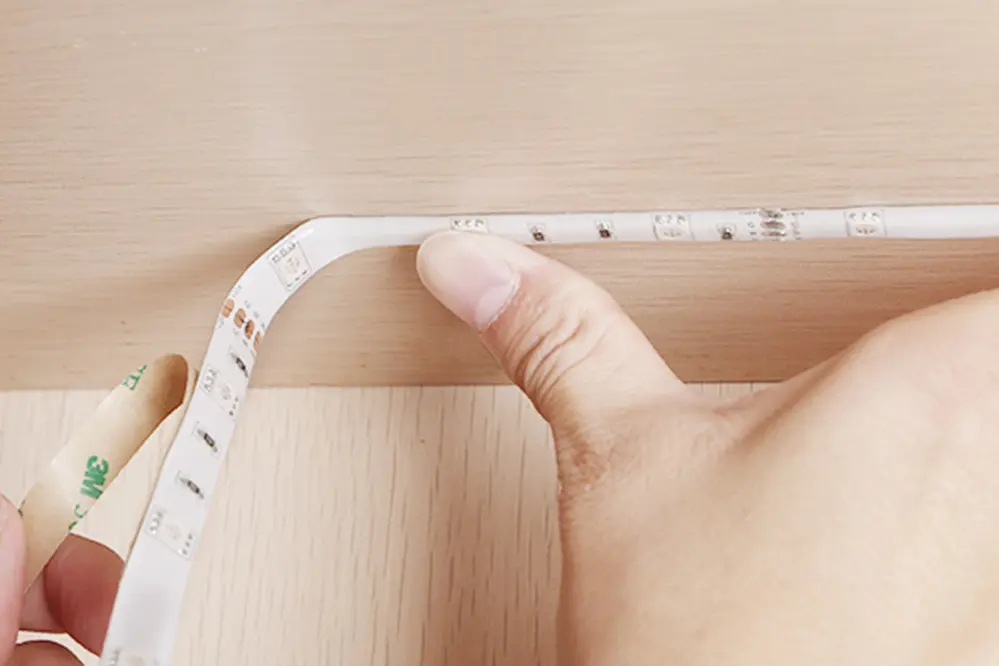
Attach the LED Strip Lights
Begin by identifying the surface where the LED strip lights will be mounted. Ensure it’s clean and dry.
Remove the adhesive backing from the strip light and press it firmly onto the surface. Taking this step ensures the adhesive holds securely and the lights are evenly aligned, providing optimal illumination.
Use mounting clips for extra reinforcement, particularly on corners. This prevents sagging over time.
Prepare the Surface

Preparing the surface is a crucial step in the successful installation of LED strip lights.
First, identify the location where you intend to install the LED strip lights. Opt for a surface that is smooth, clean, and dry for best adhesion results.
Next, thoroughly clean the designated area using a mild detergent and water solution. Make sure to remove all grease, dust, and any residue that might impair the adhesive’s effectiveness.
Once cleaned, let the surface dry completely. This step is vital to ensure that no moisture compromises the adhesive strength of the LED strip lights.
In summary, a well-prepared surface not only ensures better adhesion but also contributes to a professional-looking finish for the installation.
Apply the LED Strips
After meticulously preparing the surface, one can begin to apply the LED strips with confidence, ensuring an even and professional finish.
Begin by peeling off a small section of the adhesive backing. Adhere this starting point to the prepped surface.
As you continue, gradually peel more of the adhesive backing away, pressing the strip firmly against the surface. This method ensures precise placement.
Make sure the LED strip aligns perfectly with the markings or guidelines made earlier, maintaining a straight path.
If the strip needs to navigate around corners, use gentle pressure to bend the strip along with mounting clips for added stability and precise angles. This prevents any unintended detachment.
Finally, once the full strip is applied, reassess its placement to confirm it is secure and properly positioned, ready to illuminate the space as intended. Reapply any sections that appear loose.
Connect the Strips to the Power Supply
Connecting the LED strips to the power supply is a crucial step, ensuring functionality and safety.
First, identify the end of the LED strip marked with power input.
Next, securely attach the connector to the LED strip, ensuring proper alignment (positive and negative terminals).
Double-check that the connections are firm to prevent accidental disconnection during operation.
Then, link the connector to the power supply, matching positive to positive and negative to negative.
Ensure the power supply voltage is compatible with the LED strips, following manufacturer specifications to avoid damage and ensure optimal performance.
Lastly, with all connections secure, it’s time to power up the system. Celebrate the successful completion of this vital installation step, transforming the space with the vibrant glow of LED light.
Test the LED Strip Lights
Once all connections are secure, it’s essential to test the LED strip lights for proper functionality. This ensures that everything is working as intended, avoiding potential issues later.
Begin by switching on your power supply unit. Observing the LED lights immediately can confirm initial connection integrity.
If the lights illuminate correctly, proceed to check each section for consistent brightness. This step helps detect any irregularities that might signal a loose connection.
Pass your hand along the strip, watching for flickering or dim spots. These could indicate areas needing attention or adjustment.
Correct any discrepancies by verifying the connections and ensuring the power delivery is uniform across the entire strip. This careful inspection helps guarantee a trouble-free operation.
Finally, marvel at the transformation your LED installation brings. Take pride in a job well-done, exuding confidence in the brilliant result reflecting your meticulous effort.
Secure and Hide the Wires
Once the LED strip lights are properly affixed, attention must be directed to securing and concealing the wires.
In 2016, wire organization, a crucial aspect, gained substantial popularity among DIY enthusiasts who prized neat and efficient home setups, striving for aesthetic and practical designs.
Now, it’s more important than ever to ensure your installation’s cleanliness by using a combination of cable clips, adhesive mounts, and wire covers, which will enhance the overall appearance.
Tuck the wires along the edges or behind furniture where they are less visible to create a seamless look. This simple yet effective method not only keeps the area tidy but also prevents tripping hazards, ensuring a safe, aesthetically pleasing environment.
An organized setup with hidden wires ultimately elevates your space, giving it a polished, professional vibe.
Troubleshoot Common Issues
Even with a well-executed installation, challenges may arise that require swift attention to maintain optimal function.
One common problem is that sections of the LED strip may not light up as expected. Often, this issue is due to a loose connection in the power supply or controller.
Additionally, if the lights appear dim or flickering, the likely culprit is an inadequate power supply. Ensure that the power source matches the voltage requirements of the LED strips.
Another frequent issue is the color inconsistency across the strip, which may result from a poor soldering connection or a faulty LED. Inspect the strip carefully to identify and correct these problems.
By addressing these concerns promptly and effectively, the integrity and brilliance of the LED strip lights will be preserved, ensuring long-lasting satisfaction.
You can also read our separate article of Troubleshooting Common Issues of LED Strip Lights.
FAQs
How do I choose the right LED strip lights?
Selecting the correct LED strip lights involves considering three major factors. One needs to assess the brightness, the color temperature, and the flexibility required in their installation space, as well as the environment in which they will be used. Additionally, checking for compatibility with existing systems will ensure a seamless experience.
Are LED strip lights difficult to install?
No, they are not difficult to install. You can read our other article.
Can I cut my LED strip lights to size?
Yes, most LED strips can be cut to size.
How can I match my LED strip lights with other lighting fixtures?
To achieve a cohesive lighting design, it is essential to consider both the color temperature and brightness of the LED strip lights in relation to other fixtures. This harmonization can create an inviting ambiance while accentuating the architectural features uniquely.
What are the maintenance requirements for LED strip lights?
LED strip lights generally require minimal maintenance. Regularly inspecting the connections and the power supply can preemptively address potential issues. Cleaning the surface where the strip is attached ensures that the adhesive remains effective and prevents dust accumulation, enhancing both the performance and lifespan of the lights.
Conclusion
Embarking on LED strip light installation is highly rewarding, allowing beginners to transform spaces with professional flair. This step-by-step guide introduces creative possibilities, enhancing both aesthetics and functionality. Customizable colors and brightness enable tailored lighting solutions, elevating ambiance and efficiency. Following this guide boosts confidence and inspiration for future DIY lighting projects.
For those seeking to elevate their lighting projects to the next level, consider reaching out to Unitop, a professional Chinese manufacturer of LED strip lights and LED neon strips. With their expertise and high-quality products, Unitop can provide tailored solutions to meet your specific needs. Whether you’re looking for innovative designs or reliable performance, partnering with Unitop ensures that your lighting installations will be both stunning and durable. Don’t hesitate to contact us for exceptional products and expert guidance on your next lighting endeavor.


