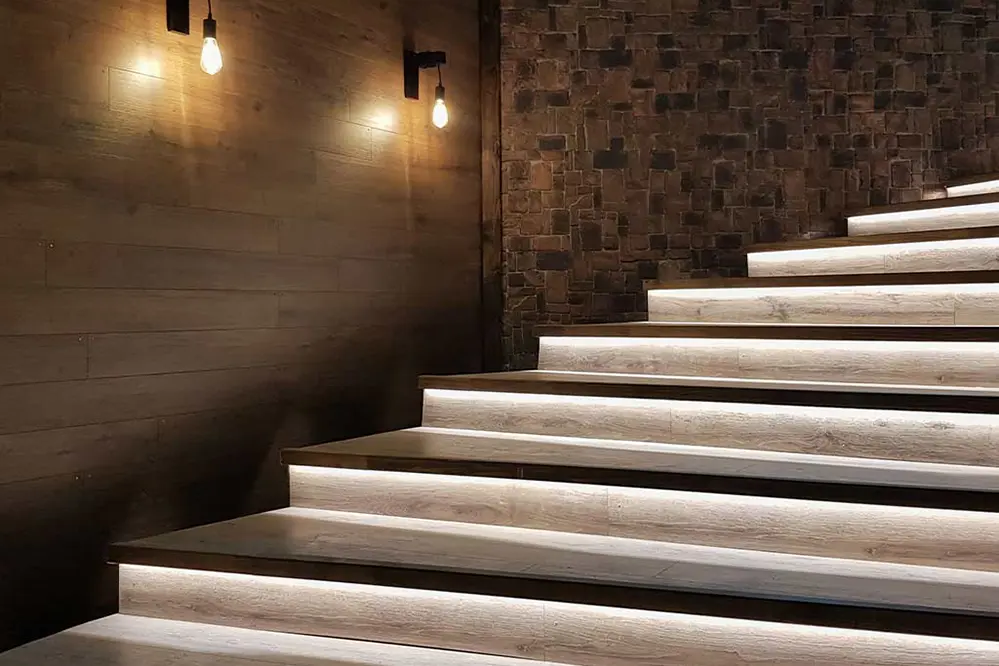
For many DIY enthusiasts, the challenge of how to connect LED strips without soldering or connectors is a common hurdle. The frustration of dealing with complex tools and intricate connections often deters individuals from pursuing their lighting projects. Yet, the desire for beautiful, efficient lighting solutions remains strong.
Addressing this issue is vital as it empowers more people to engage in creative home improvement projects. By simplifying the process, we can encourage innovation and self-expression, allowing individuals to transform their spaces with confidence and ease.
Fortunately, there are several solutions available that cater to different skill levels and project needs. From innovative clip systems to adhesive-backed strips, these options eliminate the need for traditional soldering and connectors, making LED installations more accessible than ever.
As we delve into this topic, prepare to uncover valuable insights and practical tips that will revolutionize your approach to LED lighting. Whether you’re a seasoned DIYer or a curious beginner, this article will equip you with the knowledge to illuminate your world with style and simplicity.
Understanding LED Strip Basics
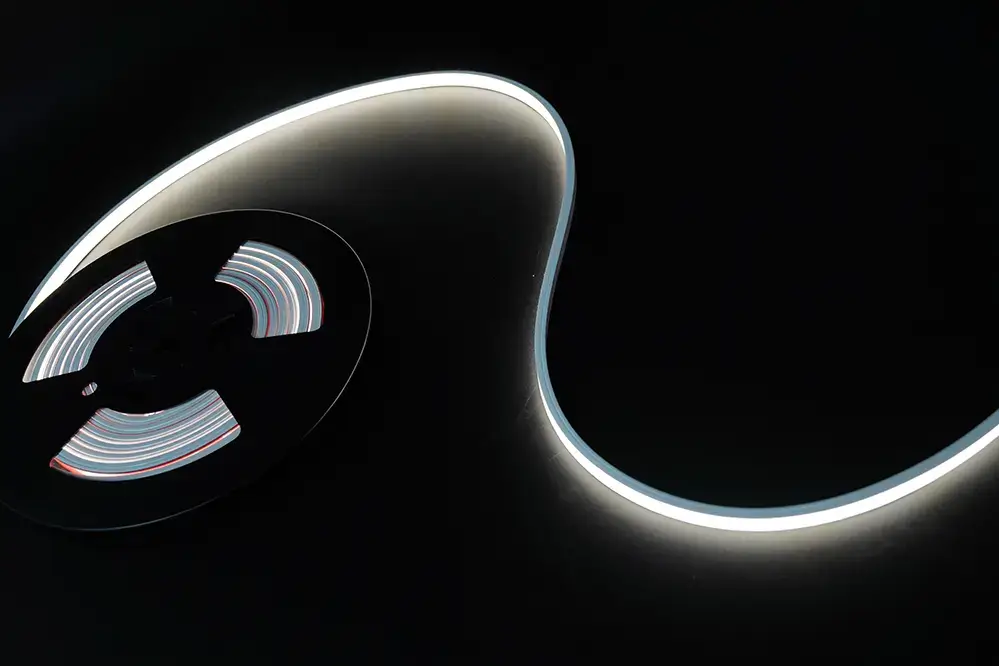
LED strips illuminate spaces beautifully, creating ambiance and flair.
To fully harness their potential, understanding LED strips is essential. LED strips are flexible circuit boards populated with small LED lights, typically encased in a flexible plastic strip. These remarkable innovations are available in a range of colors and brightness levels, allowing for customizable lighting solutions that cater to any environment or mood.
They operate with low voltage for enhanced safety.
LED strips can be cut to size — and they should be, as this ensures your lighting solution is as precise and efficient as possible — providing flexibility and creativity in lighting design projects.
Given the boundless applications of LEDs, comprehending their technical configurations and electrical requirements will position you at the forefront of modern lighting. Diving into understanding them now lays the groundwork for your illumination brilliance. Your next project could redefine how spaces are experienced, potentially revolutionizing the aesthetic of environments everywhere.
Benefits of No-Solder Connections
No-solder connections simplify LED installations impressively.
By eliminating the need for tools like a soldering iron, they offer greater accessibility. This simple approach to connecting LED strips empowers a broader audience to indulge in the magic of customizable lighting, without the specialized skills soldering demands. Consequently, it democratizes access to innovative lighting solutions, sparking creativity across varied skill levels.
Ease meets efficiency in no-solder setups.
These connections enhance safety by avoiding high-temperature tools. Such user-friendly processes are not only crucial for hobbyists but also for professional designers looking to streamline their work. They provide a hassle-free avenue for achieving illuminating results.
Moreover, no-solder connections present an environmentally conscious choice, reducing the number of materials and tools required, subsequently minimizing waste. As sustainability remains at the forefront of conscientious design in 2023 and beyond, embracing this method aligns with global initiatives for responsible consumption. This approach empowers creators to illuminate their projects with vision and environmental mindfulness, transcending traditional boundaries.
Tools for a Solder-Free Setup
Embarking on a solder-free journey requires just a handful of straightforward tools, promising a seamless transition to your new lighting adventure. This setup is intentionally designed to empower you, allowing creativity to flow unimpeded by technical barriers.
Needle nose pliers are integral for the precision positioning of LED strips, ensuring solid connectivity.
A reliable pair of wire strippers is essential. These enable accurate preparation of wires, critical for optimal performance.
Standard electrical tape is what holds your project together, delivering insulation and stability throughout.
Inclusion of a 12-volt LED power adapter boosts your project’s effectiveness, providing a reliable and efficient power source that ensures your LEDs shine brilliantly. This accessibility drives creative illumination without overwhelming technical demands.
Ultimately, the cornerstone of a successful solder-free LED setup is simplicity. Each chosen tool synergizes with your vision, inspiring awe-inspiring lighting experiences.
Using Electrical Tape for Connections
Electrical tape forms an essential component of this process.
Begin by carefully aligning the LED strips, ensuring that their copper contacts meet. This contact point is where the magic happens—binding two luminous paths into one cohesive experience. Strategically, your use of tape on this juncture ensures the continuous flow of current across the copper contacts.
Maintaining good contact is paramount.
By wrapping electrical tape around the aligned sections, a manual, solder-free link is established. This straightforward method empowers even novices to venture into LED wiring, building confidence with every loop of tape, positioning it as a gateway to more advanced methodologies.
Through this method, you exhibit resourcefulness, embracing accessible innovation in home lighting. Reflecting on the latest 2023 trends shows no need for advanced tools—only a commitment to creativity. This practice not only perfects essential skills but also enriches spaces with a touch of self-made brilliance, lighting up your world.
Employing Wire Nuts for Secure Links
Wire nuts, those small, twist-on accessories, redefine the simplicity and strength of your LED strip connections. Can they indeed transform your connectivity approach?
Since their introduction, wire nuts have maintained a revered status, offering a robust alternative to traditional soldering adventures. Through these unobtrusive tools, you can seamlessly yet powerfully establish a steadfast connection. Their ease of use combined with remarkable reliability makes wire nuts an exceptional choice for any LED enthusiast.
Indeed, it’s not just about twisting wires; it’s about unlocking the potential of the spaces you illuminate. With each turn of the wire nut, you secure the energy flow, which keeps your LED lights blazing with brilliance. This step marks a confident stride toward grasping more profound and sophisticated lighting techniques.
When you embrace the simplicity of wire nuts, your worldview expands to include practical elegance without the hassle of soldering. Their design ensures that even non-experts can deftly achieve optimal, long-lasting connections, providing durability and safety that transcends the ordinary quick fixes of the past.
In this journey without solder, wire nuts guide you toward an inspiring future of illuminated innovation. Here, lights secure, creativity unleashed.
Using Crimp Connectors as Alternatives
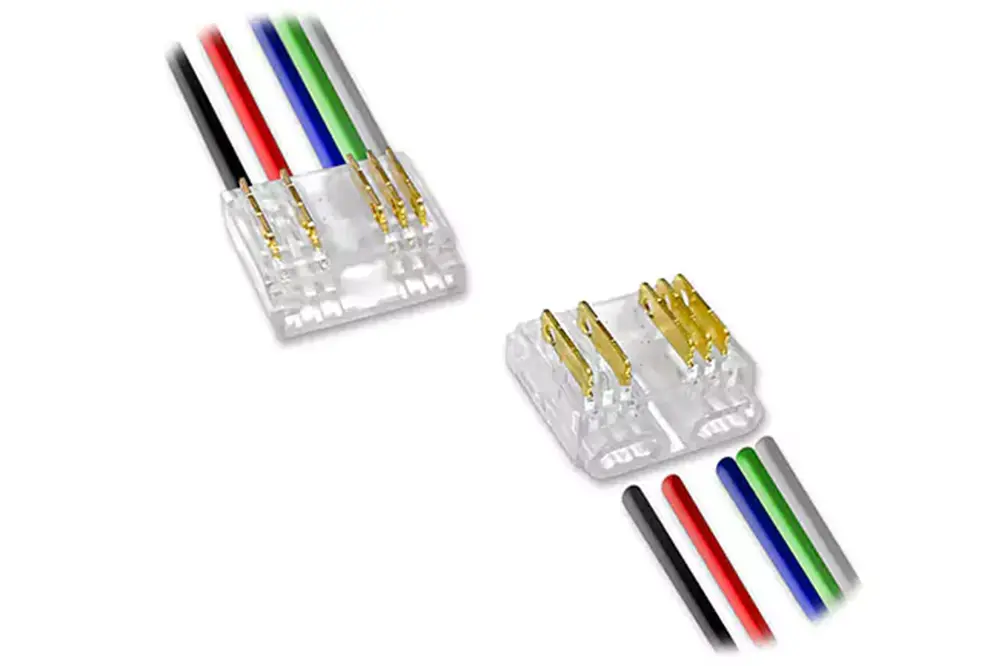
Crimp connectors serve as a versatile alternative for those desiring a straightforward, solder-free connection method. These nifty tools offer a user-friendly solution for seamless LED strip connections.
Their effectiveness stems from the way they compress wires without requiring additional materials. Crimping essentially bends metal to secure the electrical current flow.
Furthermore, these connectors come in a variety of sizes and types, ensuring a snug fit (insulated versions enhance safety) and reliability. This versatility makes them ideal for most LED setups.
Value is found in their cost-effectiveness and efficiency in maintaining strong and consistent electric links, facilitating a smooth power transition between LED strips.
Though some may need crimps, it’s possible to find them pre-attached, eliminating any apprehension over incorrect installations, thus providing peace of mind even to beginners exploring new lighting paths.
Ultimately, the best part about crimping’s ease is achieving excellence. Every connection stands testament to your craftsmanship and advances your journey into the luminous world of LED innovation.
Utilizing LED Splitter Cables
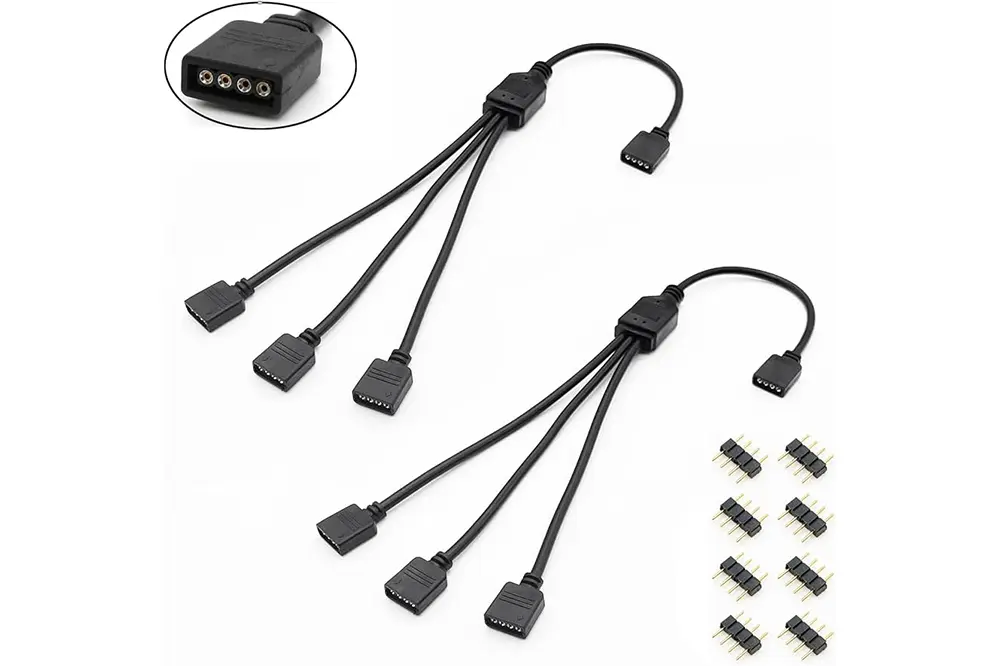
Embracing LED splitter cables offers a horizon of transformational opportunities without soldering or traditional connectors. These intelligent tools effortlessly divide power across multiple LED segments, allowing creative illumination patterns to flourish with a singular power source. By integrating splitter cables, you minimize the complexity common in intricate lighting installations, enhancing both functionality and aesthetic appeal. This method not only simplifies your setup process but also inspires boundless creativity, inviting you to explore new lighting designs with confidence and flair.
Selecting the Right Splitter Size
Choosing the correct splitter size is crucial for ensuring an optimal distribution of power across your LED strips. A properly sized splitter maintains uniform brightness throughout the setup.
For precision and efficiency in a large array, consider a “multi-port splitter”. This acts as a hub for a network of strips, making complex configurations a breeze.
Adequate splitter sizing can reduce energy consumption and enhance the lifespan of your LED strips.
Remember, each strip’s power requirement plays a pivotal role in determining the splitter size that will be most effective. Oversizing or undersizing may lead to performance inconsistencies, affecting the entire lighting arrangement. By investing in the appropriate splitter size, you bolster both the integrity and longevity of your LED installations, paving the way for future projects to shine brightly and sustainably.
Leveraging Push-In Connectors
Push-in connectors are an innovative solution that has revolutionized the ease of connecting LED strips. They offer a seamless and fuss-free alternative to traditional soldering methods.
Introduced around 2016, these connectors, a favorite among DIY enthusiasts, have transformed the landscape of LED strip installations. Simple in design yet robust in performance, push-in connectors provide a secure and reliable connection in seconds.
What’s more, they are incredibly user-friendly, allowing even a beginner to achieve professional results without the need for specialized tools. Just as their name suggests, these connectors enable you to push the LED strip into place, securing the connection without the complexity of soldering.
Designed to accommodate various strip widths, push-in connectors provide an incredibly versatile solution. It’s no longer necessary to fret about the perfect fit, thanks to these adaptable and resilient components, which seamlessly integrate into any lighting project.
By embracing this technology, you’re not only simplifying the installation process but are also empowering your creative pursuits with cutting-edge efficiency and ease.
Creating Temporary Links with Terminal Blocks
Harnessing the ingenuity of terminal blocks offers a seamless, yet empowering, way to connect LED strips in temporary settings. With terminal blocks, a world of flexible lighting solutions unfolds, allowing you to experiment and adjust without permanence yet with a steadfast connection.
Terminal blocks are practical and highly versatile, encompassing simple setups that do not demand specialized skills or equipment. They effortlessly accommodate trial-and-error experimentation.
Remarkably, these components are straightforward: once the wires are stripped, you simply insert them into the block, ensuring proper placement. By tightening screws, the terminal block secures the connection without the need for soldering or specialized tools.
Their design is so intuitive, even those who approach wiring with caution can achieve professional-grade connections. This feature makes them an attractive option for both seasoned veterans and enthusiastic DIY newcomers.
The true beauty of using terminal blocks lies in their adaptability; you can easily remove and reposition them according to your evolving project needs. This dynamic capability allows for endless creative possibilities, making modifications as effortless as flicking a switch.
Therefore, the use of terminal blocks does not pertain solely to connecting but rather to creating innovations. The knowledge that your connections are secure adds confidence, while the potential for creative exploration inspires further lighting endeavors.
Implementing Quick-Splice Connectors
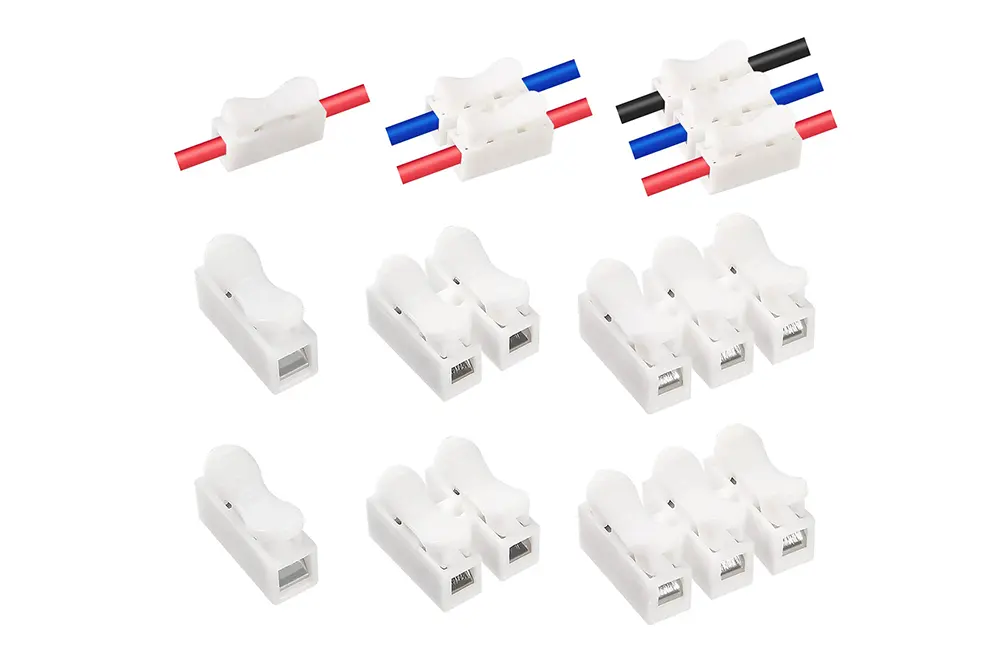
Quick-splice connectors empower your LED setup without soldering, making them a seamless addition to your toolkit.
In essence, these connectors offer a straightforward method for integrating LED strips into your lighting design, requiring little more than aligning wires and securing. As a result, exploring new lighting layouts becomes both accessible and efficient, driving innovative design.
The terms “no-soldering” and “no-connector” become milestones on the ‘creativity without limits’ journey.
Ensuring Proper Alignment
Ensuring proper alignment is paramount in maintaining the seamless flow of light across your LED strips, ensuring aesthetic harmony.
- Measure Carefully: Use a measuring tape to ensure consistent spacing between LED strips for perfect symmetry.
- Visualize the Layout: Position strips temporarily to assess alignment before securing them permanently.
- Utilize Alignment Tools: Use level tools to keep strips straight, avoiding imbalanced visuals.
- Plan Connection Points: Mark where connections should crisply meet, enhancing the uniformity of lighting.
- Double-Check: Re-evaluate the setup before adhesion to correct any misalignments early.
Taking time to align your LED strips enhances visual appeal and assures consistency.
An eye for detail now prevents later imperfections, gifting you a flawlessly illuminated space.
Utilizing Pogo Pin Connectors
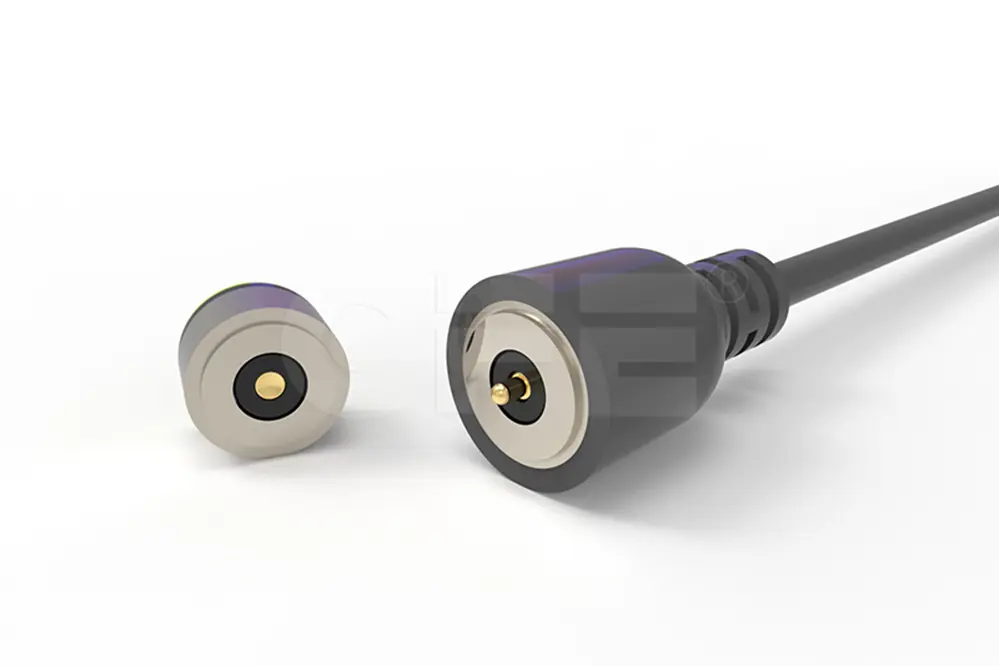
Pogo pin connectors offer a dynamic and innovative solution for linking LED strips without the need for traditional soldering or connectors. These tiny, spring-loaded pins create reliable electrical contact, enabling you to effortlessly connect strips by simply pressing them together, ensuring flexibility and ease of use.
To incorporate the power of pogo pins, you might consider using a “contact bridge.” This device acts as a bridge to transmit current across non-soldered connections. By simply aligning the pin pads with the LED strip pads, these connectors can be pressed into place, achieving a sturdy connection that stands up to small movements and vibrations, ideal for dynamic installations.
Advantages of Pogo Pins
Pogo pins provide an elegant and efficient solution for versatile electronic connections.
- Reliable Contact: Their spring-loaded design ensures consistent and robust electrical contact.
- Easy Reusability: These pins can be used multiple times without noticeable wear.
- Space Efficiency: Compact design allows integration into tight spaces, saving valuable real estate.
- Minimal Setup: Simplifies connection processes by eliminating the need for soldering or complicated connectors.
- Durable Construction: Engineered to withstand frequent use and environmental changes.
Their ease of use significantly streamlines the connection of LED strips, enhancing both speed and efficiency.
Emphasizing flexibility, pogo pins accommodate various configurations, making them ideal for innovative projects.
Leveraging Wire Clamps for Stability
In the dynamic realm of LED strip installations, wire clamps emerge as a stellar solution that combines simplicity, durability, and a sleek finish for connection stability, surpassing expectations remarkably.
Wire clamps ingeniously secure strips to a surface without soldering or additional connectors.
These clamps, readily available at most hardware and online stores, provide a dependable grip (particularly vital in vibration-prone environments) and versatility.
Featuring a design that affirms the connection’s integrity, wire clamps offer both an aesthetic and practical advantage.
Clamps can be meticulously adjusted to enhance the strength and reliability of your LED placement, ensuring there are no compromises in quality, even as environments evolve or installation conditions morph unpredictably.
Ultimately, the use of wire clamps serves not just practical needs but amplifies creativity, empowering you to experiment with designs previously limited by conventional connection methods.
Testing Connections for Faults
Ensuring a flawless connection requires careful inspection, thorough testing, and a confident validation of your LED strip setup. By doing so, you safeguard against unexpected failures.
Visual examination serves as the first checkpoint when testing connections.
Inspect thoroughly, ensuring the wire clamps are snug and aligned, signifying a fault-free alignment. This preliminary verification process identifies any obvious loose ends.
Next, verify your setup using a multimeter to measure continuity and assess any disruptions in electrical flow.
These steps help to electronically diagnose potential errors in the connections, providing data that affirms your setup or pinpoints issues needing resolution. Addressing them ensures the LED strips function optimally.
Ultimately, this rigorous diligence is what fortifies your work against potential mishaps. Investing time in testing connections efficiently can prevent future disruptions, allowing your LED configurations to shine reliably and brilliantly.
Safety Tips for No-Solder Installations
Ensuring safety in no-solder installations involves more than simply plugging in LED strips. It’s about foreseeing challenges and designing solutions that last.
Always start with high-quality materials that have been tested for electrical safety. Cheap components may cause dangerous shorts.
Pay attention to your installation environment. Ensure the surfaces are dry and free from flammable materials. This creates a secure foundation that prevents heat build-up and reduces fire risks.
Make sure all power is off when working with electrical components. Double-check that the voltage matches the LED strip specifications to avoid overloading circuits. This diligence not only protects your project but also safeguards your home environment. A thorough setup ensures both the longevity of your installation and peace of mind.
Conclusion
Mastering the art of connecting LED strips without soldering or connectors opens up a world of creativity and accessibility, enabling you to craft elegant and reliable lighting designs with ease. By employing strategic methods and maintaining meticulous attention to detail, even the most complex lighting projects can be executed flawlessly. This approach ensures optimal functionality, allowing the full radiant potential of your LED installations to shine brightly. As technology continues to evolve, these techniques reflect a shift towards more user-friendly and DIY-friendly solutions, empowering individuals to take control of their lighting projects with confidence and precision.
In the rapidly advancing landscape of 2024, your expertise in no-solder, no-connector techniques unlocks remarkable possibilities for custom lighting endeavors. This knowledge not only enhances your creative vision but also positions you at the forefront of innovative design. With the ability to transform spaces through beauty and innovation, you can reimagine the world of LED lighting, making each connection a testament to your skill and ingenuity. Embrace this transformative power and illuminate your surroundings with the brilliance and efficiency that modern technology affords, ensuring your projects remain timeless and impactful.

