
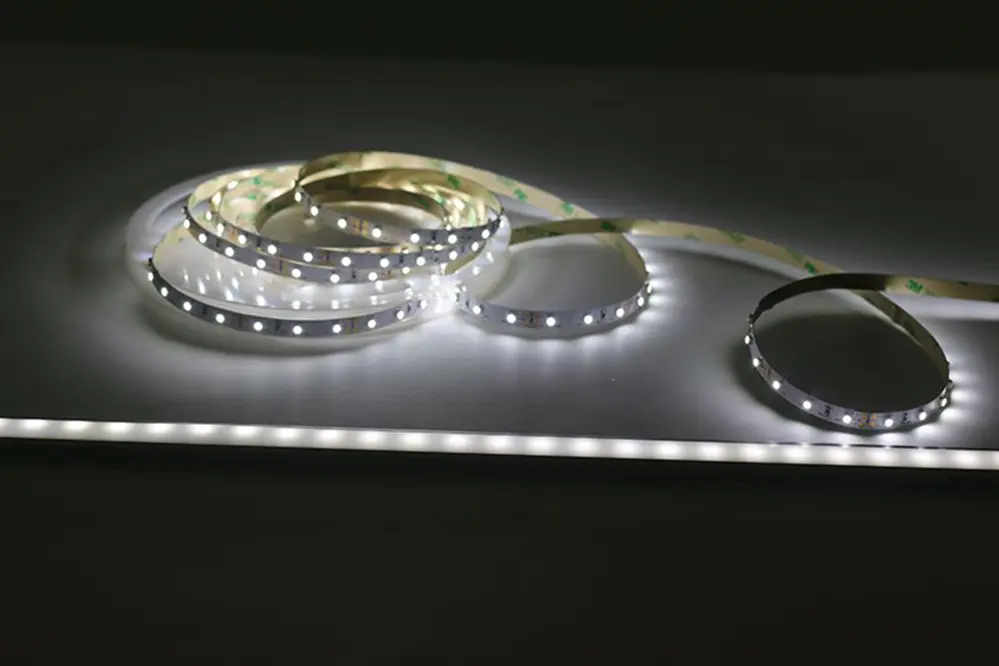
Troubleshooting common issues of LED strip lights is a challenge many homeowners face. Picture this: you’ve just installed your new LED strip lights, but instead of a smooth, vibrant glow, you encounter flickering and dimming. This scenario is all too familiar for many.
Addressing these issues is crucial for maintaining the aesthetic and functional benefits of LED lighting. Without proper troubleshooting, you may end up with a less-than-ideal lighting setup that fails to meet your expectations.
Fortunately, there are various solutions available to tackle these problems. From checking power supplies to ensuring proper connections, understanding the root causes can help you resolve these issues effectively.
In this article, we will explore practical tips and expert advice to help you troubleshoot common issues of LED strip lights. Get ready to transform your lighting experience and achieve the perfect ambiance in your space.
LED Strip Does Not Light Up at All
Firstly, consider checking the power source to ensure it is functioning correctly. A faulty or disconnected power supply could be the culprit.
If power is not the issue, inspect the connections carefully. Loose or improperly connected wires may hinder the flow of electricity, preventing the strip from lighting up.
Lastly, verify that the strip is not damaged. Visible cuts or burns signify it is time to replace the strip.
Confirm Voltage and Current Compatibility
Ensuring the proper voltage and current compatibility is crucial for the optimal performance of LED strip lights. Mismatched voltage in LED lights can lead to various issues, including dimming and overheating.
To avoid these problems, one should always check the specifications provided by the manufacturer. Voltage incompatibility often results in flickering or complete failure of the strip light.
Incorrect voltage can shorten the lifespan of LED strip lights significantly, even leading to permanent damage.
When troubleshooting common issues of led strip lights, it is imperative to use a multimeter to verify the voltage and current. This simple step can help in pinpointing potential power supply problems, ensuring the longevity and reliability of the LED strip lights. Professional installation advice often emphasizes double-checking these parameters to prevent any malfunctions down the line.
Test Power Supply Functionality
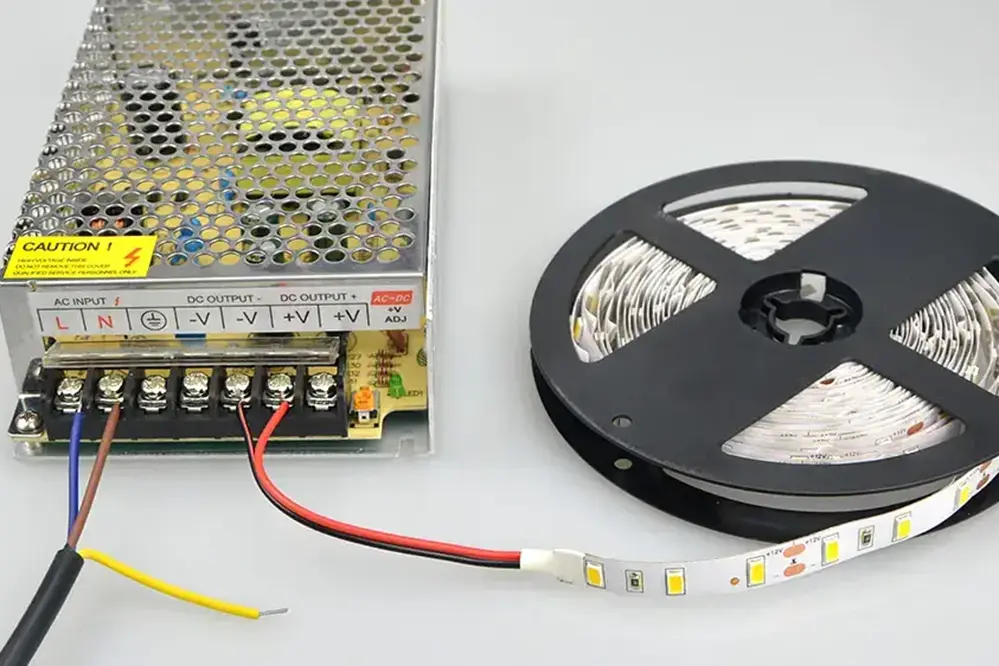
The power supply is the heart of any LED strip light setup, providing the necessary energy for effective operation.
Firstly, to ensure the power supply is in perfect working order, one should begin by visually inspecting the unit. Look for signs of physical damage, overheating, or loose connections, as these can immediately indicate a faulty power supply.
Next, using a multimeter, measure the output voltage of the power supply. It should closely match the recommended voltage specified by the LED strip light manufacturer. If there is a significant discrepancy, it may necessitate replacing the power supply unit.
Finally, consider testing the power supply under load, connecting it directly to the LED strip light. Observe for any fluctuations or inconsistencies in brightness, as this can reveal underlying issues with the power supply maintaining stable output. Ensuring a robust and stable power supply is crucial for the consistent performance and enhanced lifespan of LED strip lights.
Isolate Other Accessories
Isolating other accessories is a crucial step in troubleshooting common issues of LED strip lights.
- Disconnect additional controllers such as dimmers or remotes.
- Remove any extenders or splitters between the power supply and the LED strip.
- Temporarily detach decorative elements like channel covers that might affect performance.
By isolating each component, one can identify whether an accessory is causing the problem.
This step-by-step approach ensures effective diagnostics and resolution of issues.
Check for Loose Connections
Loose connections and poor connectivity can cause various issues.
One of the first steps when troubleshooting common issues of LED strip lights is to ensure all connections are secure. They should start by examining the connections at both ends of the LED strip, as well as any connectors or adapters used within the setup. By tightening or re-securing these points, one can potentially resolve flickering or intermittent functionality.
Visually inspect the wires and connectors.
If any wires appear frayed or connectors seem worn-out, it might be necessary to replace these components. Consistently good connections are key to maintaining reliable performance.
This visual inspection process should be thorough, as even a slight misalignment can disrupt the power flow and affect the LED strip lights. By ensuring all connections are secure and intact, individuals can often address and rectify minor issues swiftly.
Securing solid connections not only enhances the performance but also extends the life of the LED strip lights, thereby fostering an environment of efficiency and longevity. Taking the time to meticulously inspect and address loose connections reflects a proactive approach in troubleshooting common issues of LED strip lights, ensuring users enjoy the full benefits of their investment.
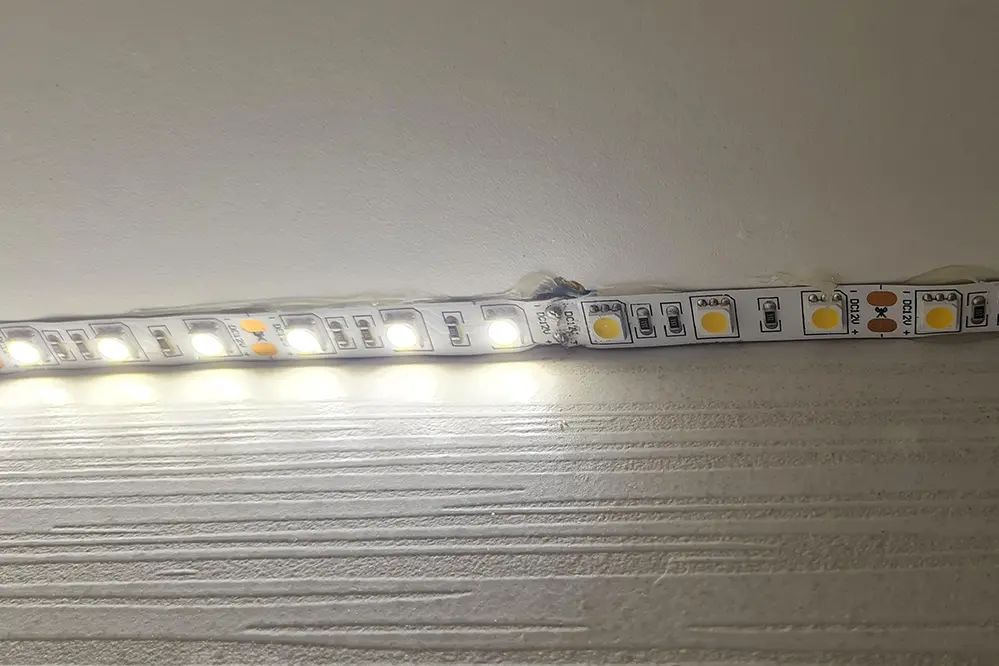
Inspect for Visible Short Circuits
In the realm of troubleshooting common issues of LED strip lights, finding visible short circuits can be a straightforward yet impactful step. Short circuits often cause erratic behavior.
They can lead to entire sections of the strip not lighting up at all. Visually scanning the strip for any abnormalities is crucial.
One should look for blackened or burned-out sections. These areas are strong indicators of short circuits (connections between power lines and ground).
Inspecting these points helps in pinpointing precise locations needing attention. Identifying a short circuit early can save time and prevent further complications.
In severe cases, it may be necessary to replace affected sections of the strip. Regularly inspecting for visible short circuits and acting swiftly ensures continuous and optimal LED strip light performance.
Thus, by keeping an eye out for these faults, one is much more likely to maintain uninterrupted illumination. This proactive measure underscores the importance of diligence in the maintenance process.
Test for Invisible Short Circuits
Testing for invisible short circuits may seem daunting, but it is manageable with the right approach.
Invisible shorts often originate from poorly soldered joints or manufacturing defects.
One should use a multimeter to check for continuity between the power and ground lines. This device helps in discovering any unintended connections, pinpointing the exact location of the short circuit.
By patiently going through each section with the multimeter, they can identify hidden issues that are not visible to the naked eye. This meticulous approach ensures that even the most elusive problems are addressed, resulting in a highly reliable and well-functioning LED strip lighting setup.
LED Strip is Dim at One End
When an LED strip is dim at one end, it often indicates inadequate power distribution along the strip.
To resolve this, they should check the voltage levels across various sections of the strip using a voltmeter. If significant voltage drop is detected, it may be beneficial to provide additional power input closer to the dim end.
Ensuring proper power delivery, connectivity, and connection integrity can restore an even and vibrant glow in dim lights.
Analyze Circuit Design
Understanding the circuit design is paramount.
A thorough analysis begins with an inspection of the schematic layout. Each component should be scrutinized to ensure it is functioning correctly. In LED strip lighting, the interconnections are vital, so attention must be paid to how diodes, resistors, and power supplies are arranged. Proper circuit design not only enhances the efficiency but also the longevity of the lighting setup.
Components should align with design specifications.
If anomalies are found, such as mismatched components or incorrect connections, immediate correction is essential. This guarantees that the electrical pathways are optimized for performance.
Embrace technologically advanced tools like circuit simulators to model and test virtual scenarios before physical implementation. These simulations can predict potential failures and offer solutions, thus saving time and resources.
Circuit design is an art of perfect science, and professionals who master it protect their creations from common issues, ensuring they illuminate spaces flawlessly and vibrantly.
Measure Electrical Resistance
To troubleshoot common issues of LED strip lights, measuring electrical resistance can be a powerful diagnostic tool. Utilizing a high-quality multimeter designed for precision work is recommended.
Start by turning off the power to the LED strip lights.
Next, carefully disconnect the LED strip from its power source to avoid any electrical hazards during the testing process.
Set the multimeter to measure resistance, ensuring it is calibrated correctly for accurate readings.
Touch the multimeter probes to the LED strip’s input terminals, noting any abnormal resistance levels.
If the resistance is too high or too low, this might indicate a fault in the LED strip, which could affect its performance.
Ultimately, this step can save one’s time by pinpointing specific issues. Systematic resistance measurement ensures all electrical components work seamlessly.
Diagnose Voltage Drop
Voltage drop in LED strip lights is a common issue that can cause dimming or uneven lighting. Diagnose it effectively with the following steps:
- Measure Voltage: Use a reliable multimeter to measure voltage at the power source and compare it with the voltage at the end of the strip.
- Inspect Connections: Ensure all connectors and solder points are secure to prevent power loss.
- Check Power Supply Capacity: Verify that the power supply can handle the total wattage of the LED strip lights.
- Utilize Shorter Strips: Consider using shorter strips or multiple power supplies to reduce voltage drop.
- Examine Wire Gauge: Use appropriate gauge wires; thinner wires may lead to significant voltage drops.
By systematically addressing these points, one can identify and correct any voltage drop issues. Each step is crucial to ensuring the LED strips illuminate efficiently.
Taking these measures will not only enhance brightness but also extend the lifespan of the LED strip lights, ensuring your led lights perform optimally for a longer period.
LED Strip is Getting Dim Over Time
If an LED strip is getting dim over time, it’s often due to power supply issues, lead oxidation, or substandard components used in the strip’s fabrication.
To begin, verify that the power supply remains consistent by using a voltage meter to measure the output voltage. It should remain steady and match the strip’s required voltage. Any noticeable deviation can indicate a failing power supply.
Additionally, excessive heat from inadequate ventilation can also degrade LEDs; ensuring proper cooling will sustain brightness.
Verify Input Voltage
The first step in troubleshooting common issues of LED strip lights is verifying the input voltage. This ensures that the LEDs receive the correct and sufficient power to function properly, thus making sure they perform at their best.
Electromagnetic interference or power surges might cause irregularities in voltage readings.
One needs to use a reliable voltage meter to measure the voltage supply to determine if it matches the required voltage of the LED strip lights. Doing so can swiftly pinpoint any discrepancies and address potential power supply problems.
Proper voltage verification can be the difference between seamless illumination and frequent issues. By establishing a stable power supply, one not only ensures the longevity of the LED strips but also maximizes their efficiency and brightness. This small yet crucial step forms the foundation of effective troubleshooting and optimized performance.
Assess LED Quality
In assessing LED quality, they should focus on brightness, consistency, and long-term performance. High-quality LEDs provide consistent illumination across the entire strip and maintain their brightness over time.
Consumers should observe any color inconsistencies that may indicate poor manufacturing.
Look for any sections of the strip that appear dimmer than others. Additionally, consider if the LED strip was purchased from a reputable manufacturer, as well-known brands often guarantee superior quality and durability.
Reviewing user feedback and industry certifications can provide insights into the true quality of the LEDs. It is essential for anyone troubleshooting common issues of LED strip lights to recognize that top-quality LEDs translate to fewer problems and greater overall satisfaction.
LED Strip Adhesive is Losing Adhesion

When an LED strip’s adhesive weakens, a matter of proactive troubleshooting, various steps can help. Properly cleaning the surface before application, allowing sufficient time for the adhesive to cure and using additional strong adhesives or mounting clips can vastly improve adhesion. This ensures the LED strip remains securely in place, fostering long-lasting and reliable performance.
Replace Adhesive Tape
Adhesive issues can compromise the functionality of LED strip lights. Over time, installation surfaces may challenge the strength of the adhesive.
In 2016, innovative technologies emerged, offering new solutions for mounting LED strips with stronger, longer-lasting adhesive tapes. These advanced adhesives ensure the strips stay in place, enhancing both aesthetic appeal and operational efficiency.
Thus, it’s not difficult to see how replacing the adhesive can significantly contribute to resolving common LED light strip issues, fostering a more consistent and reliable lighting experience.
Removing the old adhesive first, ensuring the surface is clean, and then applying a specialized, high-quality adhesive can be effective. This step-by-step methodology solidifies the strip’s placement and sustains its longevity.
Mentioning these solutions inspires confidence in anyone grappling with adhesive woes, encouraging them to invest in better materials and techniques.
Use Mounting Brackets
Mounting brackets offer a robust solution to address mounting challenges faced by LED strip lights.
Since their introduction, mounting brackets have provided enhanced stability, keeping the LED strips firmly in place even on less-than-ideal surfaces.
Importantly, these brackets can be used alongside adhesive tape, creating a dual-mounting system that significantly reduces the risk of the strips detaching or sagging over time.
The use of mounting brackets not only ensures a cleaner installation appearance but also simplifies maintenance tasks since the strips are securely fastened and can be adjusted if necessary.
Incorporating mounting brackets into installation practices builds a foundation for lasting performance and aesthetics, bolstering overall satisfaction.
LED Strip Has Sections That Do Not Light Up
When certain sections of an LED strip do not light up, a number of possible issues may be at play. Identifying these issues quickly is essential in ensuring the strip’s functionality and longevity.
One possibility is a loose connection or a faulty solder joint. This can often be resolved by inspecting the connections and ensuring they are securely attached. Additionally, it is wise to check for any visible damage on the strip itself, as this may indicate the need for a replacement section. By carrying out these initial checks, they can restore the LED strip to its full luminance and enjoy its intended beauty.
Check for Open Circuit
An open circuit usually indicates a break in the electrical path of the LED strip light.
This disruption can prevent the current from completing its intended loop, which results in parts of the strip not lighting up.
To identify an open circuit, one should start by visually inspecting the entire strip for any obvious breaks or damage. Sometimes, a bend or twist in the strip can disrupt the electrical pathway.
Using a multimeter set to continuity mode can help in confirming the presence of an open circuit. This device allows for precise detection of where the current flow gets interrupted.
By methodically checking each section, they can quickly isolate the problem area and proceed to repair or replace the affected segment.
Reheat Solder Joints
Reheating solder joints is an effective method to address issues in LED strip lights.
Over time, solder joints may weaken or experience micro fractures due to thermal expansion and contraction. This can lead to intermittent connections, causing sections of the LED strip to flicker or fail.
In such cases, it is often beneficial to carefully reheat each joint. This process involves using a soldering iron to gently re-melt the existing solder. Reheating ensures that any tiny cracks or weak connections are effectively sealed, restoring continuity.
When performing this task, they must ensure that the soldering iron’s tip is clean and tinned to avoid introducing impurities. Working methodically from one end of the strip to the other can help maintain organization and thoroughness.
A properly reheated solder joint can reinvigorate the LED strip lights, ensuring consistent illumination and prolonged lifespan.
Replace or Rejoin Failed Segments
When a segment of an LED strip light fails, it can often be replaced or rejoined to restore functionality efficiently.
- Identify the failed segment by checking for unlit sections.
- Disconnect power to ensure safety during repairs.
- Cut the strip at the nearest copper pads to remove the failed piece.
- Prepare the new segment by stripping and tinning the ends.
- Solder the new segment to the existing strip, ensuring solid connections.
- Test the connection before finalizing the repair to ensure proper operation.
Rejoining segments might involve using connectors which can be simpler than soldering.
By addressing failed segments promptly, they maintain the aesthetic and functional integrity of their LED strip lights.
Conclusion
Swiftly identifying and resolving common issues can prolong the life of LED strip lights, preserving their beauty and functionality. Effective troubleshooting saves time and avoids unnecessary replacements, while regular maintenance ensures consistent performance and vibrant illumination. Addressing power sources, connections, and ensuring proper installation of led lights is crucial for preventing problems. Confidence in managing LED strip lights enhances their utility and appeal, offering versatile lighting solutions. Proactive troubleshooting transforms potential frustrations into opportunities for seamless, long-lasting brilliance.
For those seeking expert assistance, consider reaching out to Unitop, a professional Chinese manufacturer of LED strip lights and LED neon strips. With their extensive experience and commitment to quality, Unitop can provide tailored solutions to meet your lighting needs. Whether you’re facing persistent issues or looking to upgrade your setup, our team of professionals is equipped to offer guidance and support. Contact Unitop today to ensure your LED lighting system achieves its full potential, delivering seamless and long-lasting brilliance.


