“Why are part of my LED strip lights not working?” This question might strike you as a simple curiosity, but it often signals a deeper issue that many face. LED strip lights, known for their versatility and energy efficiency, can sometimes leave users frustrated when sections fail to light up.
Many people assume that LED strip lights are infallible, but like any technology, they come with their own set of challenges. Common misconceptions include the belief that all LED strips are created equal or that installation is foolproof. However, factors such as voltage drop, poor connections, or even manufacturing defects can lead to partial failures.
Understanding the intricacies of LED strip lights can save you time and money. Proper troubleshooting not only restores functionality but also extends the lifespan of your lights, ensuring you get the most out of your investment. Moreover, addressing these issues promptly can prevent potential safety hazards.
In this article, we will cover the most common causes of partial LED strip light failures, including installation errors, power supply issues, and environmental factors. We will also provide step-by-step solutions to help you resolve these problems efficiently.
Join us as we unravel the mysteries of LED strip lights and empower you with the knowledge to keep your lighting systems shining bright. Your journey to mastering LED troubleshooting begins here.
Check Power Supply
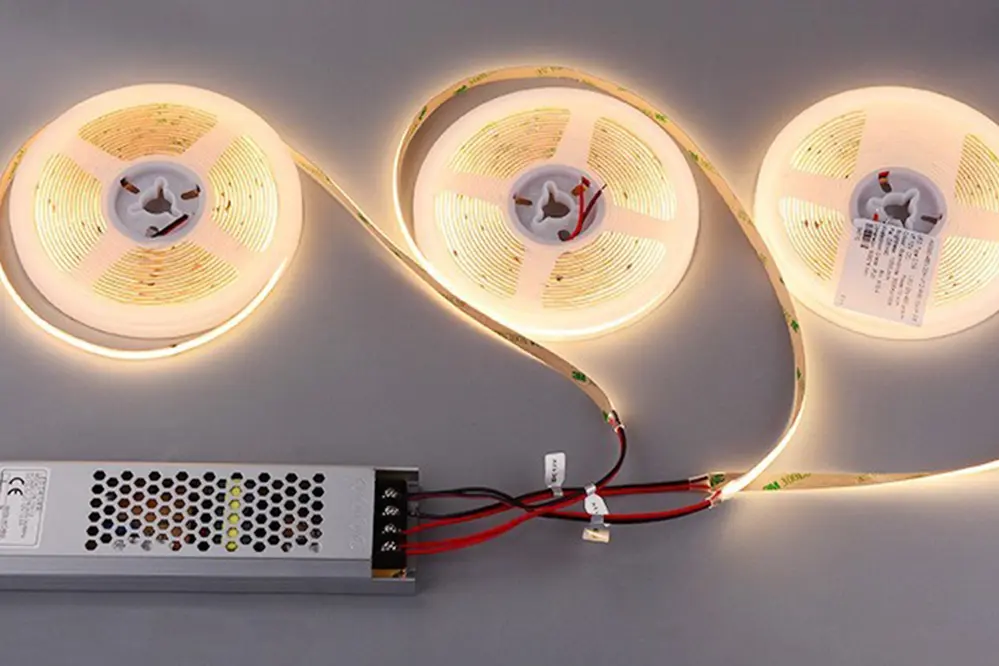
Firstly, ensure that the power supply is connected securely and is functioning optimally.
The power supply serves as a vital lifeline providing current to your LED strip lights, making it significant to confirm that all connections are intact. Loose connections can cause parts of the strip to dim or fail altogether. Should you detect any physical damage or hear any unusual sounds from the power adapter, it may be time to consider a replacement.
Remarkably, even an underpowered adapter can trigger light inconsistencies. As you troubleshoot, verify that the power supply matches the specific voltage and current requirements of your LED strips to ensure proper functionality.
Furthermore, investing in a quality power supply is paramount for sustaining consistent brightness across your LED strip lights. Regardless of whether you’re an enthusiast or a professional, choosing a reliable power source not only enhances performance but also prolongs the lifespan of your lights. Such consideration instills confidence and guarantees your lights stay vibrant, elevating your space with clarity and style.
Inspect Connections
Before delving deep into troubleshooting, examine the connections from end to end of your LED strip.
Secure connections are crucial for a seamless lighting experience. If you observe any segment of your LED strip flickering, dimming, or exhibiting an inconsistent glow, inspect each connection point meticulously. Look for any frayed or damaged wires and ensure all plug-in points are firmly connected. Loose or compromised connections are often the culprits behind partial lighting issues, so verify every connection for snugness and completeness.
Occasionally, connectors or solder joints may have inadvertently loosened over time. In such instances, disconnect the strip gently, inspect each connector, and re-establish firm contact. Pay particular attention to areas where the strip has been bent or where the connection is most active.
Finally, evaluate whether appropriate connectors have been utilized by reviewing the specifications that accompany your LED strip components. Ensuring compatibility can lead to significant improvements in function and reliability. A keen and methodical examination can usually restore your lighting setup to its original brilliance, empowering you to transform your environment with vibrant illumination.
Test LED Strip Sections
In the journey to illuminate your space brilliantly, a moment of analytical exploration can reveal much about your LED strip sections. Systematically testing each section can uncover specific areas causing disruption, allowing for focused troubleshooting and swift resolution of any inconsistencies in output.
To effectively test sections of the strip, begin by employing a “continuity test.” This is performed using a multimeter set to measure resistance. If a section fails, the multimeter reading will indicate a lack of continuity. In this case, the defect lies either with a faulty LED or a broken circuit trace, which can then be expertly addressed with soldering or replacement, rekindling the strip’s luminous potential.
Identifying Faulty Sections
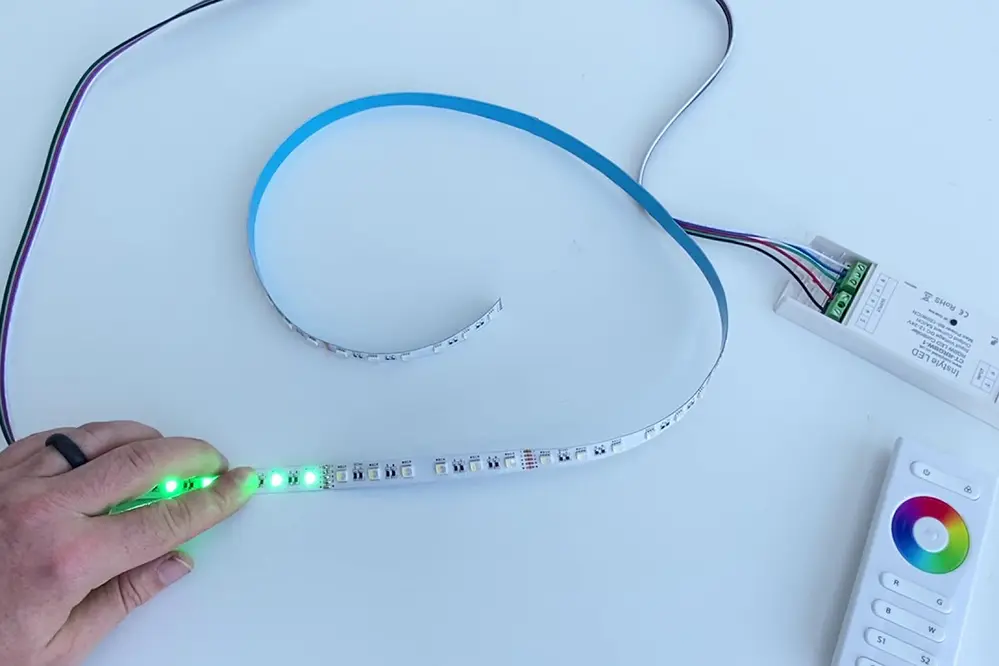
Pinpointing problematic segments is essential for restoring the full vibrancy of your LED strip lights. Initiate this process by observing where the lights first start to malfunction.
Examine any visible signs of damage or disconnection, especially near bends or joints. A simple press on connectors can often re-establish connection, allowing dimmed sections to relight.
Efficient troubleshooting can save up to 75% of energy associated with unnecessary replacements.
Utilize a multimeter to perform a continuity test on these areas. This precise tool offers quick insights, helping identify whether an issue is due to a compromised LED or a disrupted circuit. Adequately attending to these faults can swiftly bring your lighting back to its peak brilliance, turning potential setbacks into all-encompassing illumination.
Examine LED Strip Alignment
Examine the alignment of your LED strips.
Proper alignment is essential for effective lighting. Any misalignment can lead to sections appearing dim or not lighting up at all, detracting from the seamless illumination intended. Therefore, it is advisable to check for straightness and uniformity in the placement to ensure each segment functions optimally.
Misalignments might disrupt the electrical flow.
In many cases, these adjustments are simple – sliding a connector back into position may restore full connectivity or reapplying adhesive backing can bolster support. By taking such matters into your own hands, you have the capability to rejuvenate your LED setup.
With precision and patience, aligning the LED strips can remarkably enhance the visual impact of your installation, unleashing the full spectrum of brightness. Though this aligns your current setup, staying updated with the latest techniques in LED technology, emerging as of October 2023, can further empower your next project. Embracing these insights can significantly bolster your efforts, transforming any alignment setbacks into a dazzling showcase of brilliance.
Assess Circuit Overload
An overloaded circuit can be a sneaky culprit, causing sections of your LED strip lights to malfunction. Excessive demand on a single power source can hinder the system’s performance, leading to partial failures or reduced lighting output in some areas.
To evaluate the likelihood of a circuit overload, begin with a “power audit.” This involves assessing the total wattage your LED setup requires compared to what the power supply can deliver. If there is a mismatch, the redistribution of power sources or adding an additional power supply might rectify the issue, breathing new life into your vibrant lighting vision.
Evaluating Power Loads
Efficient power management is crucial, making the troubleshooting process less daunting and more rewarding as you unlock solutions.
When addressing power inconsistencies in a sprawling lighting design, ensuring each component receives its requisite power allocation is vital. By meticulously calculating and balancing the load across the system, you safeguard against potential disruptions that could otherwise dim your space’s allure. A systematic examination can often unearth intriguing discrepancies that might not be immediately apparent, championing the effective functionality of your lighting scheme.
Consider, for instance, the implications of faulty connections or weak power delivery. In diagnosing such issues, elaborate on the precise measuring of voltage drop, assessing whether all sections of the LED strip are receiving consistent and ample power to sustain brilliance. This methodical approach not only secures reliability but also maximizes the technological prowess of your LED setup.
In conclusion, a strategic evaluation of power loads, combined with understanding any warranty provisions, empowers a more responsive lighting design, enhancing its potential to evoke the desired ambiance. As you navigate this technical landscape, harnessing refined insights into power management will not only rectify current issues but also expand your proficiency, culminating in a vibrant and enduring illumination experience that captures both imagination and expertise.
Detect Moisture Damage
When considering the potential reasons behind LED strip light malfunctions, moisture damage is a crucial factor that deserves attention. This can often manifest as part of your lights not illuminating as expected, hinting at a potential underlying issue.
Moisture intrusion can lead to the corrosion of delicate electronic components. This degradation hampers the flow of electricity, resulting in a noticeable reduction in performance, or even complete failures.
Carefully inspect areas where the LED strips are installed for signs of moisture, including discoloration or residue, which are telling indicators. Locations that are particularly susceptible include kitchens and bathrooms, or outdoor installations exposed to harsh conditions.
By systematically drying and addressing these areas with appropriate protective measures, you enhance the longevity of your lighting. Employ waterproofing agents or protective casings to guard against future moisture incursions.
This proactive approach not only resolves current complications but also fortifies your lighting against future vulnerabilities. With each remedied fault, you bring yourself closer to realizing the full potential of your LED displays, turning every trial into an opportunity for excellence.
Ultimately, the key to success often lies in the foresight to safeguard against moisture. Empowered with these enhanced precautions, your lighting system will dance with brilliance, unperturbed by environmental challenges.
Evaluate Voltage Drop Issues
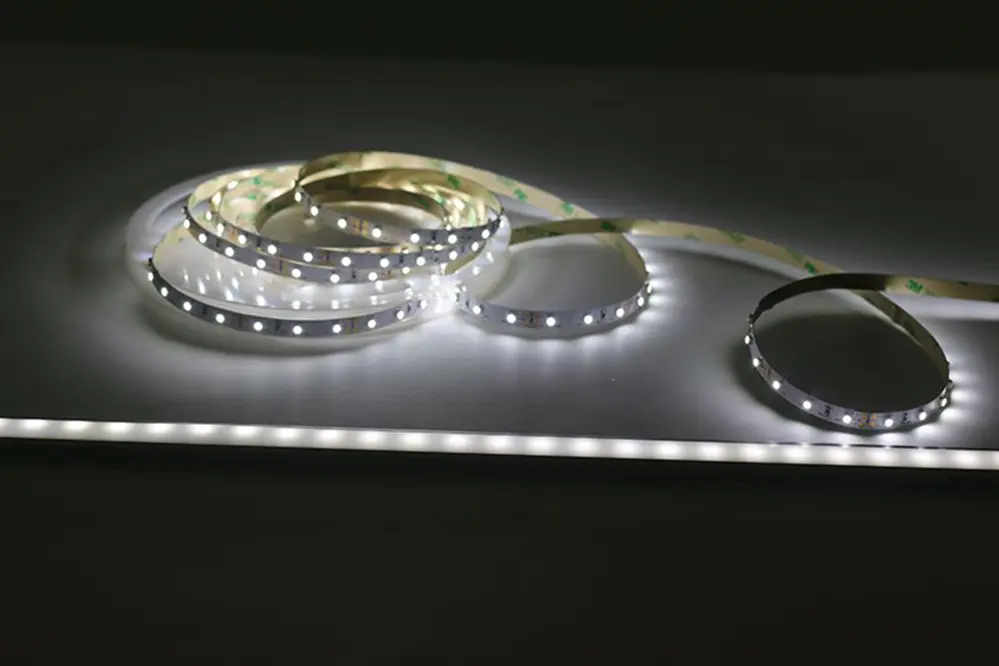
Voltage drop, an electrical phenomenon that can hinder your lights’ performance, often necessitates thorough examination.
As an initial step, check whether the power supply sufficiently accommodates the required voltage across your LED strip, since insufficient supply can adversely affect brightness and lead to under-performance.
The terms “voltage drop” and “under-voltage” are quintessential in assessing if the ‘power bottleneck’.
Calculating Voltage Requirements
Determining the precise voltage necessities becomes paramount, for inadequate or excessive voltage can compromise the efficiency and lifespan of your LED strip lights.
Begin by understanding the voltage rating of each LED segment.
Typically, LED strips operate on low voltages, generally 12V or 24V, underscoring the importance of correct evaluations.
Verify that the power supply is matched appropriately to the voltage required by your strip, ensuring a harmonious system.
Knowing these aspects of voltage requirements aids in methodically troubleshooting partial LED strip failures, transforming uncertainty into strength with every calculated step toward resolving the issue.
Thus, the path to vibrant, reliable LED lighting isn’t always as elusive as it seems. Accurately gauging voltage needs makes a noticeable impact on consistency.
Inspect for Physical Damage
Examining your LED strip lights for physical damage can significantly uncover the reasons behind malfunctioning segments. Before diving into more complex investigations, a simple visual inspection is beneficial.
Start by cautiously checking the entire length of the strip lights for any apparent signs of damage. Carefully look for tears, cuts, or obvious breaks in the strip, which might disrupt the flow of electricity and cause part of the lights not to work.
Sometimes, even the slightest nick can sever the connection in the circuit, hindering the illuminating harmony of the entire strip. Look closely at areas where the strip may have been bent or folded, as this can damage the delicate internal connections.
Moreover, pay close attention to solder joints and connections between segments, as a detached or weak connection might lead to partial failure. These connections are pivotal in ensuring uninterrupted functionality across the LED strip.
Identifying physical damage early empowers you to take corrective measures promptly, reinstating the brilliance of your LED strip lights and fortifying their resilience.
Replace Defective LEDs
Embarking on the journey to replace defective LEDs can seem a daunting task, yet it holds immense promise.
Once you’ve identified faulty LEDs, replacing them can rejuvenate the integrity of your lighting setup. Armed with a soldering iron, you can transform non-working sections into vibrant displays.
First, carefully desolder the damaged LEDs from the strip without disturbing the surrounding components. Precision and patience during this step ensure that you preserve the functionality of adjacent lights.
Next, secure new LEDs in place, aligning them correctly with the circuit flow. Testing the new connection before finalizing is essential, as it guarantees seamless integration and operation, restoring the strip’s unified glow.
In reviving your LED strip, each LED represents both a victory over challenges encountered and a testament to your skill.
Verify Remote Control Functionality
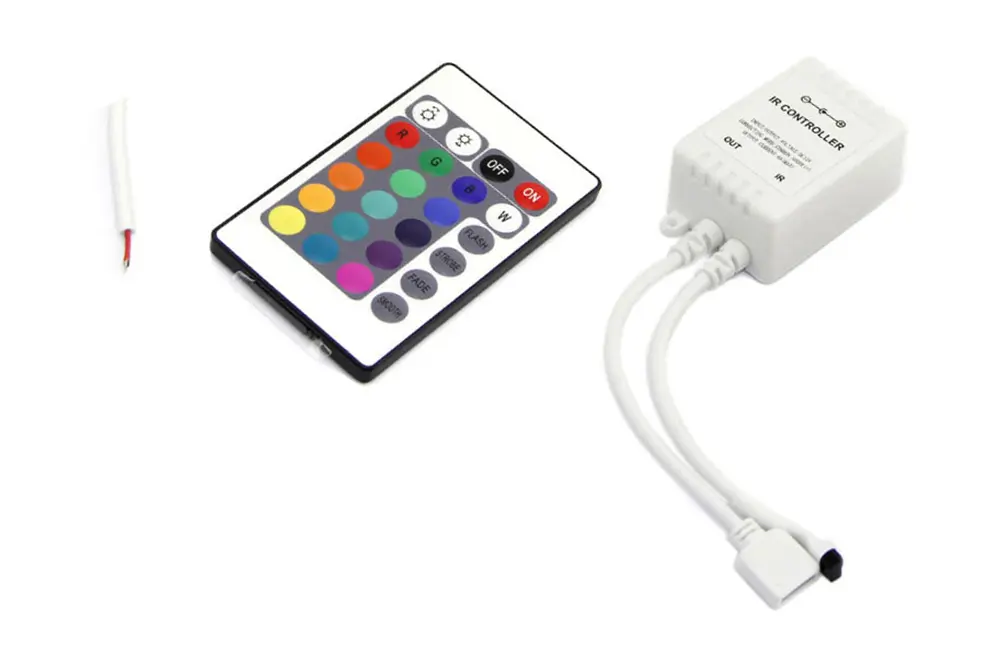
Ensuring your remote control operates effectively is essential.
Even the most sophisticated LED systems rely heavily on remote controls. The first step is to check the power source of the remote control to confirm fresh, functional batteries are in place. Additionally, examine the remote for any signs of physical or internal damage that might hinder its performance.
A functional remote ensures seamless control.
If the remote appears to be in order—yet the lights don’t respond or only some segments work—try a reset or re-sync the remote according to the manufacturer’s instructions.
These steps could illuminate underlying issues masked by more superficial troubleshooting, ensuring that your LED strip lights rise to their full potential. While technology may confuse or complicate at moments, understanding and mastering it leads to satisfaction, turning your LED lighting setup into a story of triumph over technical adversity.
Understand Heat Buildup Effects
The phenomenon of heat buildup is a critical factor affecting the performance and longevity of LED strip lights, and must not be overlooked.
Even subtle increases in heat can compromise electrical connections.
This rise in temperature has the potential to cause partial or complete shutdowns, as LEDs are sensitive to excessive heat. Heat buildup can occur when strips are mounted without proper airflow, insulation, or distance from heat-generating devices.
To mitigate these effects, ensure your LED strip is not in close proximity to heat sources and consider using heat-dissipating mounting methods. It’s a proactive strategy that not only enhances durability but also bolsters performance. This awareness transforms concern into “caution” effectively managing your LED investments.
Seek Professional Assistance
When DIY solutions fall short, expert help can shine.
Professional technicians know the intricate workings of LED strip lights. They bring expertise not just in identifying the underlying malfunctions but in providing enduring solutions tailored to your specific environment and setup. Moreover, their ability to discern issues that are not immediately obvious can prevent future failures and optimize your current lighting arrangements.
Their experience is invaluable; leverage it.
Going this route not only assures peace of mind—knowing that your lighting solution is in capable hands—but also enhances overall system efficiency long-term. This strategic investment in expert advice and services fosters continuous improvement and innovation.
By embracing qualified assistance, you unlock a portal to seamless, spectacular illumination that marries technical acumen with cutting-edge developments, continually adapting and evolving to meet the glowing demands of tomorrow. Let this assurance pave the way to brighter, more empowered environments where light isn’t just functional—it’s transformative.
Prevent Future LED Failures
Achieving consistent performance in your LED strip lights involves a proactive approach, starting with quality components. Investing in high-grade materials and ensuring proper installation can significantly extend their lifespan, minimizing the risks of intermittent issues that might compromise your lighting system.
To maintain the resilience of your LED setup, embark on a “scheduled checks” regimen. Regular evaluations act as a safeguard against potential disruptions, addressing concerns before they escalate. By staying vigilant, you increase the longevity of your lights and the vibrancy of their shine, ensuring that your lighting experience remains not just effective, but awe-inspiring for years to come.
Proper Installation Practices
Ensure a solid installation setup.
For an optimal lighting experience, precise installation is paramount. The foundation of an enduring and efficient LED strip configuration begins with diligent planning, which is essential during each installation phase. Meticulously, attention to detail, from the correct measurement of the strips to the thoughtful execution of the wiring, forms the backbone of a successful brightening endeavor.
Order is key to avoiding the most common pitfalls.
The initial step is to clean surfaces that will host the LED strips to ensure strong adhesive bonding and reduce the risk of detachment. Equally important is ensuring that the strips are aligned correctly to prevent misdirected illumination that can disrupt the visual harmony of your installation.
Stay current with technological advancements and innovative methodologies, particularly as the LED industry evolves. With the advent of numerous new technologies in 2023, it’s imperative to stay abreast of the latest trends. Doing so not only enhances performance but also optimizes your overall lighting experience, reducing the possibility of erratic behavior or unexpected malfunctions.
Conclusion
Embrace the potential of overcoming challenges with LED strip lights as opportunities for growth and mastery in advanced electrical systems. Each hurdle encountered, such as troubleshooting why part of your LED strip lights are not working, serves as a pivotal learning point. By focusing on attention to detail and persistence, you can enhance your expertise in diagnosing connectivity issues and ensuring precise installations. This journey not only builds your confidence but also equips you with the skills to deploy innovative lighting solutions that stand the test of time.
Mastering LED technology empowers you to seamlessly blend aesthetic appeal with functional brilliance, enriching your contribution to the ever-evolving world of lighting design. Your prowess in overcoming lighting challenges not only empowers your creative vision but also positions you as a leader in the field. By embracing these opportunities, you fortify your capability to create mesmerizing atmospheres through flawless illumination, ultimately enhancing both your personal and professional growth in the dynamic landscape of modern lighting.

